Configuring Single Sign-On Using SAML2
Single sign-on is a key feature of the WSO2 Identity Server that enables users to access multiple applications using the same set of credentials. This tutorial allows you to have hands-on experience on how to configure SSO with WSO2 Identity Server using SAML protocol.
To read more about single sign on with WSO2 Identity Server, see Single Sign On.
Scenario
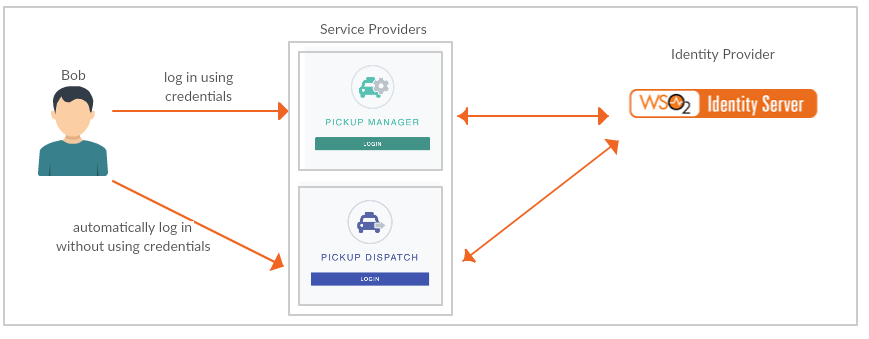
Pickup is a cab company that has two SAML web applications called pickup-dispatch and pickup-manager. Both applications use WSO2 IS as the identity provider. When SSO is configured for both these applications, an employee is only required to provide their credentials to the first application and the user will be automatically logged in to the second application.

Info
You can find more information regarding the SAML2 and SAML2 Web Browser SSO Profile in the saml-core specification and the saml-profile specification.
Set up
- Download WSO2 Identity Server.
-
Navigate to
<IS_HOME>/binand start the server by executing one of the following commands.sh wso2server.shwso2server.bat run -
Follow the steps in deploying saml2-web-app-pickup-dispatch webapp to download, deploy and register dispatch sample.
-
Follow the steps in deploying saml2-web-app-pickup-manager webapp to download, deploy and register manager sample.
You are now ready to try out SAML SSO with the Pickup Dispatch and Pickup Manager sample web applications.
Try it out
-
Navigate to http://localhost.com:8080/saml2-web-app-pickup-dispatch.com on your browser and click Login.

-
You will be redirected to the login page of WSO2 Identity Server. Login using your WSO2 Identity Server credentials (admin/admin). Provide the required consent. You will be redirected to the Pickup Dispatch application home page.
-
Now, if you navigate to http://localhost.com:8080/saml2-web-app-pickup-manager.com and click Login, you can see that user has been automatically logged in to this application without being prompted for user credentials.
Configure claims
Additionally, you can also configure claims for the service providers.
Info
For more information, see Configuring Claims for a Service Provider.
- On the Main menu of the management console, click Service Providers>List and Edit the "dispatch" service provider.
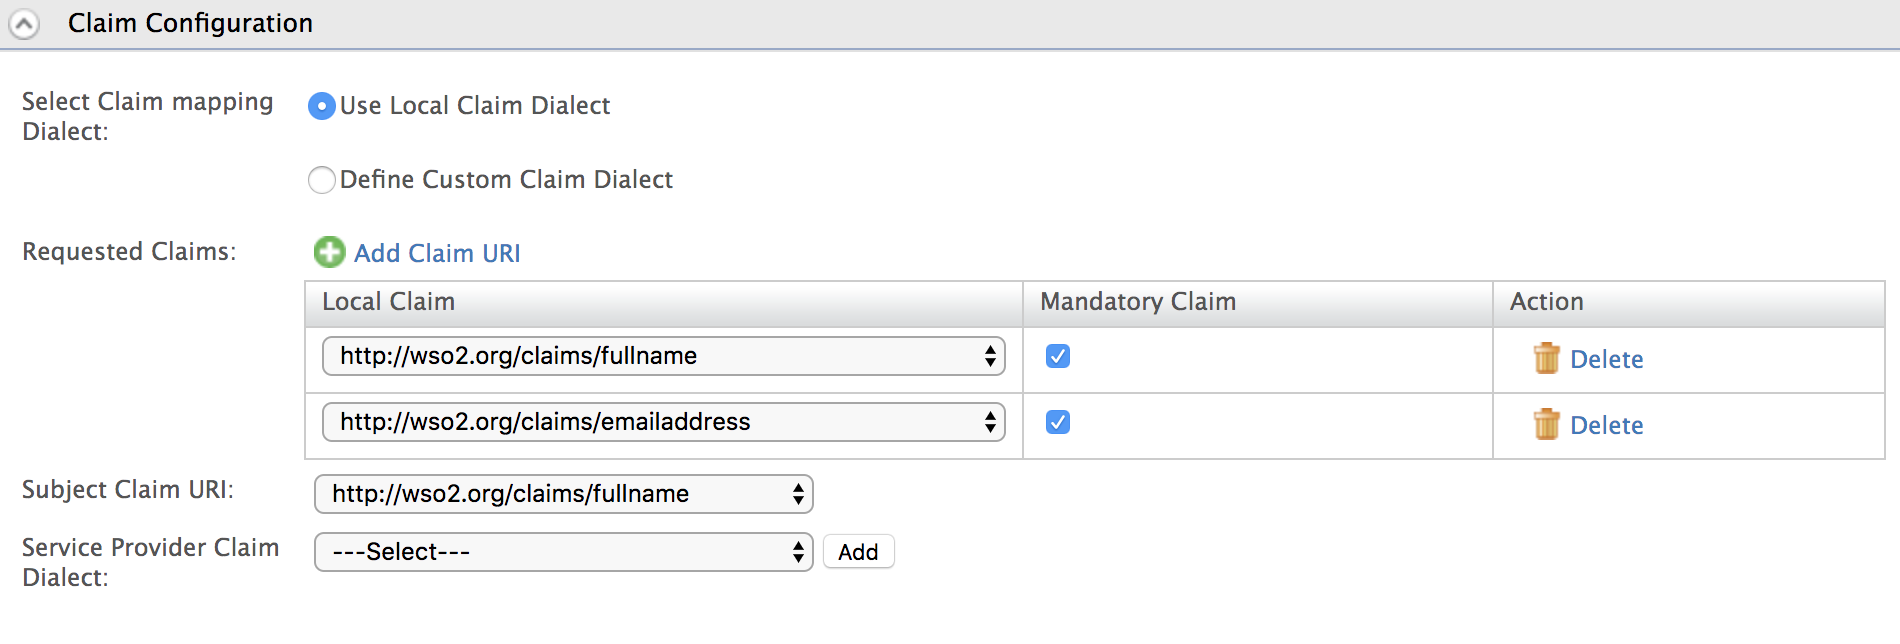
- Expand the Claim Configuration section in the service provider form.
- You can select the claims that must be sent to the service provider. Select Use Local Claim Dialect and click Add Claim URI.
- Add the following claims as Requested Claims.
- http://wso2.org/claims/fullname
- http://wso2.org/claims/emailaddress
-
Select
http://wso2.org/claims/fullnameas the Subject claim URI and click Update to save the service provider configurations.
-
Now, logout of the Pickup Dispatch and Pickup Manager applications.
- Access http://localhost.com:8080/saml2-web-app-pickup-dispatch.com on your browser and click Login.
-
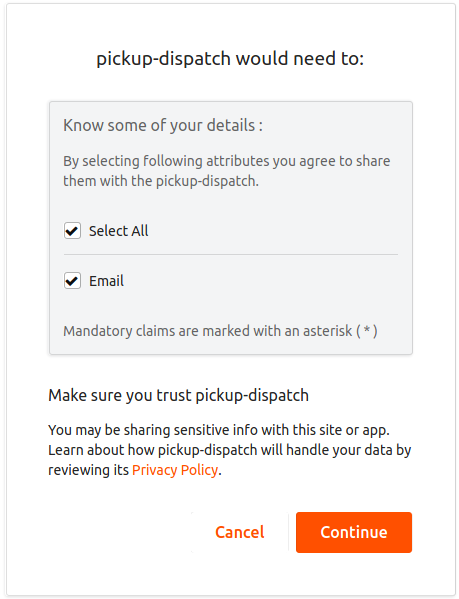
Note that the user is now prompted for consent to share the Email Address claim value with the sample application.

This means that you have successfully configured additional claims for your service provider.
Related Topics
For more detailed information on configuring single sign-on using SAML2, see the following page:
To set up reCaptcha for single sign on, see the following page: