Configuring OpenID Connect Back-Channel Logout
OpenID Connect back-channel logout feature enables logging out users from a client application/Relying Party (RP) by directly communicating the logout requests between the client application and authorization server.
What is direct communication?
Direct communication enables communicating the requests between the client application and authorization server through direct network links without having to rely on a browser/agent.
This approach is more reliable as it does not require communicating the logout requests through a user agent/browser and maintain active RP browser sessions for the communication to succeed.
Message flow
Let's take a look at the underlying message flow of the OpenID Connect back-channel logout.
- The client application or authorization server triggers a user logout.
- The authorization server identifies all the client applications that share the same user session.
- The authorization server generates the logout token, which is a special JWT containing claims and sends it with the logout request to the logout endpoints of the client applications.
- Upon receiving the logout token, the client application validates the logout token and invalidates the user session.
Configuring the sample applications
-
Follow the steps here to download, deploy and register
playground2applications. -
Make a copy of
playground2.warand rename toplayground3.warin the same location described in step 1.
Configuring OpenID Connect back-channel logout
Follow the steps below to configure OpenID Connect back-channel logout in WSO2 Identity Server:
-
Sign in to the WSO2 Identity Server Management Console.
Tip
In the previous section you have registered the
playground2webapp. If you complete that you can skip step 2 below. -
To register a web application as a service provider:
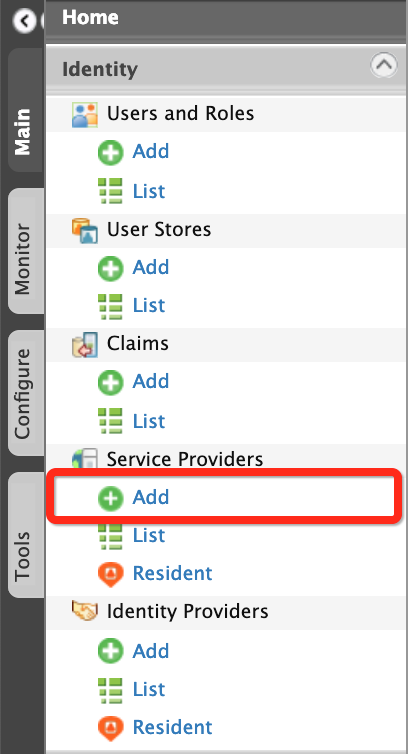
- On the Main menu, click Identity > Service Providers >
Add.
- Enter
playground2in the Service Provider Name text box.
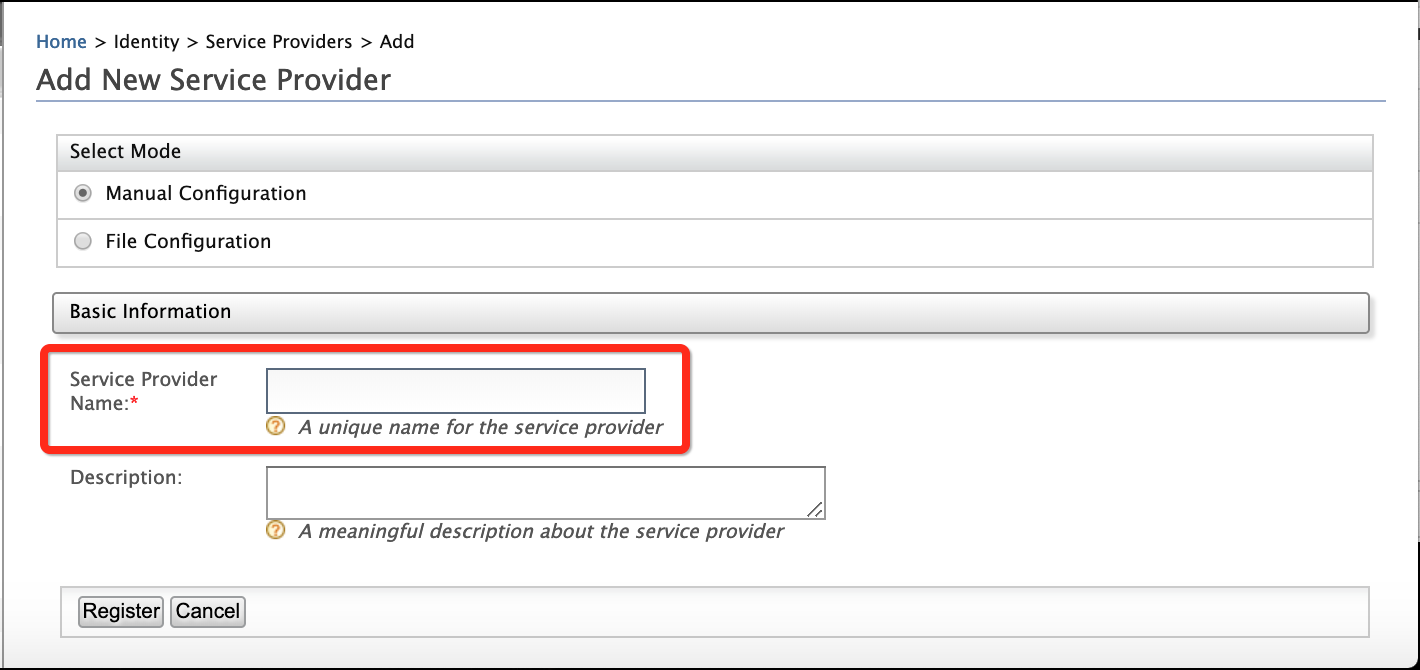
- Click Register. Note that you will be redirected to the Service Providers screen.
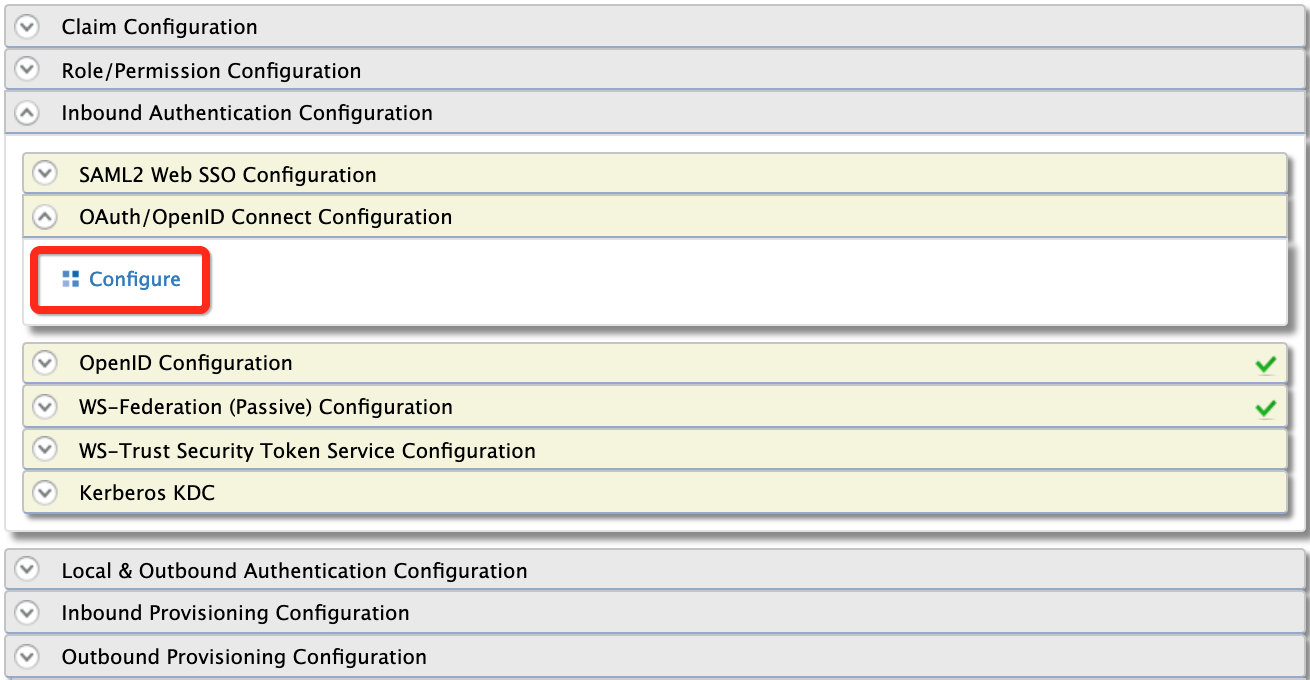
- Under Inbound Authentication Configuration, click
OAuth/OpenID Connect Configuration > Configure.
-
Enter the configurations as follows:
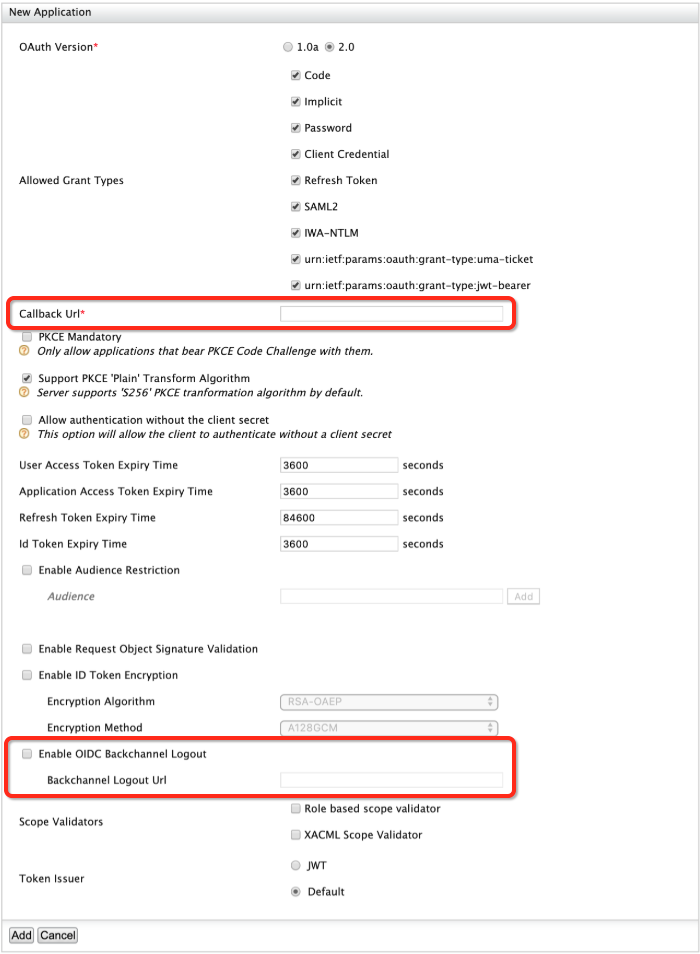
Field Description Sample Value Callback URL This is the service provider's URL to which the authorization codesare sent. Upon a successful authentication, the browser should be redirected to this URL.http://localhost:8080/playground2/oauth2clientEnable OIDC Backchannel Logout This defines whether the back-channel communication is used to communicate the logout tokenor not.Selected Logout URL This is the service provider's back-channel logout endpoint URL to which the logout tokenis sent to.http://localhost:8080/playground2/bclogout -
Click Add. Note that a
client IDandclient secrethave been created.

- On the Main menu, click Identity > Service Providers >
Add.
-
You have successfully added the playground2 service provider. Similarly, register another service provider performing all the sub-steps in above Step2 with the following data:
- Service Provider Name :
playground3 - Callback URL :
http://localhost:8080/playground3/oauth2client - Logout URL :
http://localhost:8080/playground3/bclogout
- Service Provider Name :
-
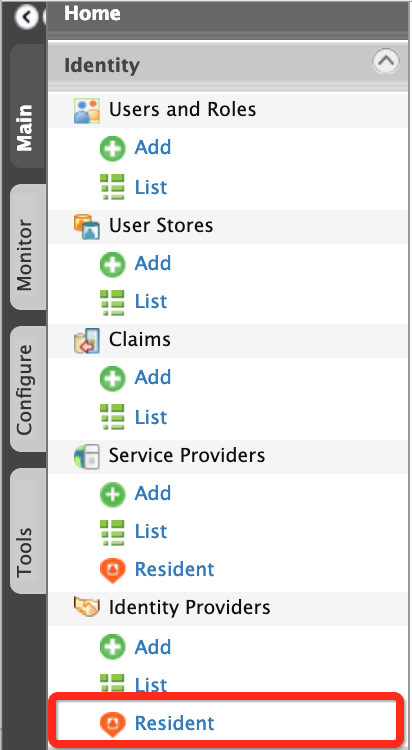
To view the identity provider's logout endpoint URL, which gets called when the logout is triggered from the service provider:
- On the Main menu, click Identity > Identity Providers >
Resident.
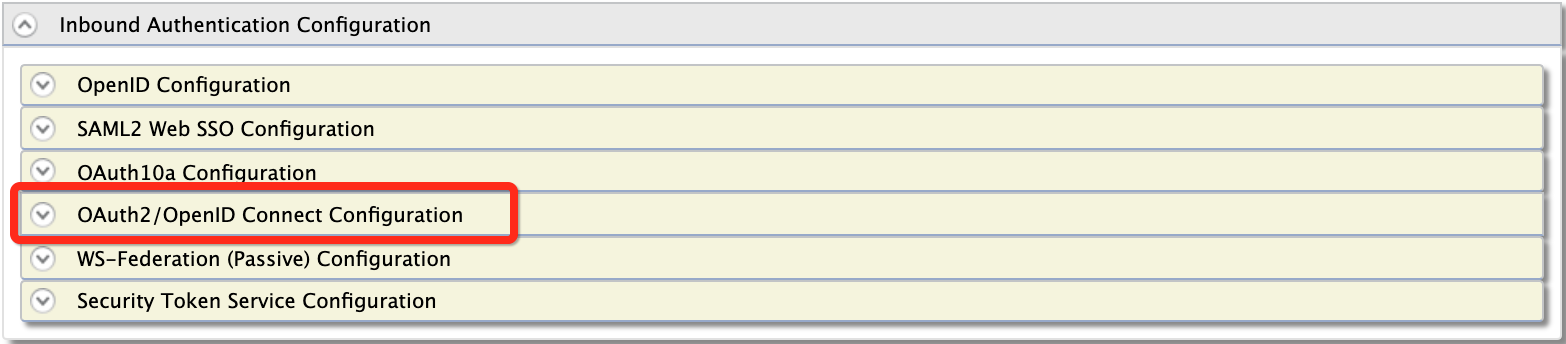
- Under Inbound Authentication Configuration, click
OAuth2/OpenID Connect Configuration.
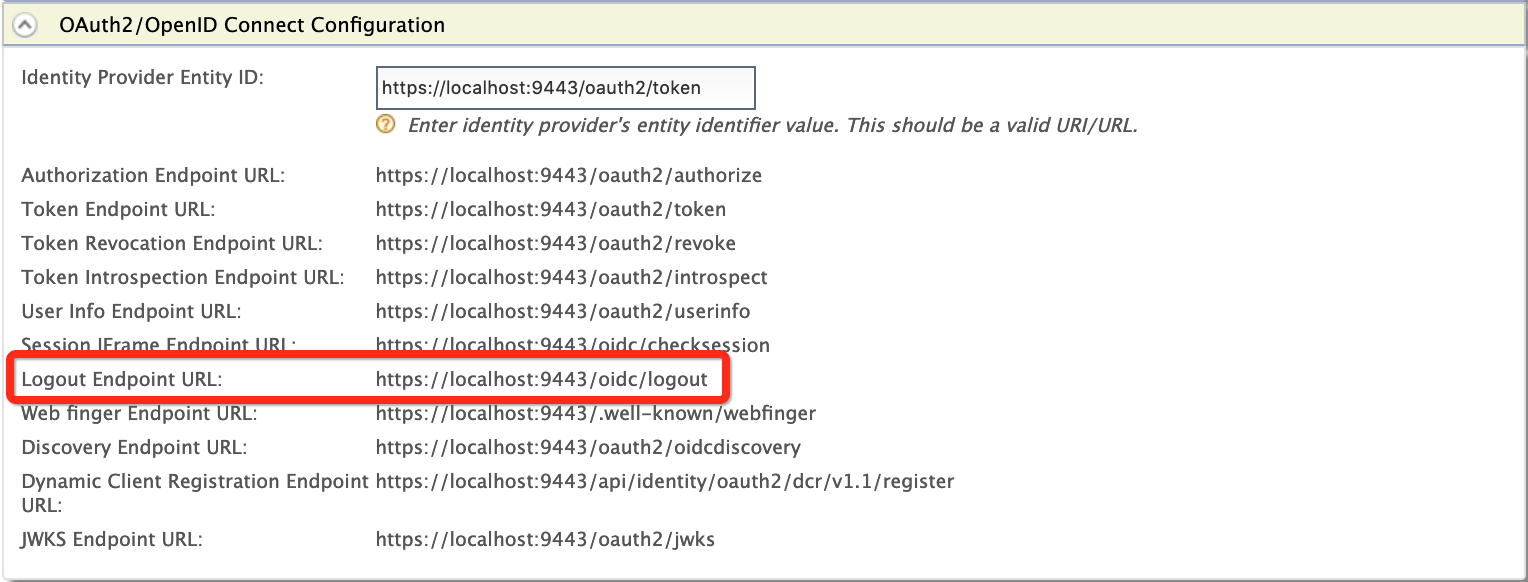
Note that the identity provider's logout endpoint URL is listed out.
- On the Main menu, click Identity > Identity Providers >
Resident.
Testing OpenID Connect back-channel logout with the sample applications
Follow the steps below to test OpenID Connect back-channel logout with the newly registered service provider:
-
To sign in to the playground2 web application:
-
Navigate to
http://<TOMCAT_HOST>:<TOMCAT_PORT>/playground2in your browser, e.g.,http://localhost:8080/playground2.Note
Even though
localhostis used in this documentation, it is recommended to use a hostname that is notlocalhostto avoid browser errors. To achieve this, modify the/etc/hostsentry on your computer.The following screen appears.
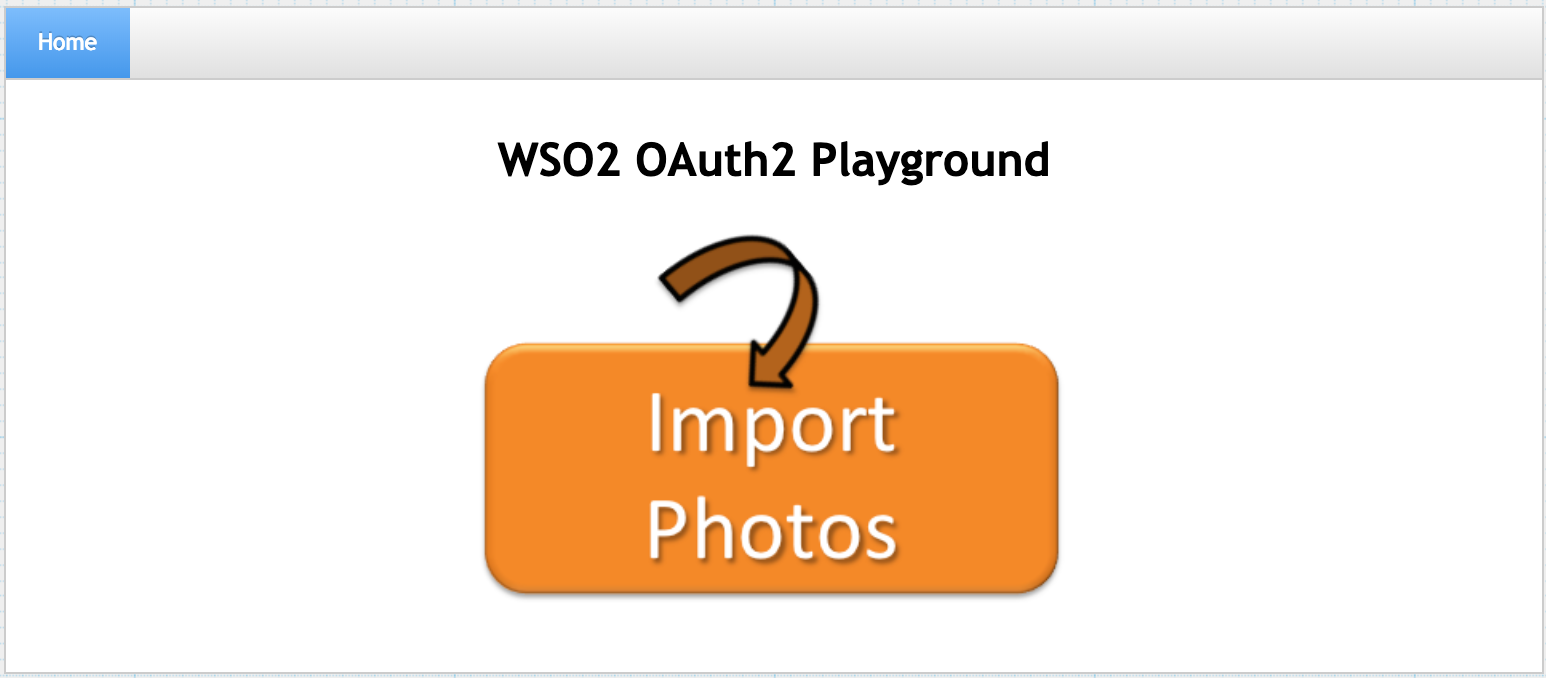
-
Click Import Photos.
-
Enter the required details as follows:
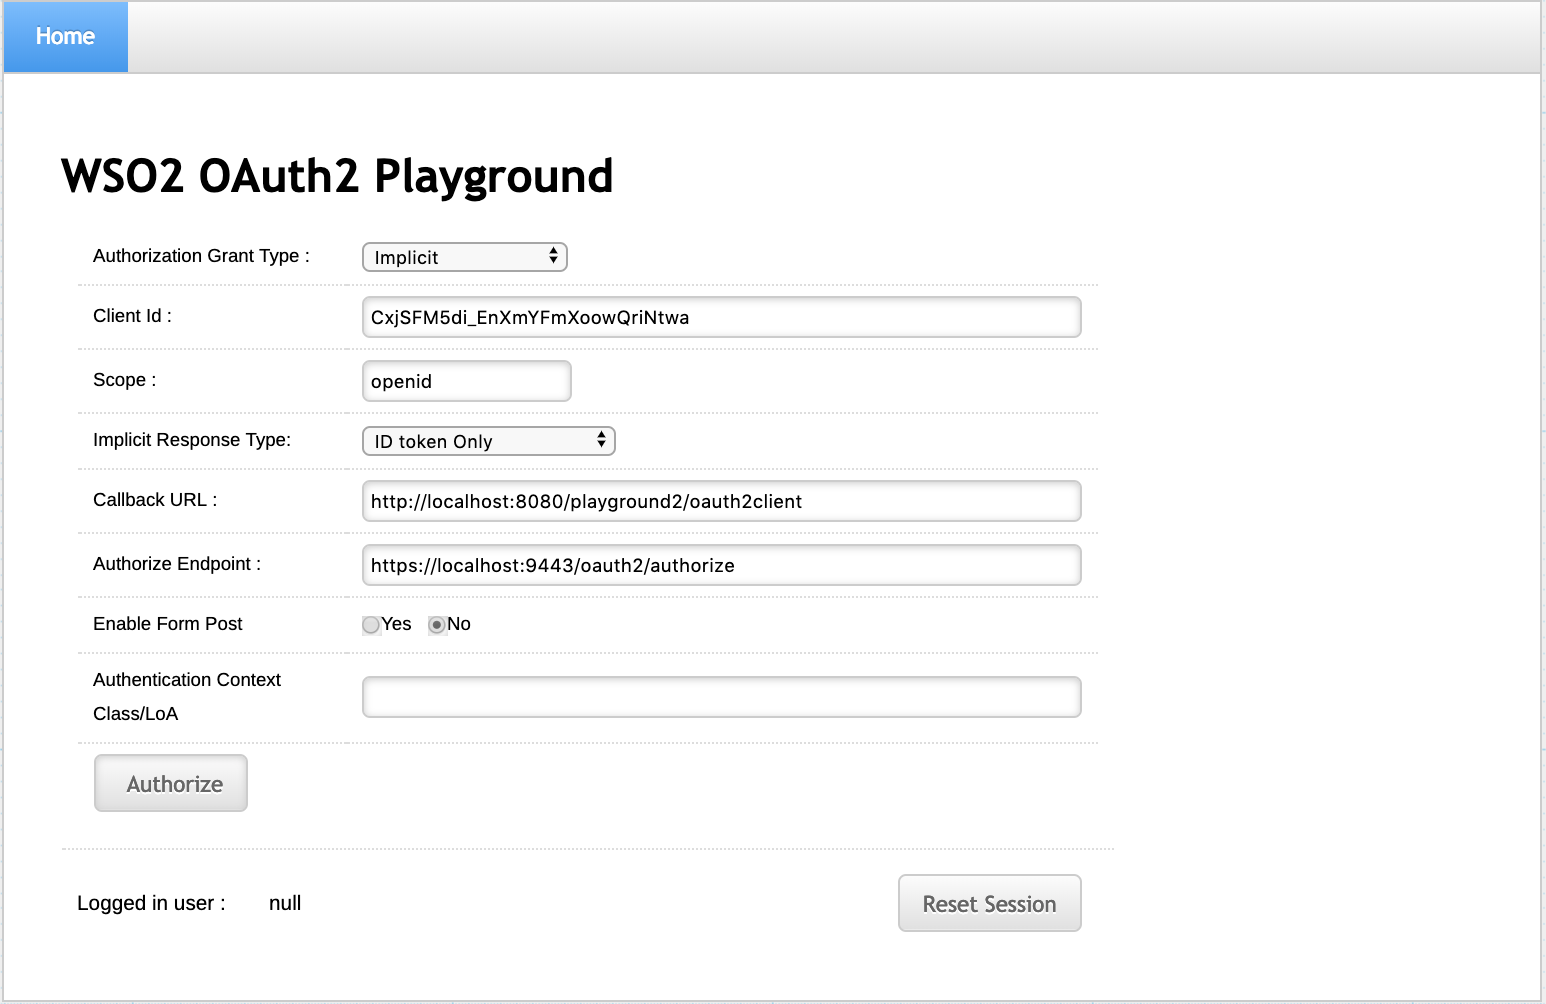
Field Description Sample Value Authorization Grant Type This determines the credentials that are used to generated the access token. There are four types of grant types available in the playground2 application: - Authorization Code :
- Implicit :
- Client Credentials :
- Resource Owner :
For more information on grant types, see OAuth 2.0 Grant Types .
ImplicitClient Id This is the client keyof the service provider.CxjSFM5di_EnXmYFmXoowQriNtwaScope Scopes enable fine-grained access control to API resources based on user roles. When a user invokes the API, the user's OAuth2 bearer token cannot grant access to any API resource beyond its associated scopes. T
openidImplicit Response Type This determines retrieving either of the following: code: Retrieves theauthorizecodecode id_token: Retrieves theauthorizecodeandID token
ID token onlyCallback URL This is the service provider's URL to which the authorization codesare sent. Upon a successful authentication, the browser should be redirected to this URL.http://localhost:8080/playground2/oauth2clientAuthorization Endpoint This is a standard OAuth authorization endpoint URL of the federated identity provider.
https://localhost:9443/oauth2/authorizeEnable Form Post
NoAuthentication Context Class/LoA
-
Click Authorize. The login page of the identity provider appears.
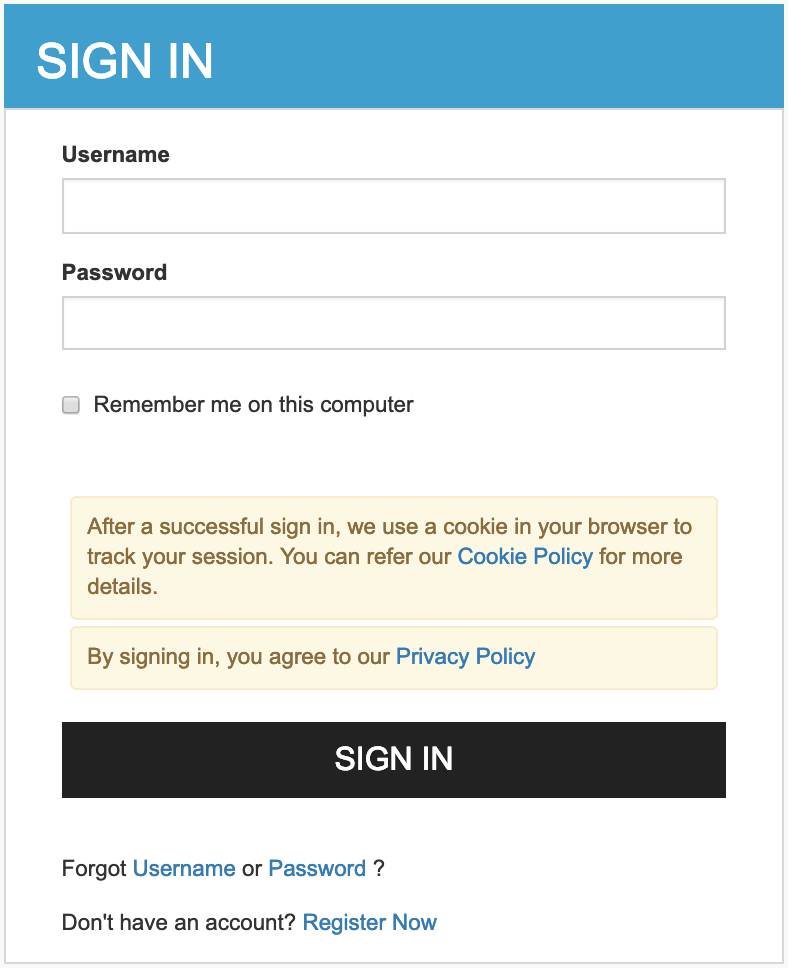
- Sign in as an admin user. The user consent screen appears.

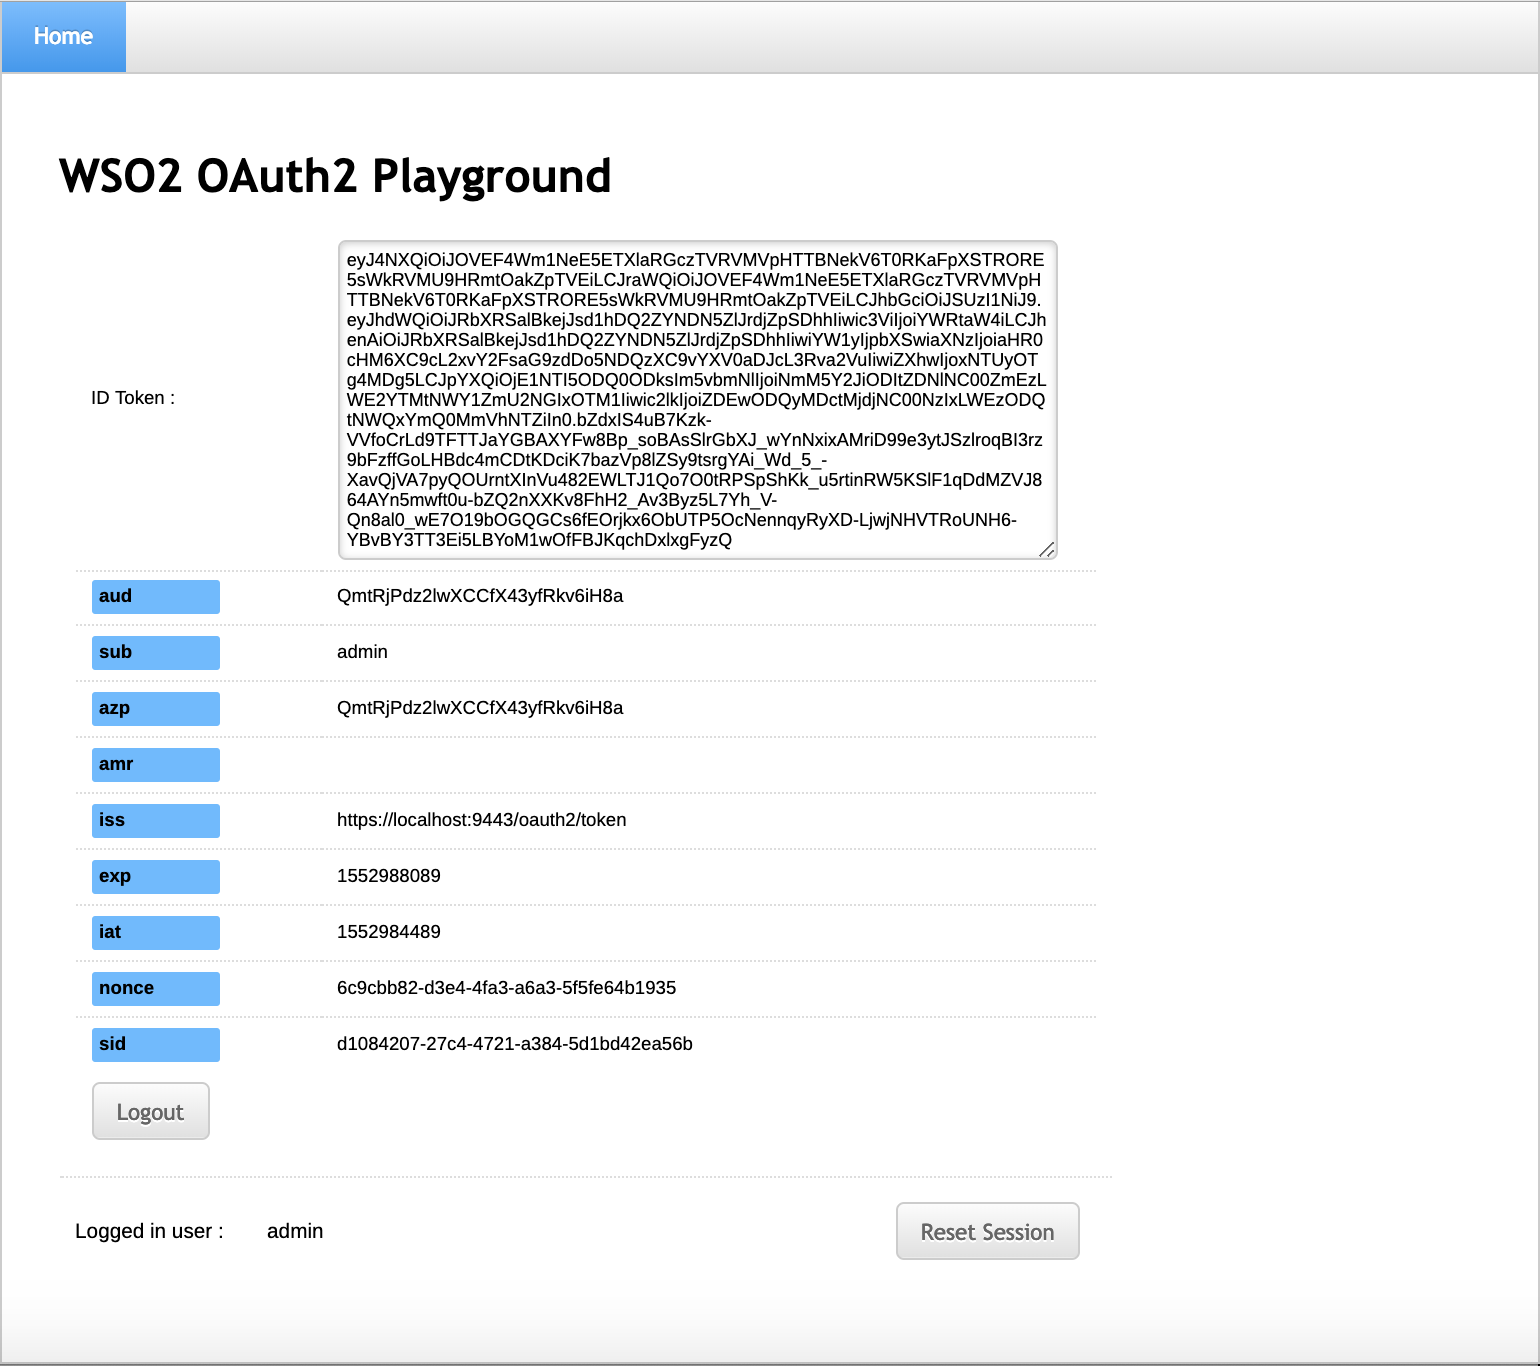
- Select the necessary attributes and click Continue. The
playground2 home screen appears with the Logged in user set
to
admin.
-
-
Similarly, sign in to the playground3 application by navigating to
http://<TOMCAT_HOST>:<TOMCAT_PORT>/playground3(ex:http://localhost:8080/playground3) in a separated browser tab. - Click Logout. A confirmation message appears.
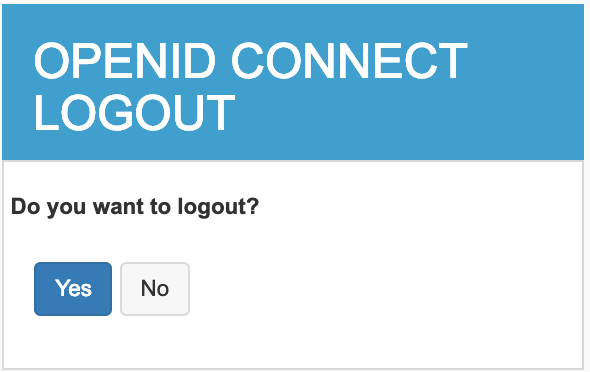
- Click Yes. A success message appears
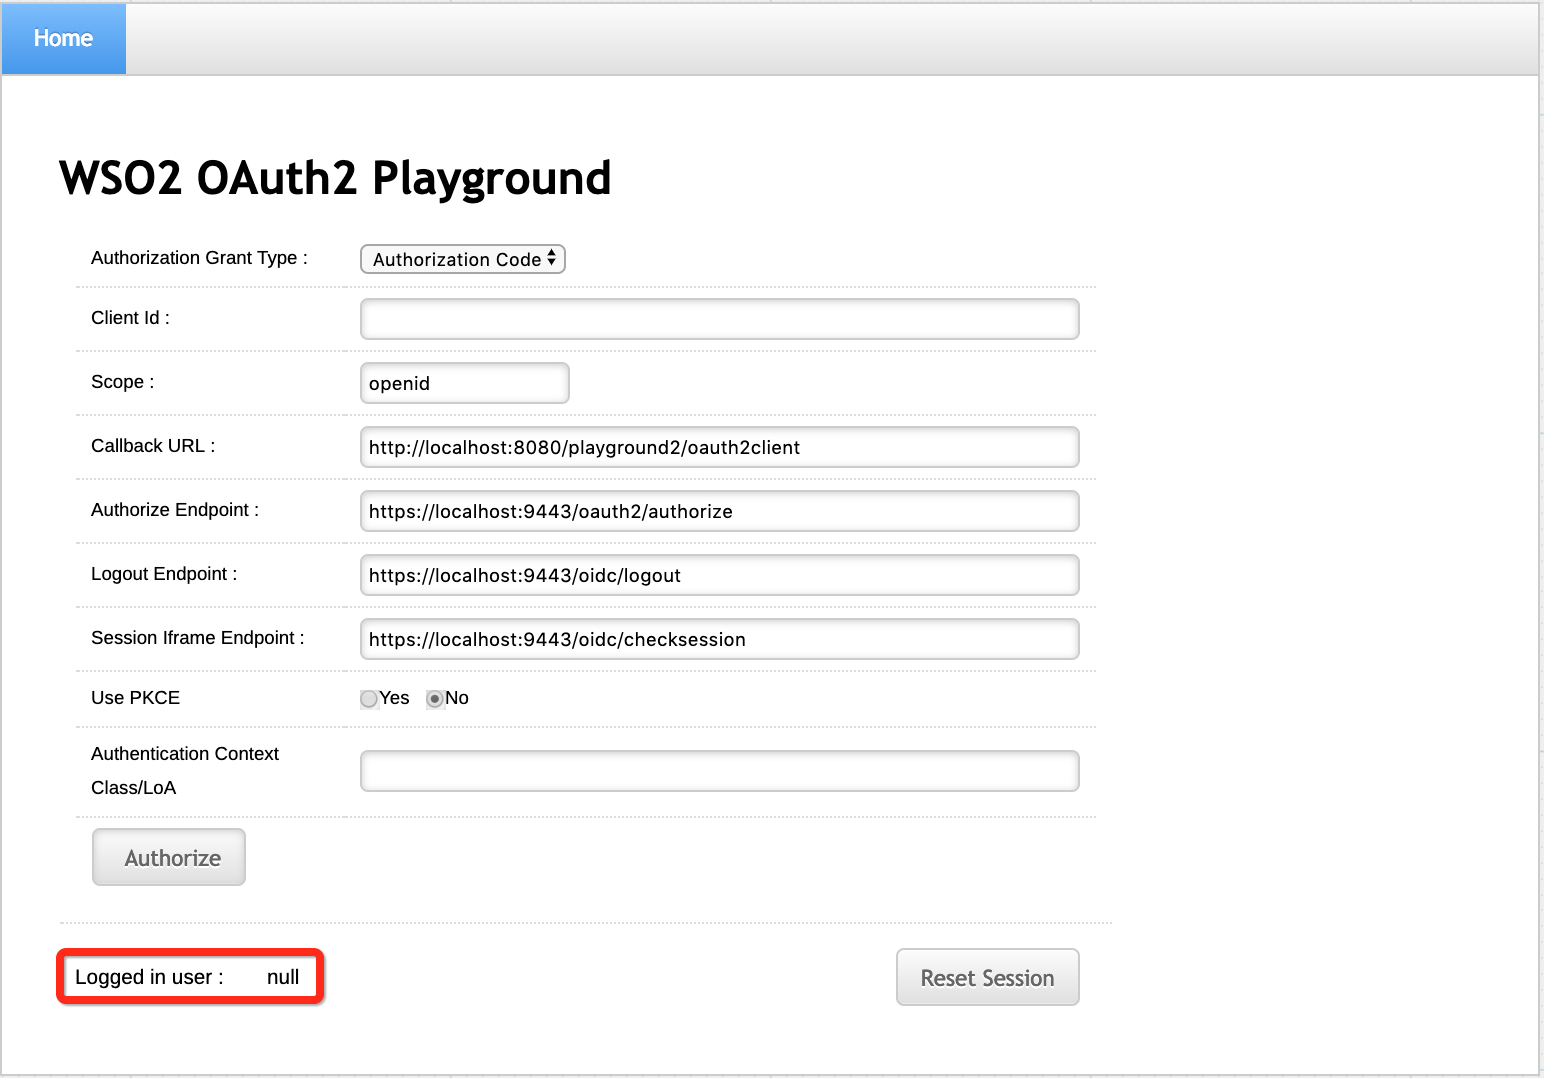
- Go back to the playground2 application and refresh. Note that the
Logged in user had changed from
admintonullindicating that you are also logged out from the playground2 application.