Single Sign-On for Native iOS Applications with WSO2 Identity Server
Single sign-on (SSO) is an authentication process that allows a user to access multiple applications using the same set of credentials. With SSO, a user can provide credentials once and gain access to different applications without having to sign in to each application individually.
You can add SSO capability to your iOS based native client applications using WSO2 Identity Server as an identity provider.
This tutorial demonstrates how you can add SSO support to a sample iOS application using WSO2 Identity Server as the Identity Provider.
Prerequisites
Before you start the tutorial, be sure to complete the following prerequisites:
- Set up a macOS based computer to try out the tutorial.
- Download and install WSO2 Identity Server, which will act as the identity provider in the tutorial. You can download the product installer from here, and run it.
- Download or clone the WSO2 Identity Server samples repository.
- Download and install Xcode 9+ to work with the iOS client app sample.
Tip
It is useful to have basic knowledge in iOS application development and some experience with the SWIFT (3+) programming language.
Once you have the prerequisites, you can follow the step-by-step instructions in the following sections.
Setting up WSO2 Identity Server
Since WSO2 Identity Server acts as the identity provider in this tutorial, first you need to configure WSO2 Identity Server as an identity provider.
Info
Let’s refer to the WSO2 Identity Server installation location as
<IS_HOME> throughout the tutorial.
Before you begin, you need to set up a valid SSL certificate in WSO2 Identity Server. This is important because by default iOS applications are restricted from communicating with a source that does not have a valid certificate. However, if you are running the server locally and you want to test the sample application via the iOS simulator, you can add a self-signed certificate to both WSO2 Identity Server and the simulator.
-
Follow the steps here to add a self-signed certificate to WSO2 Identity Server.
Note
If you are running WSO2 Identity Server locally, you can add a local DNS entry to a custom domain name and generate self-signed certificates to that particular domain. If you are doing this, you also need to change the WSO2 Identity Server host accordingly and add the local DNS entry to your hosts file.
-
Start WSO2 Identity Server and access the management console. You can sign in using
adminas the username and password. For detailed instructions on accessing the management console of WSO2 Identity Server, see Accessing the Management Console. - On the Main tab of the management console, go to Identity -> Service Provider and click Add.
- Enter an appropriate name for the new service provider and click Register.
- Expand the Inbound Authentication Configuration section, and then expand the OAuth2/OpenID Connect Configuration.
- Click Configure and set the following values in addition to the
values that are set by default:
- Specify
wso2issample://oauthas the Callback Url. This is the sample application’s URL. - Select PKCE Mandatory. This is recommended because you need to adhere to the PKCE protocol as a best practice when developing native mobile applications.
- Select Allow authentication without the client secret. This allows the native mobile application to bypass the authentication phase. For information on how native applications should interact with an authorization endpoint, see OAuth 2.0 for native apps specification.
- Specify
- Click Add. You will see an information message that says Application registered successfully.
- Click OK.
- Make a note of the generated OAuth Client Key. You need this value when you set up the sample application.
Now you have set up WSO2 Identity Server. Next you need to set up the sample iOS application.
Setting up the sample application
-
Use this tool to import a self-signed certificate to the iOS simulator.
-
Go to the downloaded WSO2 Identity Server samples repository. Let’s refer to the samples repository directory location as
<SAMPLES_HOME>throughout this tutorial. -
Open the
<SAMPLES_HOME>/oidc-client-app-samples/ios-client-app-sample/WSO2-IS-SampleApp.xcworkspacefile in Xcode.Note
Note
Ensure that you do not open the
<SAMPLES_HOME>/oidc-client-app-samples/ios-client-app-sample/ WSO2-IS-SampleApp.xcodeprojfile as it will not resolve the CocoaPods dependencies.
Following is the directory structure of the sample application project:
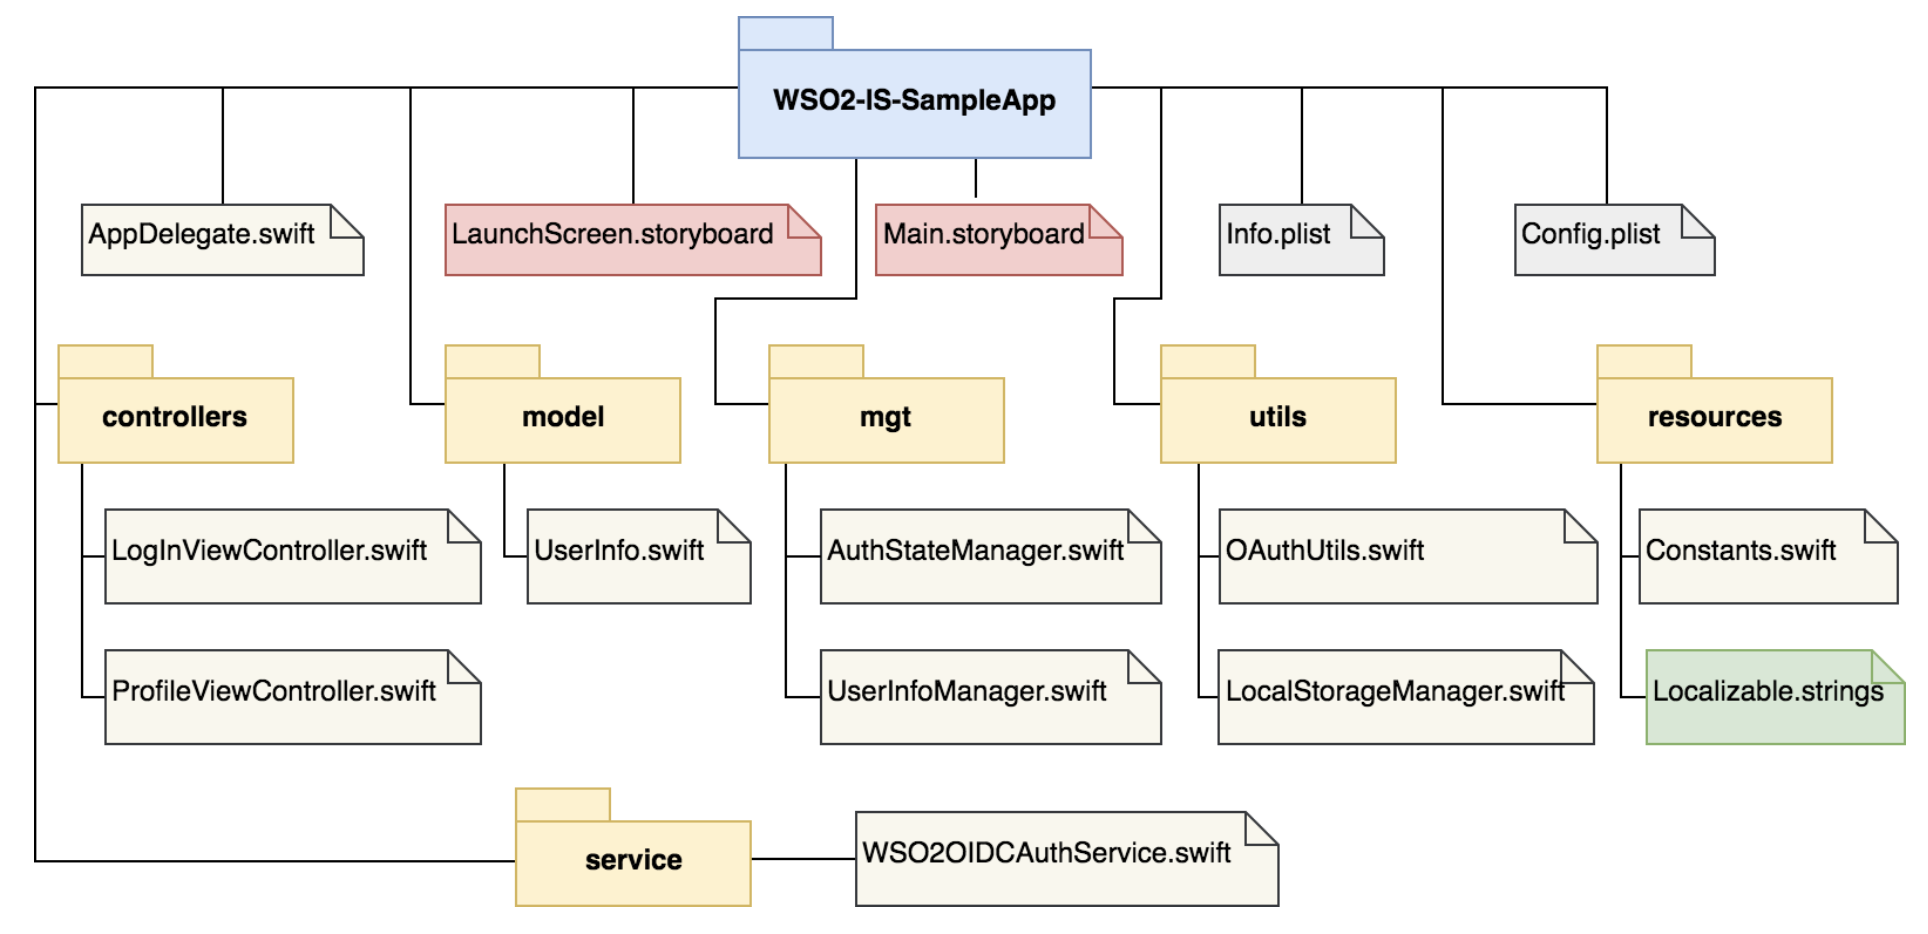
Following are descriptions of the key components of the sample application project:
AppDelegate.swift- The default delegation class to observe changes of the sample application state.Main.storyboard- The main storyboard of the sample application.Info.plist- Contains all the essential details about the sample application.Config.plist- The configuration file that contains identity provider details along with the OAuth client ID.controllersdirectory - Contains controllers for the login view and profile view.modeldirectory - Contains model data objects.mgtdirectory - Contains management classes.utilsdirectory - Contains utility classes.resourcesdirectory - Contains the resource files used in the application.servicedirectory - Contains the service class that handles the OAuth communication. We will take a look at the purpose of this directory in detail later in the tutorial.
Now that you are familiar with the key components of the sample project, let's set up the dependencies and third party libraries that are required.
-
The sample client application uses CocoaPods as the dependency manager in the project and the dependencies are defined in the pods file. In this tutorial you do not need to install the dependencies because the dependencies are already included along with the sample application source code.
Note
If you are using your own sample application, you have to navigate to the project root folder and run the following command to install dependencies:
pod install -
The sample client application project uses AppAuth as the third party library for OAuth 2.0 communication between the client and server. The AppAuth library is added as a dependency in the pod file.
Note
The sample client application uses the dev-logout development branch of the AppAuth for iOS library due to several logout functionality issues in the main branch. Therefore, you will see the following line in the pods file:
pod 'AppAuth', :git => 'https://github.com/openid/AppAuth-iOS.git', :branch => 'dev-logout'The dev-logout development branch can get removed or merged in the future. If that happens, you can replace the above line with the following to import the standard AppAuth library from the main branch:
pod 'AppAuth'Note: Since there are ongoing discussions about the issues and complexities exposed by the AppAuth for iOS library, the recommended approach is to use the dependencies that are already included in the sample source code. Installing dependencies from scratch is not recommended until the issues and complexities are resolved.
Configuring the sample application
There are two key configuration steps that you need to perform before you run the application.
Configuring application settings
To configure application settings, right click on the
<SAMPLES_HOME>/oidc-client-app-samples/ios-client-app-sample/WSO2-IS-SampleApp/Info.plist
file and open it with a source code editor.
-
In the source code, you will see the following lines of code:
<key>CFBundleURLTypes</key>
<array>
    <dict>
        <key>CFBundleURLName</key>
        <string>wso2is.local</string>
        <key>CFBundleURLSchemes</key>
        <array>
            <string>wso2issample</string>
        </array>
    </dict>
</array>
Here, the
CFBundleURLTypesproperty specifies the URL scheme of the application. The URL scheme defines the manner in which applications communicate with each other. The sample application uses a custom URL scheme calledwso2issample.This is why you had to specify
wso2issample://oauthas the callback URL when you created the OAuth service provider in the Setting up WSO2 Identity Server section. When authentication is done, users are redirected to the sample application through thewso2issample://oauthURL.Info
You can register any URL scheme that you want by defining it as above. If you are running WSO2 Identity Server locally, you must appropriately configure endpoints and OAuth client settings to successfully test the application.
-
You will also see the following lines of code:
<key>NSAppTransportSecurity</key>
<dict>
    <key>NSAllowsArbitraryLoads</key>
    <true/>
</dict>
The above code block specifies that you allow the application to connect to sources with untrusted certificates. You can only use the above code block in a test environment.
Warning
It is not recommended to connect to sources with untrusted certificates in a production environment. Therefore, be sure to remove the above code block before you publish your application for review.
Configuring endpoints and OAuth client settings
To configure endpoint and OAuth client settings, right click on the
<SAMPLES_HOME>/oidc-client-app-samples/ios-client-app-sample/WSO2-IS-SampleApp/Config.plist
file and open it with a source code editor.
-
In the source code, you will see several OAuth related properties defined as follows:
<dict>
    <key>IssuerURL</key>
    <string>https://localhost:9443</string>
    <key>LogOutURL</key>
    <string>https://localhost:9443/oidc/logout</string>
    <key>UserInfoURL</key>
    <string>https://localhost:9443/oauth2/userinfo?schema=openid</string>
    <key>TokenURL</key>
    <string>https://localhost:9443/oauth2/token</string>
    <key>AuthURL</key>
    <string>https://localhost:9443/oauth2/authorize</string>
    <key>RedirectURL</key>
    <string>wso2issample://oauth</string>
    <key>ClientID</key>
    <string>[YOUR_OAUTH_CLIENT_ID]</string>
</dict>
The first few properties are endpoints of the WSO2 Identity Server OAuth API. You can replace these values depending on your WSO2 Identity Server setup.
-
The
RedirectURLshould be the same URL that you specified as the callback URL when you created the OAuth service provider in the Setting up WSO2 Identity Server section. -
The
ClientIDshould be the OAuth client ID that you obtained in the Setting up WSO2 Identity Server section.Info
You do not need to specify the client secret anywhere in the code because this sample application is considered as a public client that cannot securely keep the client secret.
-
Now you are ready to try out the sample application.
Running the sample application
Follow the steps below to use the iOS simulator and run the sample application:
-
Open the
<SAMPLES_HOME>/oidc-client-app-samples/ios-client-app-sample/WSO2-IS-SampleApp.xcworkspacefile in Xcode. You may already have this file open in Xcode if you followed the steps in the Setting up the iOS client sample application section. -
Click Run on the Xcode toolbar to build the sample application and run it via the simulator. This will launch the sample application in the simulator.
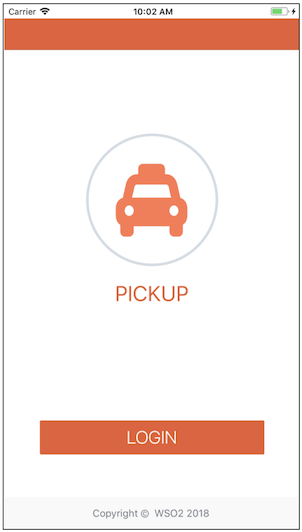
-
Click LOGIN. You will see the following message on the screen:
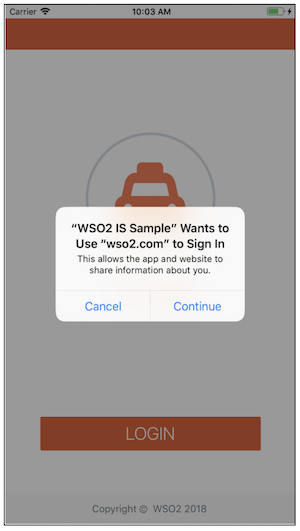
-
Click Continue. You will be redirected to the sign-in screen so that you can sign-in via WSO2 Identity Server.
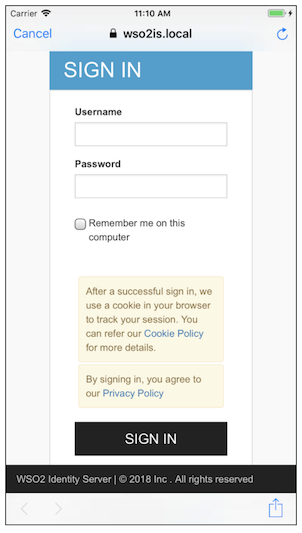
-
Enter your credentials and click SIGN IN. This will take you to the consent screen.
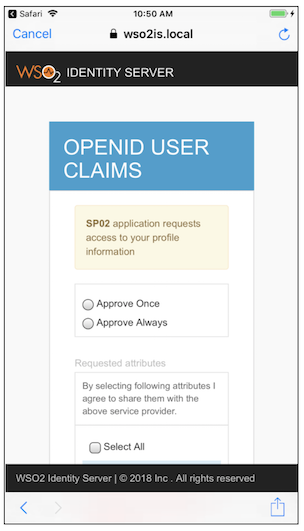
-
Select a required approval mechanism, then select the attributes you want to share with the service provider, and then click Continue to allow the sample application access your information. This will redirect you to the sample application profile screen that displays your user name and a Sign out button.
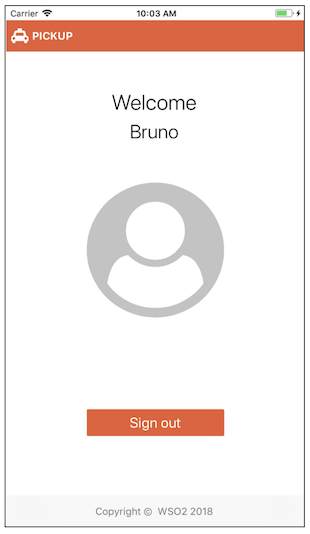
Now you have successfully signed in to the sample application using WSO2 Identity Server as an identity provider.
Next, you can try signing out of the sample application to understand the complete SSO authentication experience provided by WSO2 Identity Server for native iOS applications.
Follow the steps below to sign out of the sample application:
-
On the sample application profile screen, click Sign out. You will see the following message on the screen:
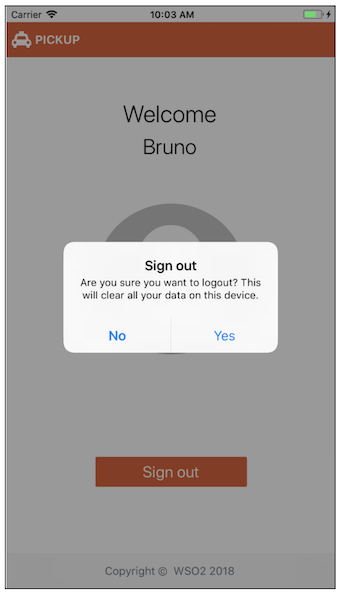
-
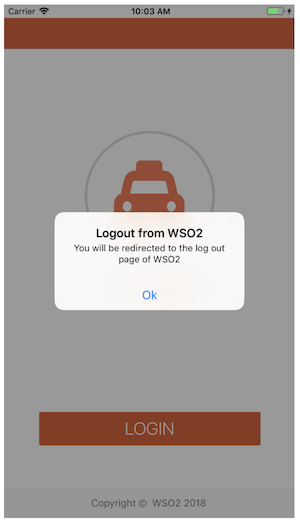
Click Yes. This will sign you out from the sample application. You will also see a message as follows notifying that you are going to be redirected to a page to log out of WSO2 Identity Server.
-
Click Ok. You will see a message as follows:
Important
- The following message displays the identity provider name as
(null). This happens when you run WSO2 Identity Server in your local machine and use a host entry to resolve DNS. - The message says
Sign Inalthough you are performing a log out action This is due to a known iOS application log out issue. For more information on this known issue, see the Apple developer forum.
However, you can continue to log out of the application.
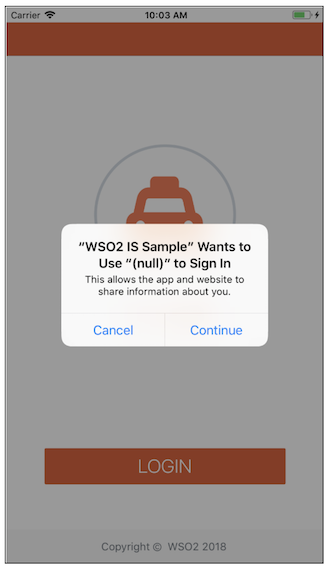
- The following message displays the identity provider name as
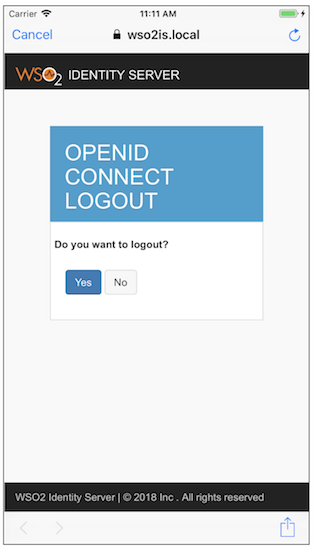
-
Click Continue. This will redirect you to the OpenID Connect logout page of WSO2 Identity Server. Once you click ‘Yes’ you will be logged out from the server and will be redirected to the login page of the application.
-
Click Yes. This will log you out from the server and will redirect you to the sign-in page of the sample application.
Note
- If you do not log out from WSO2 Identity Server and the application is not cleared from memory, you can access the sample application without providing credentials. This is possible because the cookies set by the server are not cleared from the application side.
- If you sign in to the sample application and then close the application, clear it from memory and try to log out, you will not be able to perform external log out from the server side because cookie data will not be available. This is a result of not having a proper mechanism to persist cookie data due to a known iOS application log out issue.
The issues mentioned above are unresolved issues in the AppAuth for iOS library. There are no workarounds for these issues at the moment because Apple does not allow access to the Safari view controllers cookie storage. For more information on the issues, see the following:
Now that you understand how to add SSO capability to an iOS application, you can implement your own iOS application and configure SSO for the application using WSO2 Identity Server as the identity provider.
Top