Provisioining Users to Salesforce
This tutorial will walk you through the steps on integrating WSO2 Identity Server with Salesforce for provisioning users by utilizing WSO2 Enterprise Integrator as the message coordinator. The use-case is that, whenever a user is created in WSO2 Identity Server, the same user needs to be created as a ‘Lead’ in Salesforce.
Configuring Salesforce
- Create a trial Developer account in Salesforce.
-
Create a new Connected App from Platform Tools > App Manager > New Connected App as shown in the diagram below.
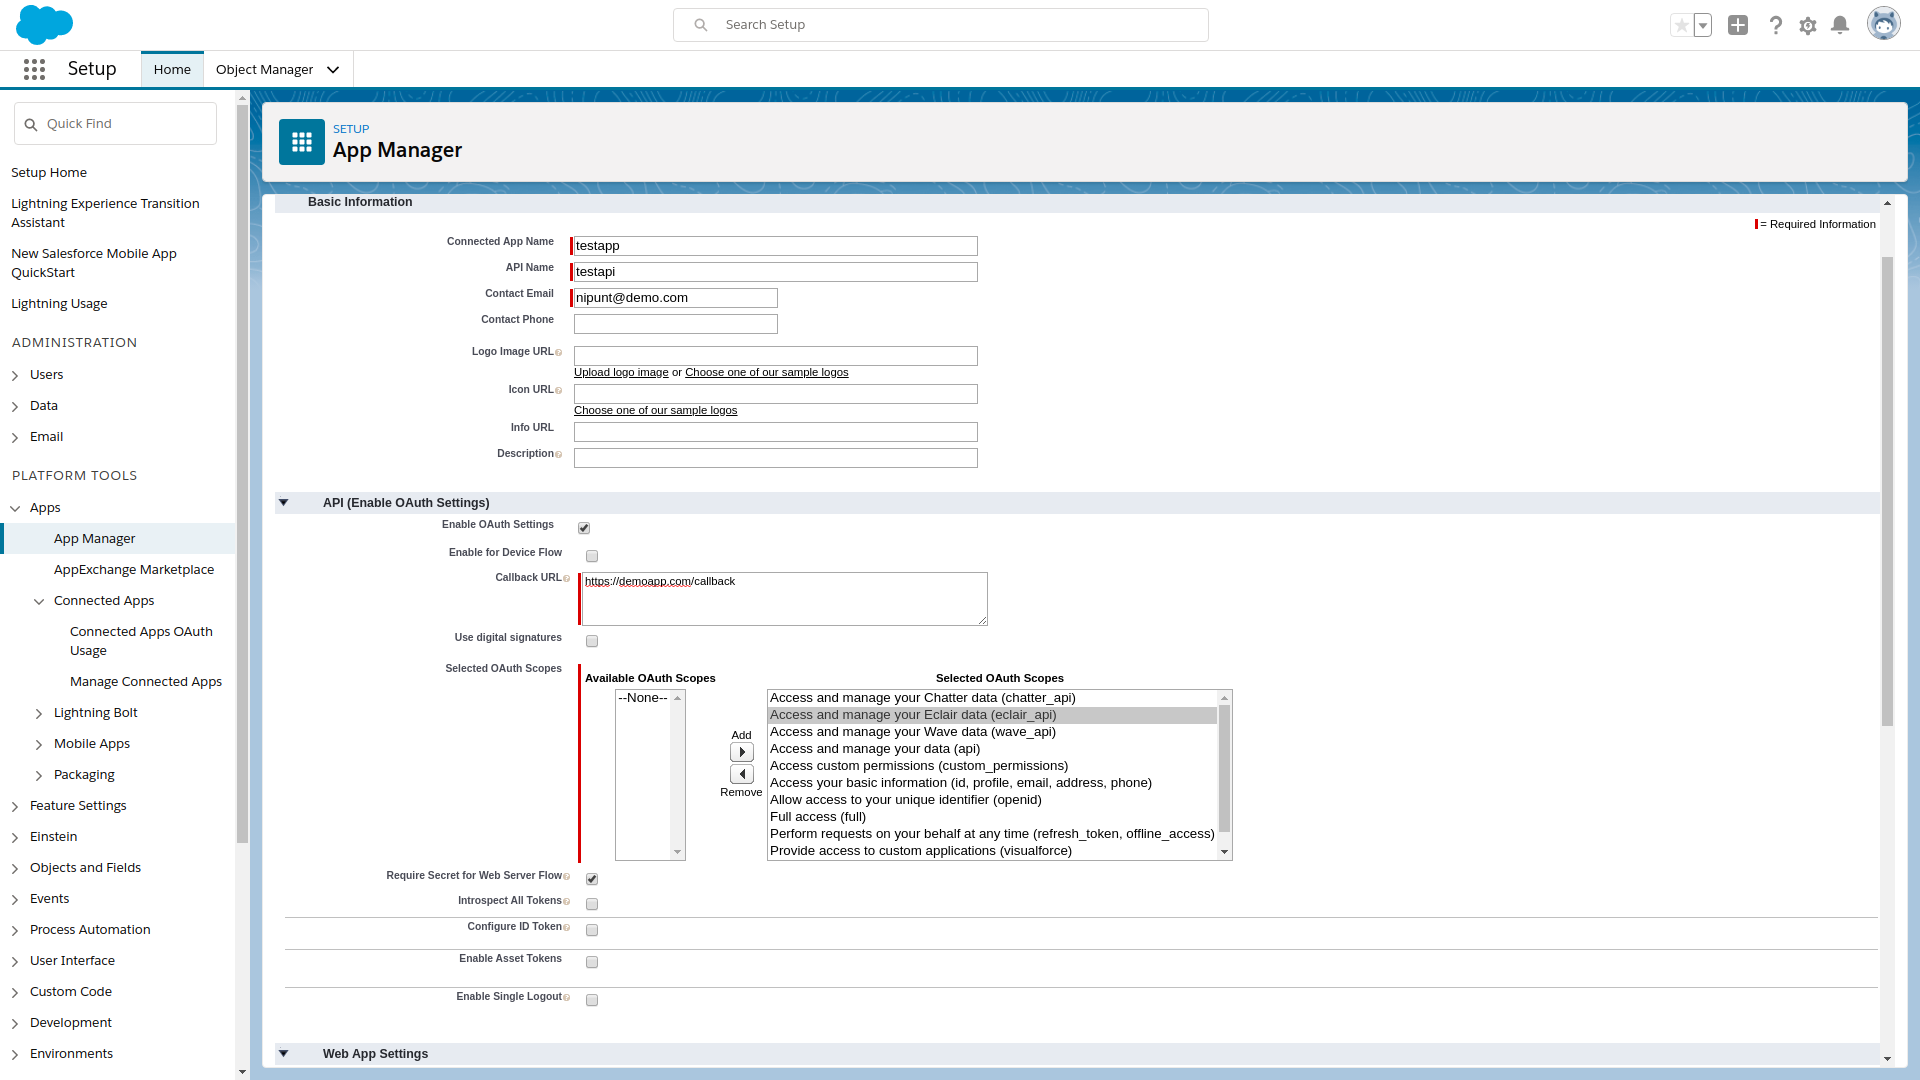
-
Select all the scopes, provide a call back URL for your application and create your new Connected oauth application.
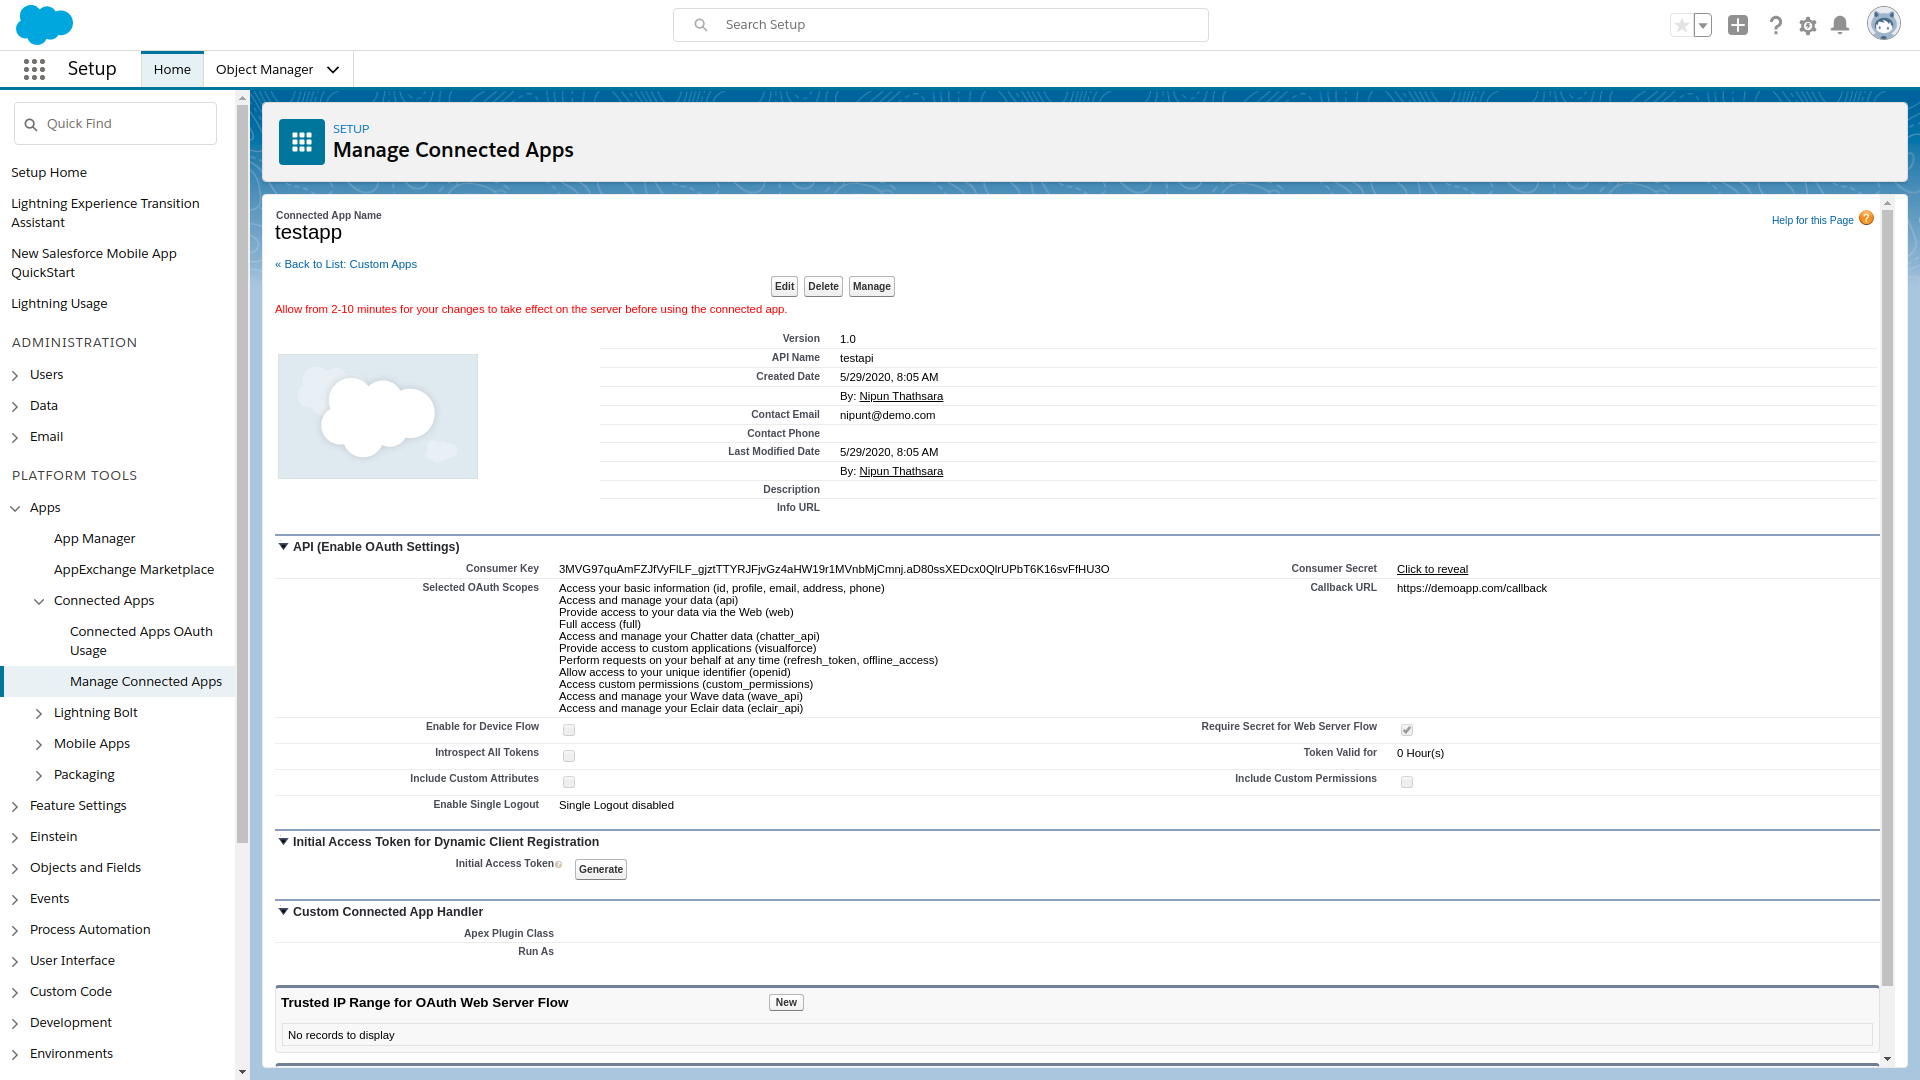
-
Once you create it, you will be redirected to the next page with Oauth client key and client secret as below.
Configure the WSO2 Enterprise Integrator (EI)
In order to enable WSO2 Enterprise Integrator Server (WSO2 EI) to be able to communicate with Salesforce using REST APIs exposed by the Salesforce platform, you need to install WSO2 EI Salesforce REST connector. Please follow the steps given below.
- Download the Enterprise Integrator.
- Download the Salesforce REST Connector from the WSO2 Connector Store.
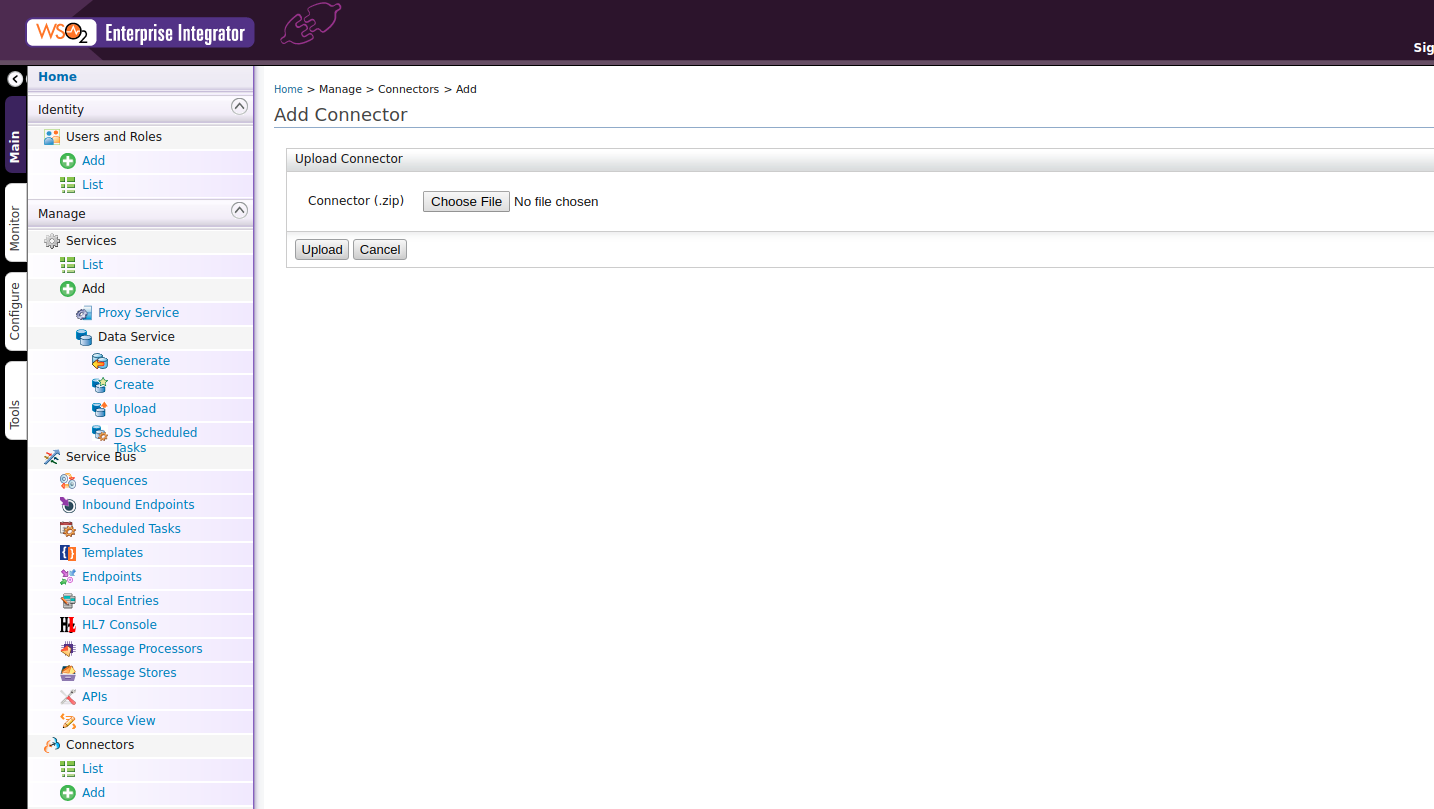
- Start the EI server and install the downloaded REST connector. From the EI management console, navigate to
Connectors > Add > Upload
-
Add below two sequences from
Sequences > Add Sequence
Replace<?xml version="1.0" encoding="UTF-8"?> <sequence name="create" xmlns="http://ws.apache.org/ns/synapse"> <property expression="json-eval($.sObject)" name="sObject" scope="default" type="STRING" xmlns:ns="http://org.apache.synapse/xsd"/> <property expression="json-eval($.fieldAndValue)" name="fieldAndValue" scope="default" type="STRING" xmlns:ns="http://org.apache.synapse/xsd"/> <salesforcerest.init> <username>[email protected]</username> <password>admin123</password> <apiVersion>v48.0</apiVersion> <hostName>https://login.salesforce.com</hostName> <clientSecret> ye3gf9yfgfn34fn9f3fg3f3f3n</clientSecret> <clientId>8r439nr83smseyenx2gr</clientId> <apiUrl>https://ap17.salesforce.com</apiUrl> <registryPath>connectors/SalesforceRest</registryPath> </salesforcerest.init> <property name="uri.var.apiUrl" value="https://ap17.salesforce.com"/> <salesforcerest.create> <sObjectName>{$ctx:sObject}</sObjectName> <fieldAndValue>{$ctx:fieldAndValue}</fieldAndValue> </salesforcerest.create> </sequence> <?xml version="1.0" encoding="UTF-8"?> <sequence name="retrieve" xmlns="http://ws.apache.org/ns/synapse"> <salesforcerest.init> <username>[email protected]</username> <password>admin123</password> <apiVersion>v48.0</apiVersion> <hostName>https://login.salesforce.com</hostName> <clientSecret> ye3gf9yfgfn34fn9f3fg3f3f3n</clientSecret> <clientId>8r439nr83smseyenx2gr</clientId> <apiUrl>https://ap17.salesforce.com</apiUrl> <registryPath>connectors/SalesforceRest</registryPath> </salesforcerest.init> <property name="uri.var.apiUrl" value="https://ap17.salesforce.com"/> <property name="apos" scope="default" type="STRING" value="'"/> <property expression="fn:concat('SELECT count() FROM Lead WHERE Email = ', $ctx:apos, get-property('uri.var.email'), $ctx:apos)" name="uri.var.queryString" xmlns:ns="http://org.apache.synapse/xsd"/> <call blocking="true"> <endpoint> <http method="GET" uri-template="{uri.var.apiUrl}/services/data/{uri.var.apiVersion}/query/?q={uri.var.queryString}"> <timeout> <duration>{$ctx:timeout}</duration> <responseAction>fault</responseAction> </timeout> <suspendOnFailure> <errorCodes>-1</errorCodes> <progressionFactor>1.0</progressionFactor> </suspendOnFailure> <markForSuspension> <errorCodes>-1</errorCodes> </markForSuspension> </http> </endpoint> </call> </sequence>username,password,clientId,clientSecretas per your created application. -
Create the below API from
API > Add API<api xmlns="http://ws.apache.org/ns/synapse" name="salesforcerest" context="/salesforce"> <resource methods="POST"> <inSequence> <property name="uri.var.email" expression="json-eval($.emails[0])" scope="default" type="STRING"/> <sequence key="retrieve"/> <switch source="json-eval($.totalSize)"> <case regex="0"> <payloadFactory media-type="json"> <format>{"sObject":"Lead", "fieldAndValue": {"LastName" : "$1", "Company" : "Guardio", "Email" : "$1", "LeadSource" : "Guardio brochure download."}}</format> <args> <arg evaluator="xml" expression="get-property('uri.var.email')"/> </args> </payloadFactory> <sequence key="create"/> </case> </switch> <respond/> </inSequence> <outSequence/> <faultSequence/> </resource> </api>
Configuring the Identity Server
- Download the WSO2 Identity Server.
- Add an Identity Provider to configure outbound provisioning as shown in the diagram below.
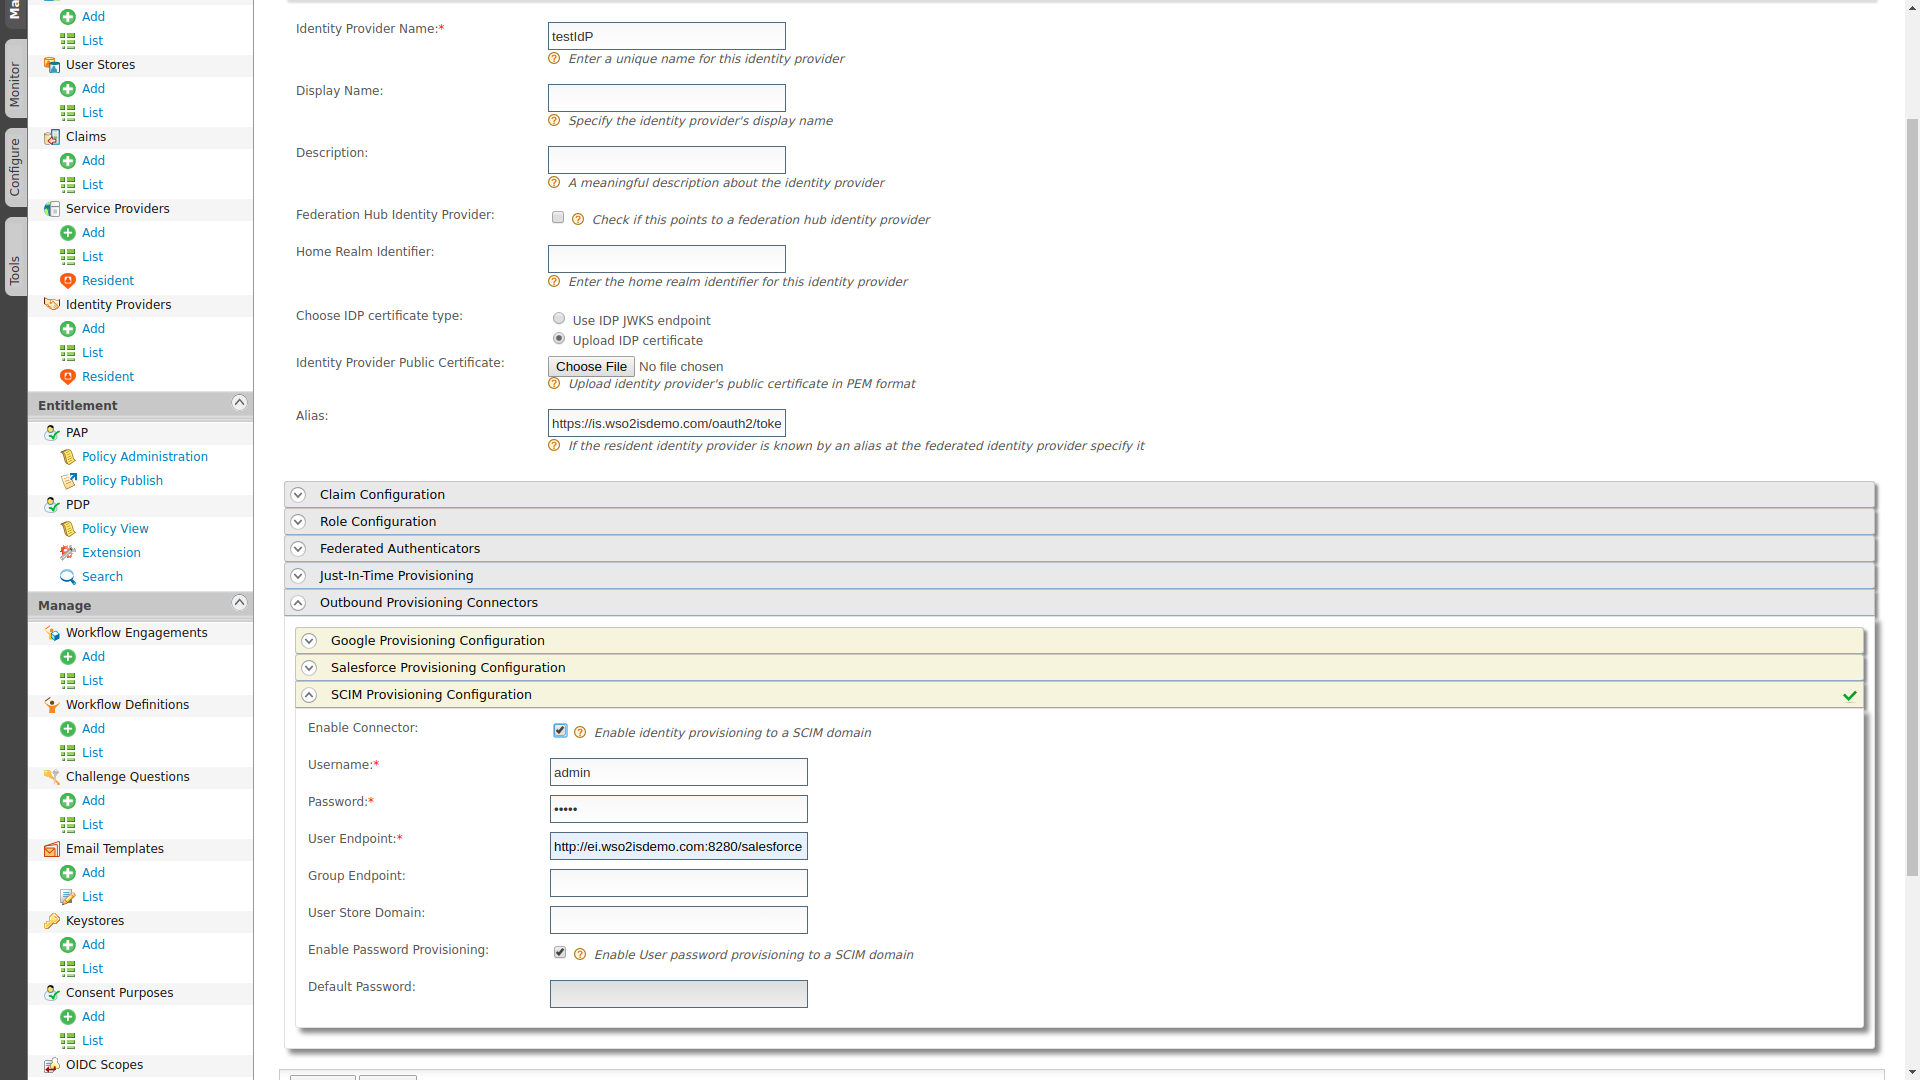
- In the
SCIM Provisioning Configuration, provide the REST endpoint details of the EI server. If they are secured APIs, provide the credentials as well. - Configure the
Resident Service Providerto register the newly created Identity Provider for Outbound Provisioning as shown below.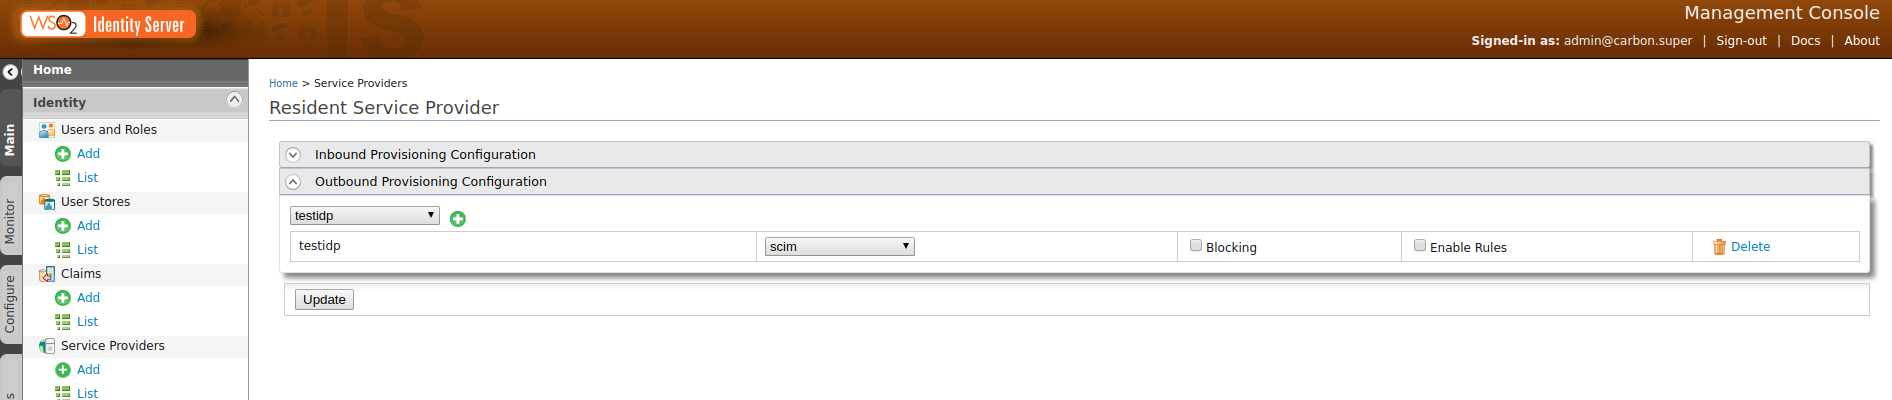
Try Out
- Send a simple SCIM request to WSO2 IS as shown below.
In the above command, the email attribute will be the one that is consumed by the EI Salesforce Connector to create thecurl -v -k --user admin:admin --data '{"schemas":[],"userName":"Robin","password":"robin123", "emails":["[email protected]"]}' --header "Content-Type:application/json" https://localhost:9443/scim2/UsersLeadin the Salesforce. You can also send other parameters in this SCIM request and change the EI REST API appropriately to capture the information and send to Salesforce. - You can see the local user by searching the string
Robinin the Management Console > Users and Roles > Users > View. - Login to Salesforce and navigate to this URL to see the created
Lead.
Note
This EI Salesforce REST connector makes use of the Salesforce REST APIs. Those REST APIs cater many functionalities in the Salesforce side. Therefore, the EI REST connector too supports execution of those APIs in a more convenient manner. Using this, you can achieve many user management scenario integrations with the WSO2 Identity Server.