Configuring Account Locking due to Failed Login Attempts
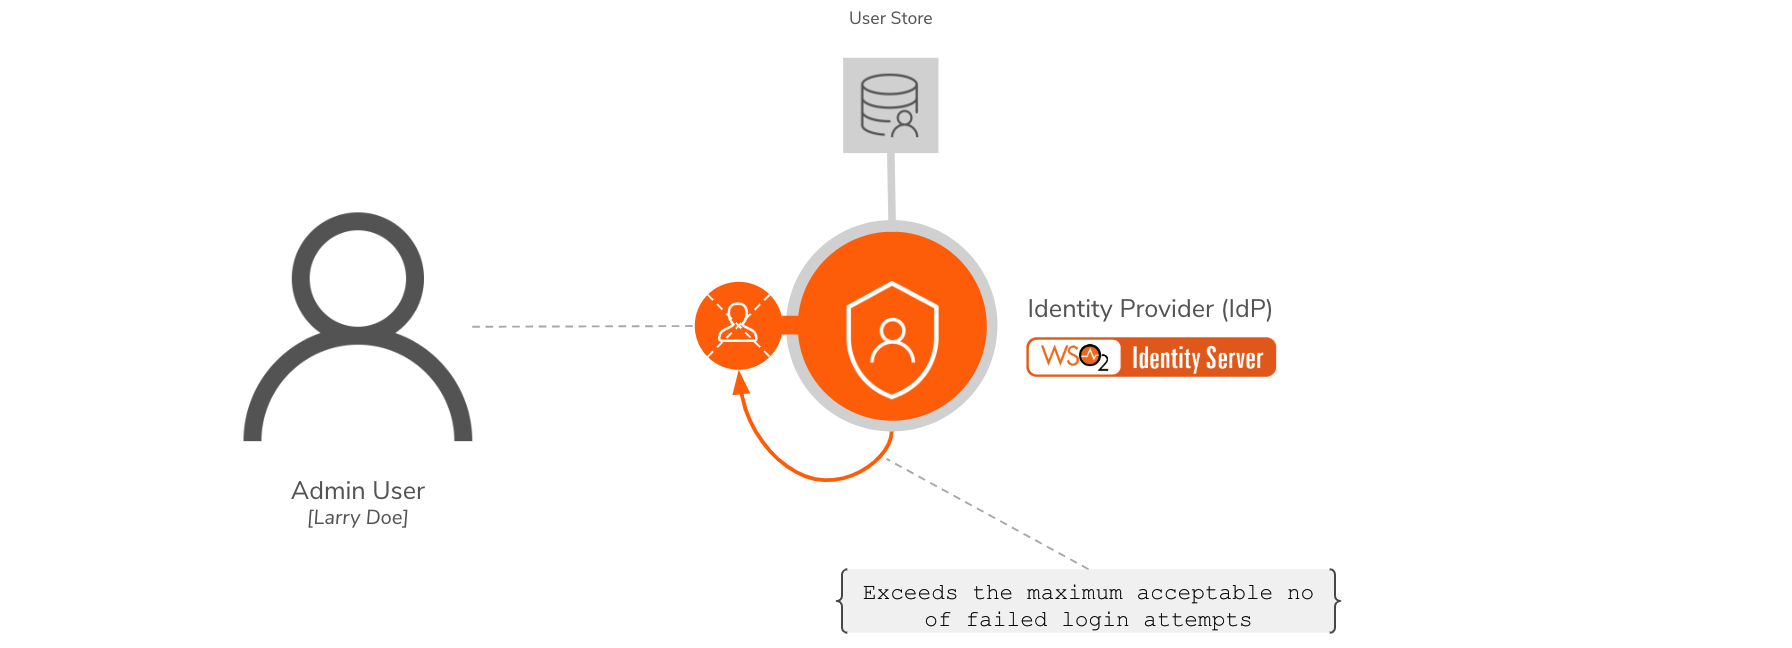
WSO2 Identity Server enables privileged users to define the maximum number of failed login attempts the system accepts. When a user exceeds the maximum number of failed login attempts defined in the system, the user account will be automatically locked. The privileged users can also define for how long the account should be locked.
Scenario
Pickup is a cab company that has many employees who use different credentials to sign in to different internal enterprise applications. While Sam is an administrator at Pickup, Alex is a new recruit. To prevent unauthorized access, Sam wants to temporarily lock accounts to which more than 3 failed login attempts were made.
Let's learn how Sam implements this!
Set up
Follow the steps below to configure account locking due to failed login attempts.
-
Open the
deployment.tomlfile in the<IS_HOME>/repository/confdirectory.-
To request password entry from the users who are registered via Management Console, add the following configurations:
[event.default_listener.identity_mgt] priority= "50" enable = false [event.default_listener.governance_identity_mgt] priority= "95" enable = true -
To configure the email server to send emails requesting password entry, add the following configurations:
- from_address: This is the email address from which the confirmation email will be sent.
- username: This is the user name of the given email address.
- password: This is the password of the given email address.
[output_adapter.email] from_address= "" username= "" password= "" hostname= "smtp.gmail.com" port= 587 enable_start_tls= true enable_authentication= true[output_adapter.email] from_address= "[email protected]" username= "wso2iamtest" password= "Wso2@iam70" hostname= "smtp.gmail.com" port= 587 enable_start_tls= true enable_authentication= trueIf you are using a Google email account
Google has restricted third-party applications and less secure applications from sending emails by default. As WSO2 Identity Server acts as a third-party application when sending emails for password entry, follow the steps below to enable your Google email account to provide access to third-party applications.
-
Under Signing in to Google section, turn off the 2-step Verification option.
-
Enable Less secure app access in the Google Account security section.
-
-
To configure the account locking requirements:
-
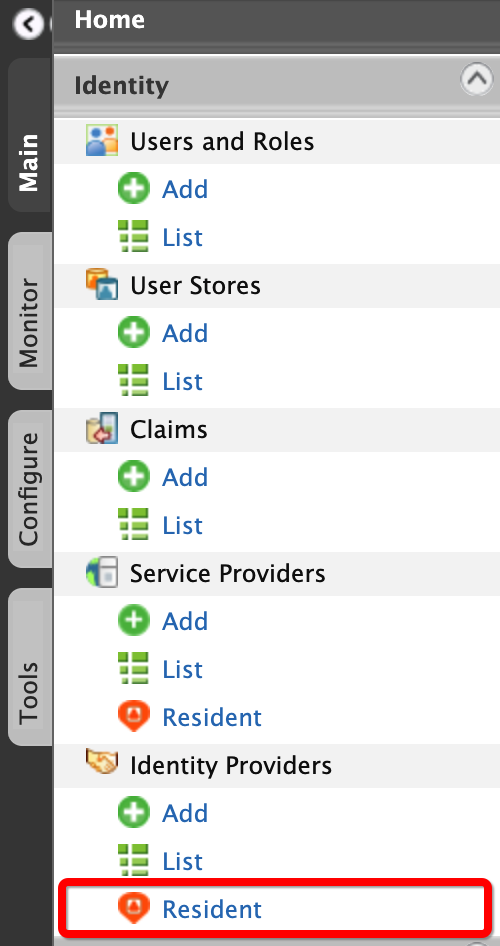
On the Main menu of the Management Console, click Identity > Identity Providers > Resident.
-
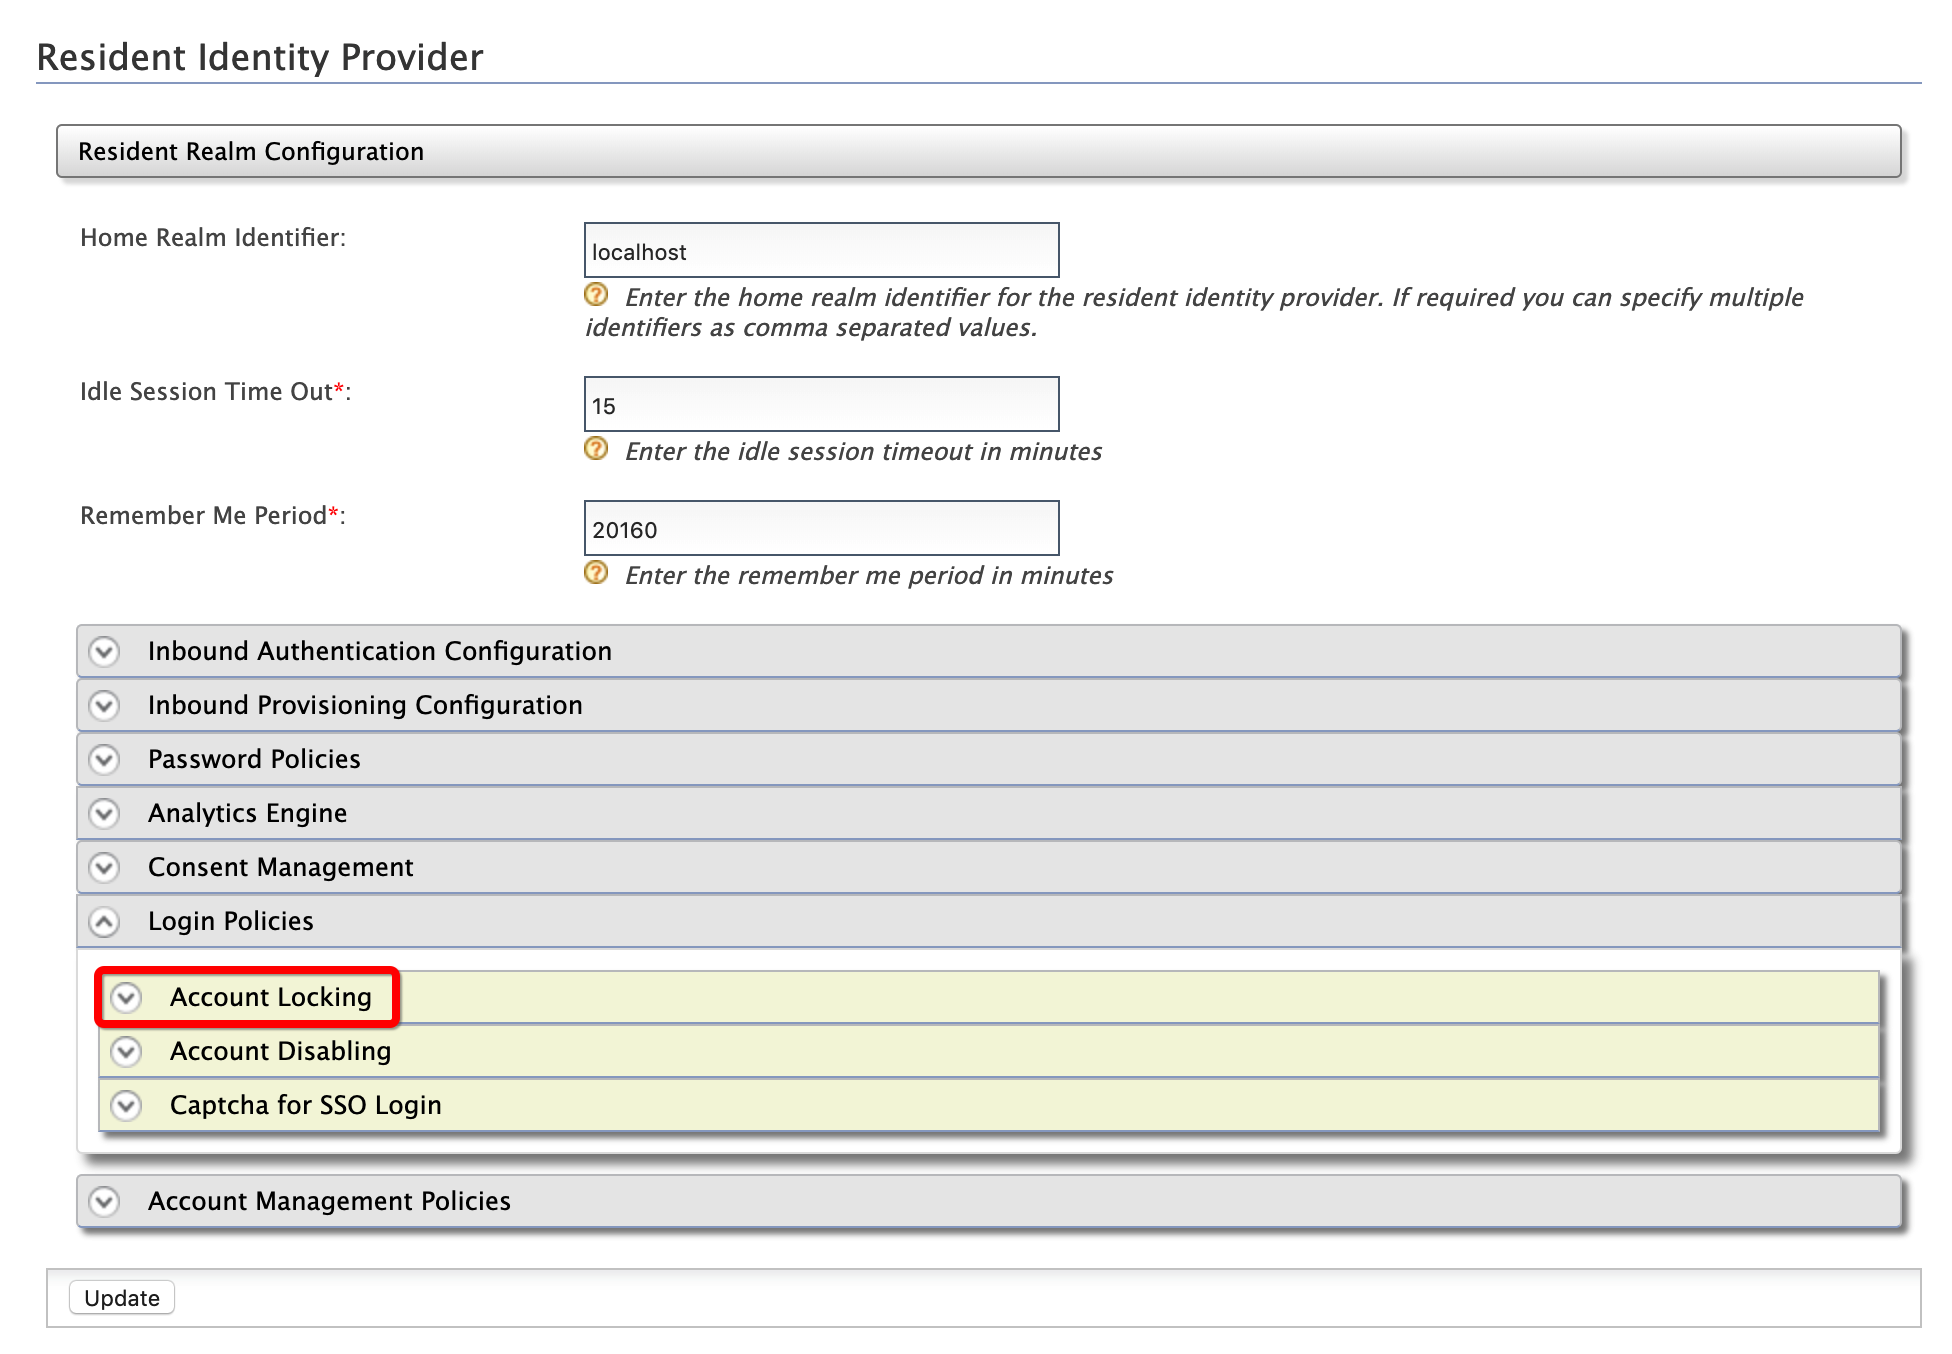
Under the Login Policies section, click Account Locking.
-
Enter the required information as given below:
- Maximum Failed Login Attempts:
3 - Account Unlock Time:
15
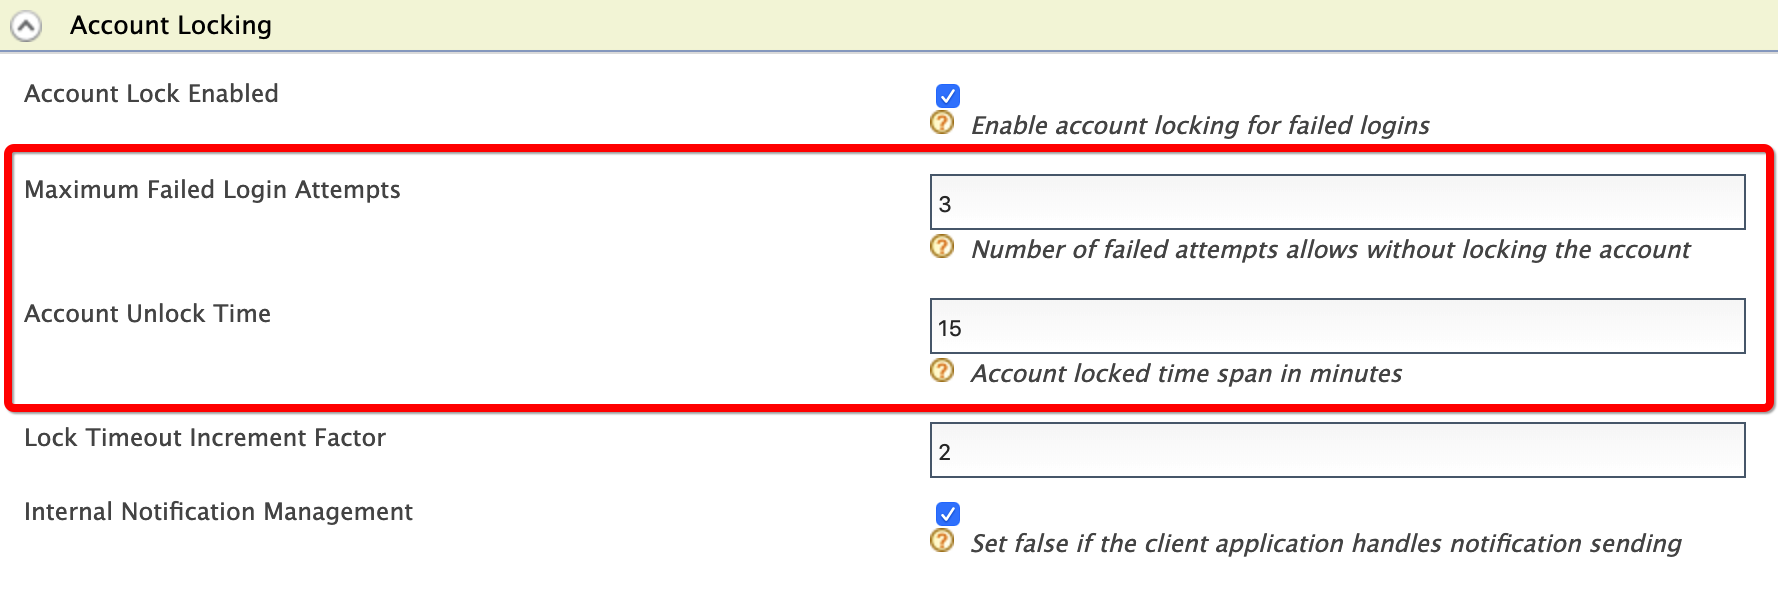
- Maximum Failed Login Attempts:
-
Click Update.
-
Try out
-
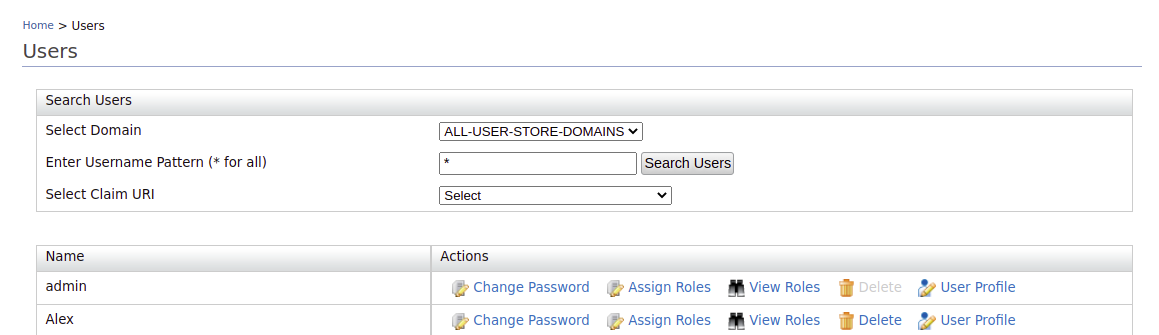
To create the user account for Alex:
-
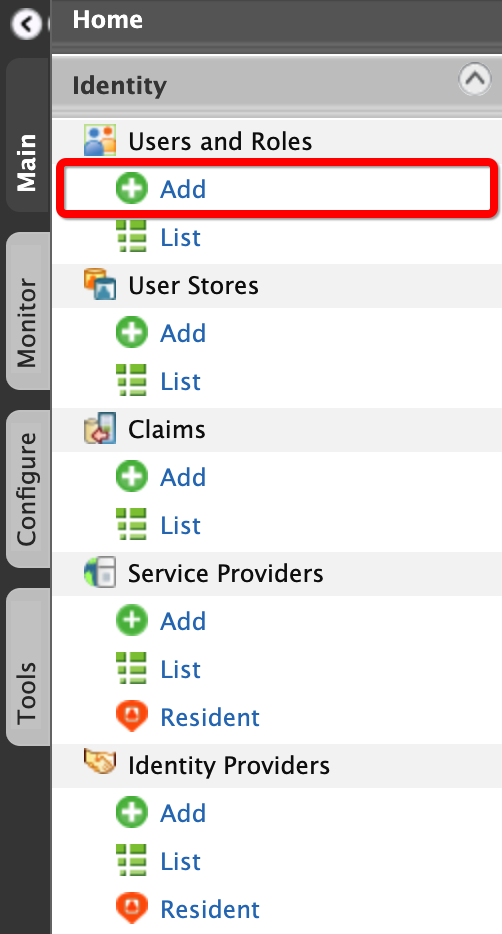
On the Main menu of the Management Console, click Identity > Users and Roles > Add.
-
Click Add New User.

-
Enter the required data as follows.
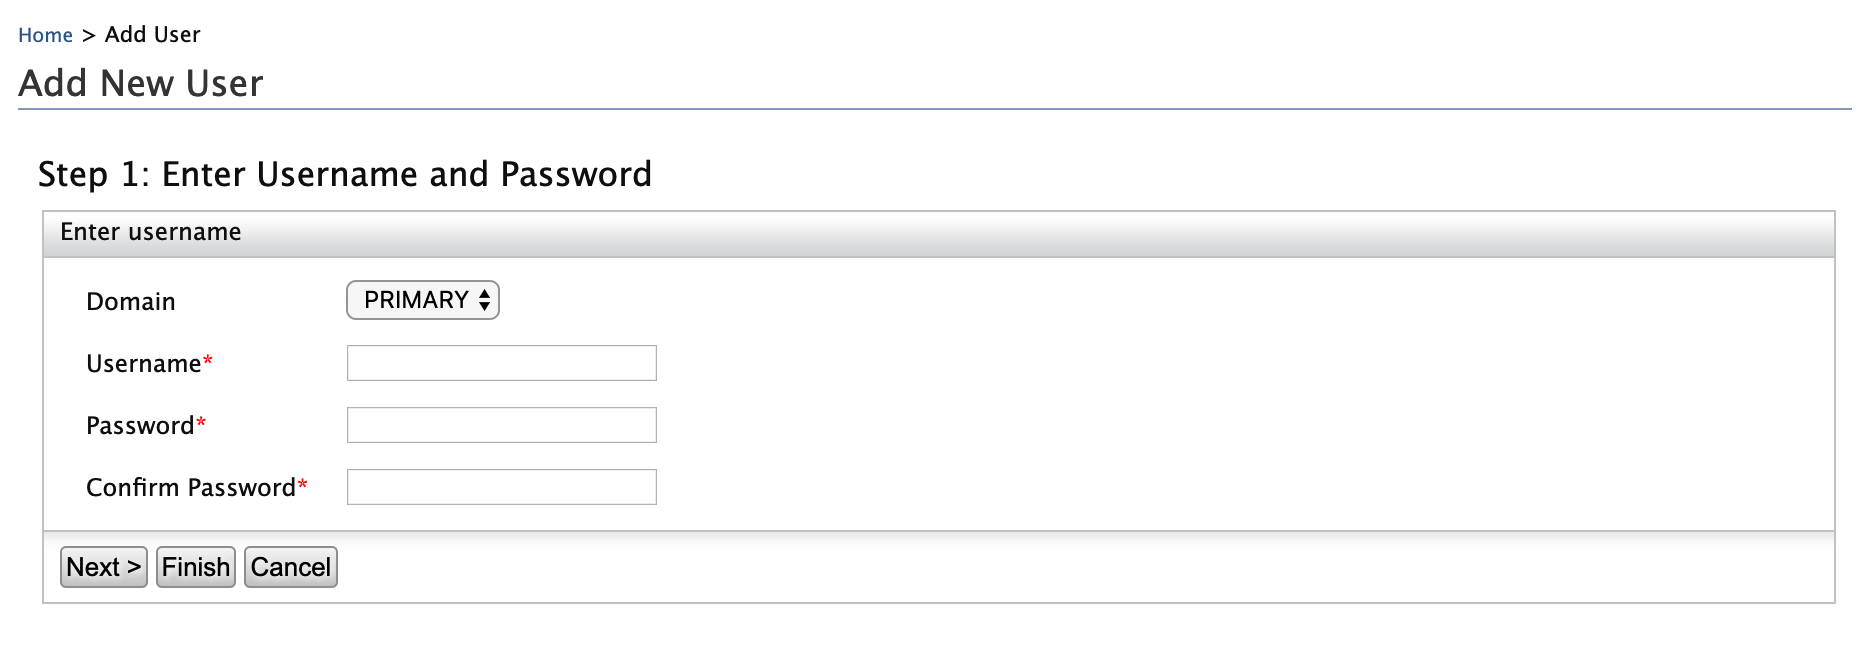
- Domain:
Primary - Username:
Alex
- Domain:
-
Click Finish.
-
-
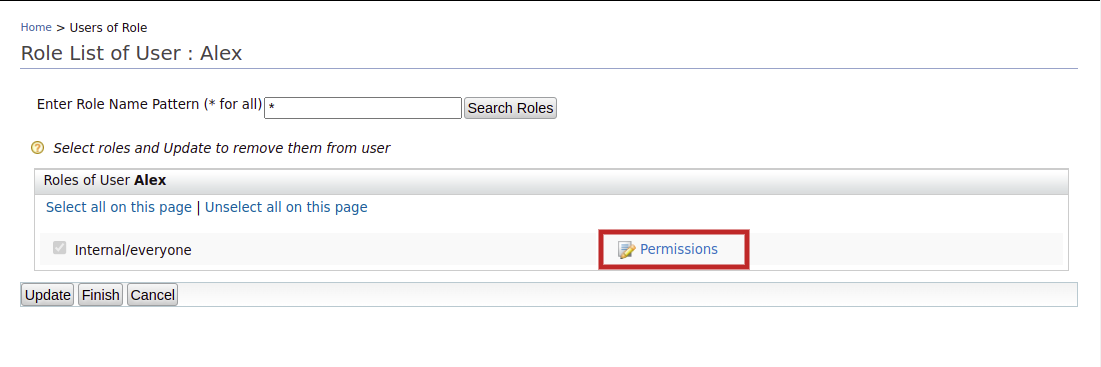
To assign login permissions to the user:
-
Click the View Roles option of Alex.

-
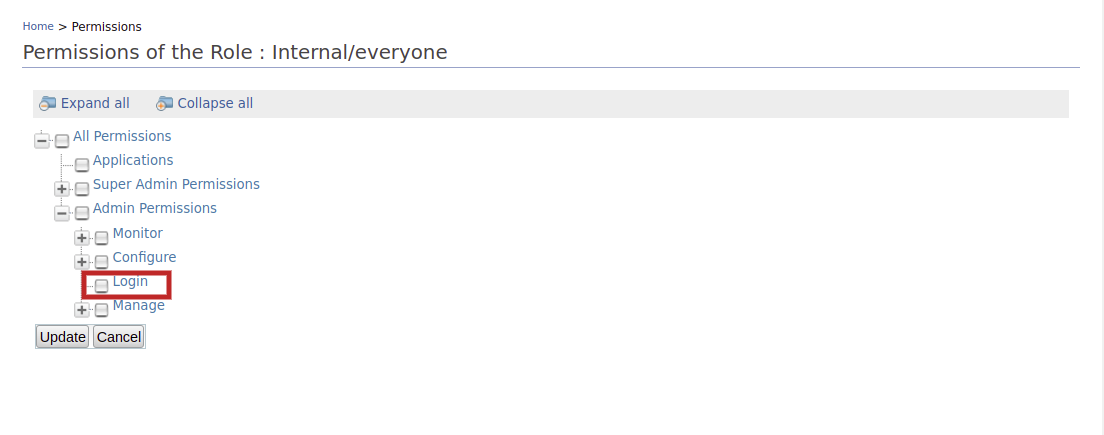
Click Permissions.
-
Select Login and click Update.
-
-
To configure Alex's email account:
-
Click User Profile option of Alex.
-
Enter an email address to which Alex's account locking emails should be sent.
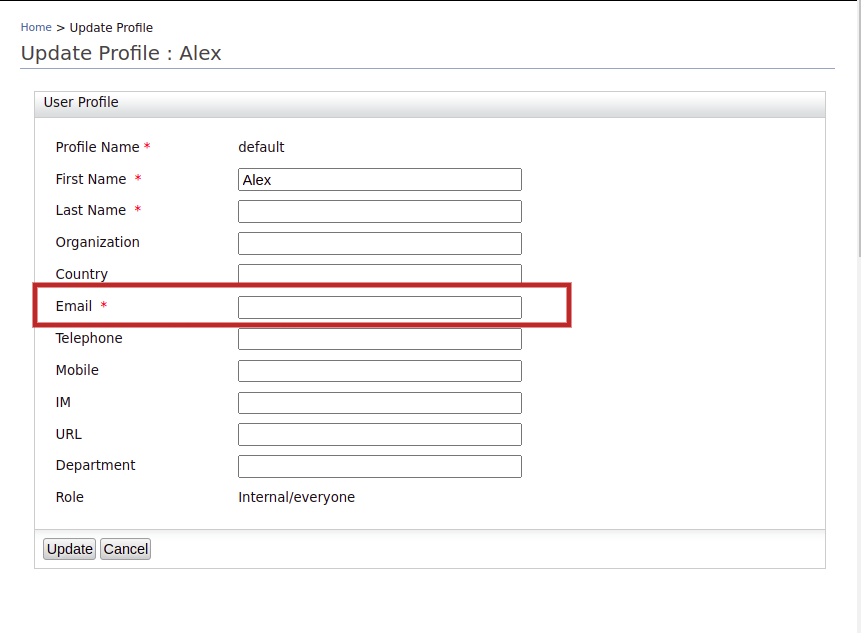
-
Click Update.
-
-
To mimic account locking:
-
Access the WSO2 Identity Server My Account at
https://localhost:9443/myaccount/.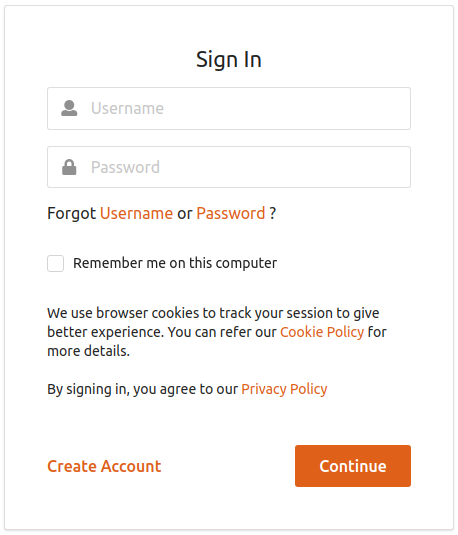
-
To mimic three consecutive erroneous login attempts, log in with Alex's user name and the following as passwords sequentially:
test123test234test345
-
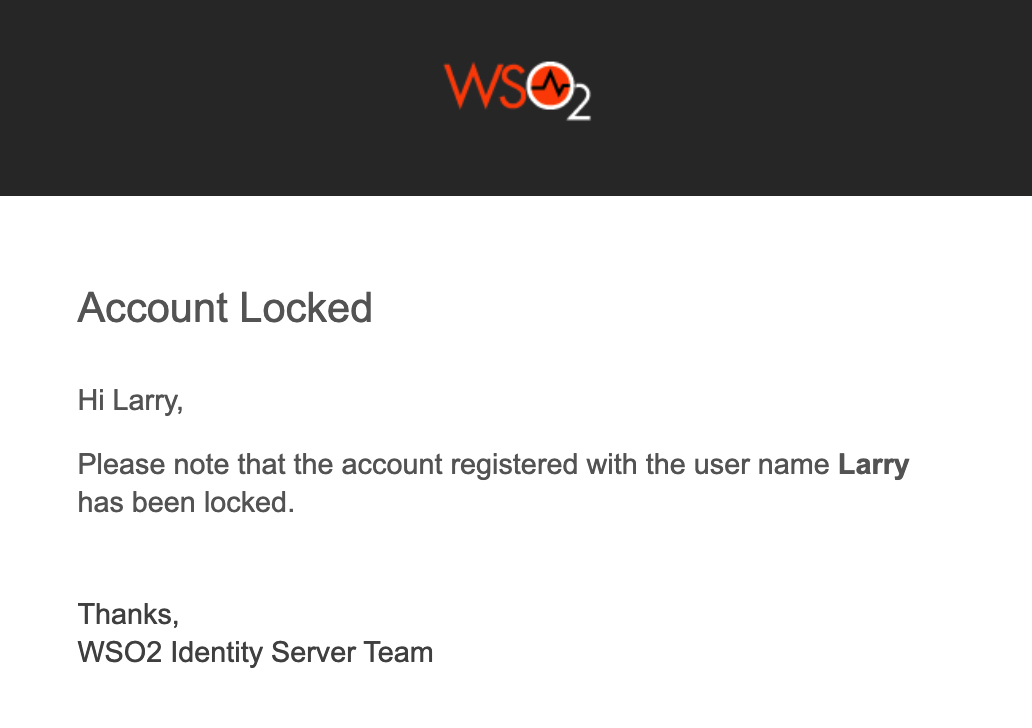
An email that informs about the account locking is sent to the given email address.
-
Wait for 15 minutes and try to log in again with the correct credentials. The WSO2 Identity Server User Portal home screen appears.
-