Using OPA Policies for Adaptive Authentication
The Open Policy Agent is an open source, general-purpose policy engine. This page guides you through configuring the OPA Integrator and WSO2 Identity Server, to perform adaptive authentication based on your OPA policies using a sample policy, application, and authenticator.
Download OPA
-
Use the following curl command to download an OPA binary for your platform from GitHub releases.
```curl tab="On macOS(64-bit)" curl -L -o opa https://openpolicyagent.org/downloads/latest/opa_darwin_amd64
```curl tab="On Linux(64-bit)"
curl -L -o opa https://openpolicyagent.org/downloads/latest/opa_linux_amd64
curl tab="On Windows" Windows users can obtain the OPA executable from GitHub Releases. The steps below are the same for Windows users except the executable name will be different. -
Run the following command to set permissions on the OPA executable.
chmod 755 ./opa
Tip
You can also download and run OPA via Docker. The latest stable image tag is openpolicyagent/opa:latest.
Run OPA engine
-
Run the following command on a command prompt/terminal window to start the OPA service. For more information, see OPA Documentation: Running OPA.
./opa run --server -
Write an OPA policy as shown in the example below. The policy below permits user authentication based on role, and allows only users that belong to the 'manager' or 'admin' role to log in.
package play.policy import input default permit = false Permit { role = [“manager” , “admin”] user := input.user.roles[_] user == role[_] } -
If you have data, first upload the data file into OPA using the following curl command. (This tutorial does not use data, therefore this step is not required for this example.)
curl -X PUT http://localhost:8181/v1/data/myapi/acl --data-binary @myapi-acl.json -
Upload the policy to the OPA engine using the following command.
curl -X PUT http://localhost:8181/v1/policies/myapi --data-binary @ispolicy.rego
Set up the sample app
Set up the service provider and WSO2 IS sample application for adaptive authentication if you have not done so already. For instructions on how to do this, see Configuring a Service Provider for Adaptive Authentication.
You can skip this step if you are using your own application.
Configure the adaptive authentication script
-
Log in to the management console using admin/admin credentials.
-
Under the Service Providers section, click Add.
Tip
If you are using the WSO2 IS sample application, you can skip steps 2 and 3 and directly edit the service provider you created when configuring the sample app.
-
Enter a name for the service provider under Service Provider Name and click Register.
-
Expand Local and Outbound Configuration and click Advanced Authentication.
-
Click Templates on the right side of the Script Based Conditional Authentication field, and add the following script.
var errorPage = '';
var errorPageParameters = {
'status': 'Unauthorized',
'statusMsg': 'You need to be an admin or a manager'
};
var onLoginRequest = function(context) {
executeStep(1, {
    onSuccess: function(context) {
    invokeOPA('http://localhost:8181/v1/data/play/policy', {
        "context": context,
        "ip_address": "111.222.333.333"
    },
    {
        "sendClaims": "false",
        "sendRoles": "true"
    },
    {
        onSuccess: function(context, data) {
        var permit = data.result.permit;
        Log.info('permit ' + permit);
        Log.info("Successfully posted data.");
        if (permit) {
            executeStep(2);
        } else {
            Log.debug('User ' + context.currentKnownSubject.identifier + '');
            sendError(errorPage, errorPageParameters);
        }
        },
        onFail: function(context) {
        Log.info("Failed to post data");
        }
    });
    }
});
};
Using the function
invokeOPAin adaptive scripts, you can pass any JSON object with the context as the payload and then, using OPA, it is possible to process the data object and extract the required information. The OPA engine will then execute the defined policies and send back a JSON response to WSO2 IS. The final authentication or authorization decision will be made by OPA according to the policies that have been defined. -
Add two authentication steps.
-
Creating the first authentication step:
-
Click Add Authentication Step.
-
Select basic under Local Authenticators of Step 1 and click Add Authenticator.
Adding basic authentication as a first step prompts the user to enter user crendentials as the first step of authentication when logging in to the application.
-
-
Creating the second authentication step:
-
Click Add Authentication Step.
-
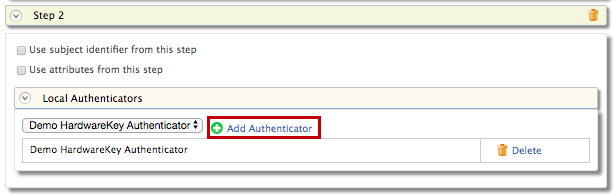
Select Demo Hardware Key under Local Authenticators of Step 2 and click Add Authenticator.
The demo hardware key authenticator is the sample authenticator you configured in the previous section. Adding hardware key authentication as the second stop prompts the user to enter a 4-digit security code as the second step of authentication after entering their credentials to log in to the application.
-
-
-
Click Update.
Try it out
-
Access the following sample PickUp application URL:
-
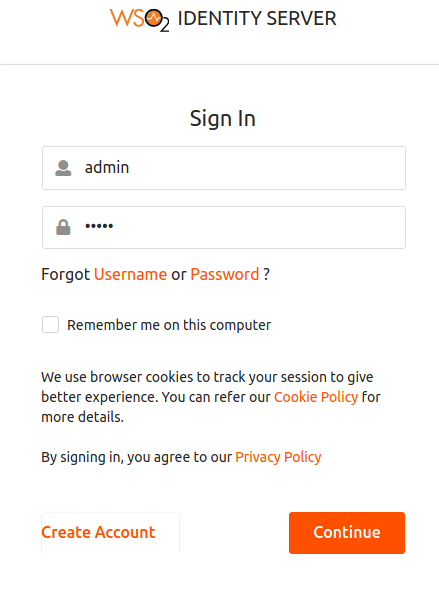
Click Login and enter admin/admin credentials. You are prompted to use the hardware key after basic authentication according to the authentication step defined in the JavaScript above.
-
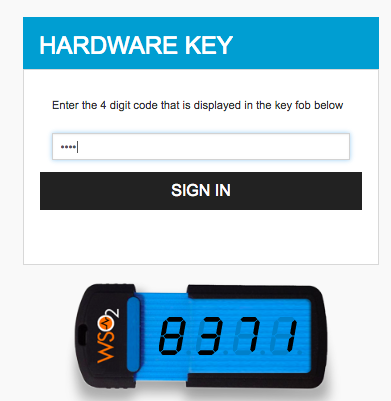
Enter the 4 digit key given on the screen and click Sign In.
-
Next, log out of the application and log in again as a different user that is not assigned to any role. You will see that this will redirect you to an error page that displays the following error message: “You need to be an admin or a manager.”