Login to Identity Server using another Identity Server - OAuth2
This tutorial guides you through setting up two instances of WSO2 Identity Server (WSO2 IS) and using one Identity Server to authenticate the user and login to the other one.
-
Start two WSO2 IS instances. Start the second instance with its hostname as
wso2is. -
Add a relevant certificate to the primary IS client-truststore, and a port offset of 1.
For more information on how to configure this instance, see Default Ports of WSO2 Products and Changing the hostname.
-
Configure an OAuth/OIDC service provider in the second WSO2 IS instance. For more infomation on how to do this, see Configuring OAuth2-OpenID Connect Single-Sign-On .
Callback Url: https://localhost:9443/commonauth

-
Create an identity provider in the first Identity Server instance.
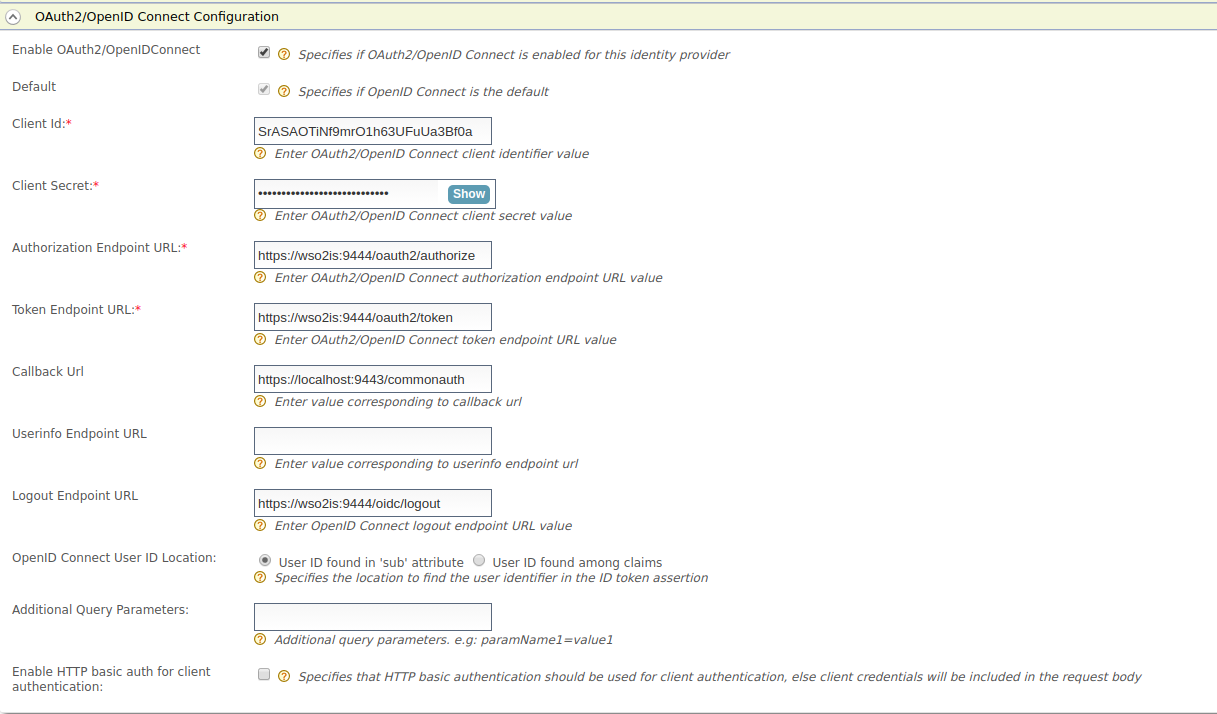
For more information on how to do this, see Configuring OAuth2-OpenID Connect.Set the values as follows.
-
Enable OAuth2/OpenIDConnect: selected
-
Default: selected
-
Client Id: (client id of the service provider registered in the second identity server instance)
-
Client Secret: (client secret of the service provider registered in the second identity server instance)
-
Authorization Endpoint URL: https://wso2is:9444/oauth2/authorize
-
Token Endpoint URL: https://wso2is:9444/oauth2/token
-
Callback Url: https://localhost:9443/commonauth
-
Logout Endpoint URL: https://wso2is:9444/oidc/logout

-
-
Setup the playground sample in the first Identity Server instance.
-
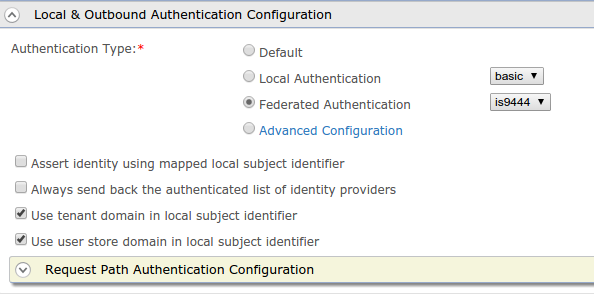
Edit the service provider in the first Identity Server instance and select the Federated Authentication as the Authentication type in the Local and Outbound Authentication Configuration.
-
Now select the created identity provider from the dropdown menu in Federated Authentication.

-
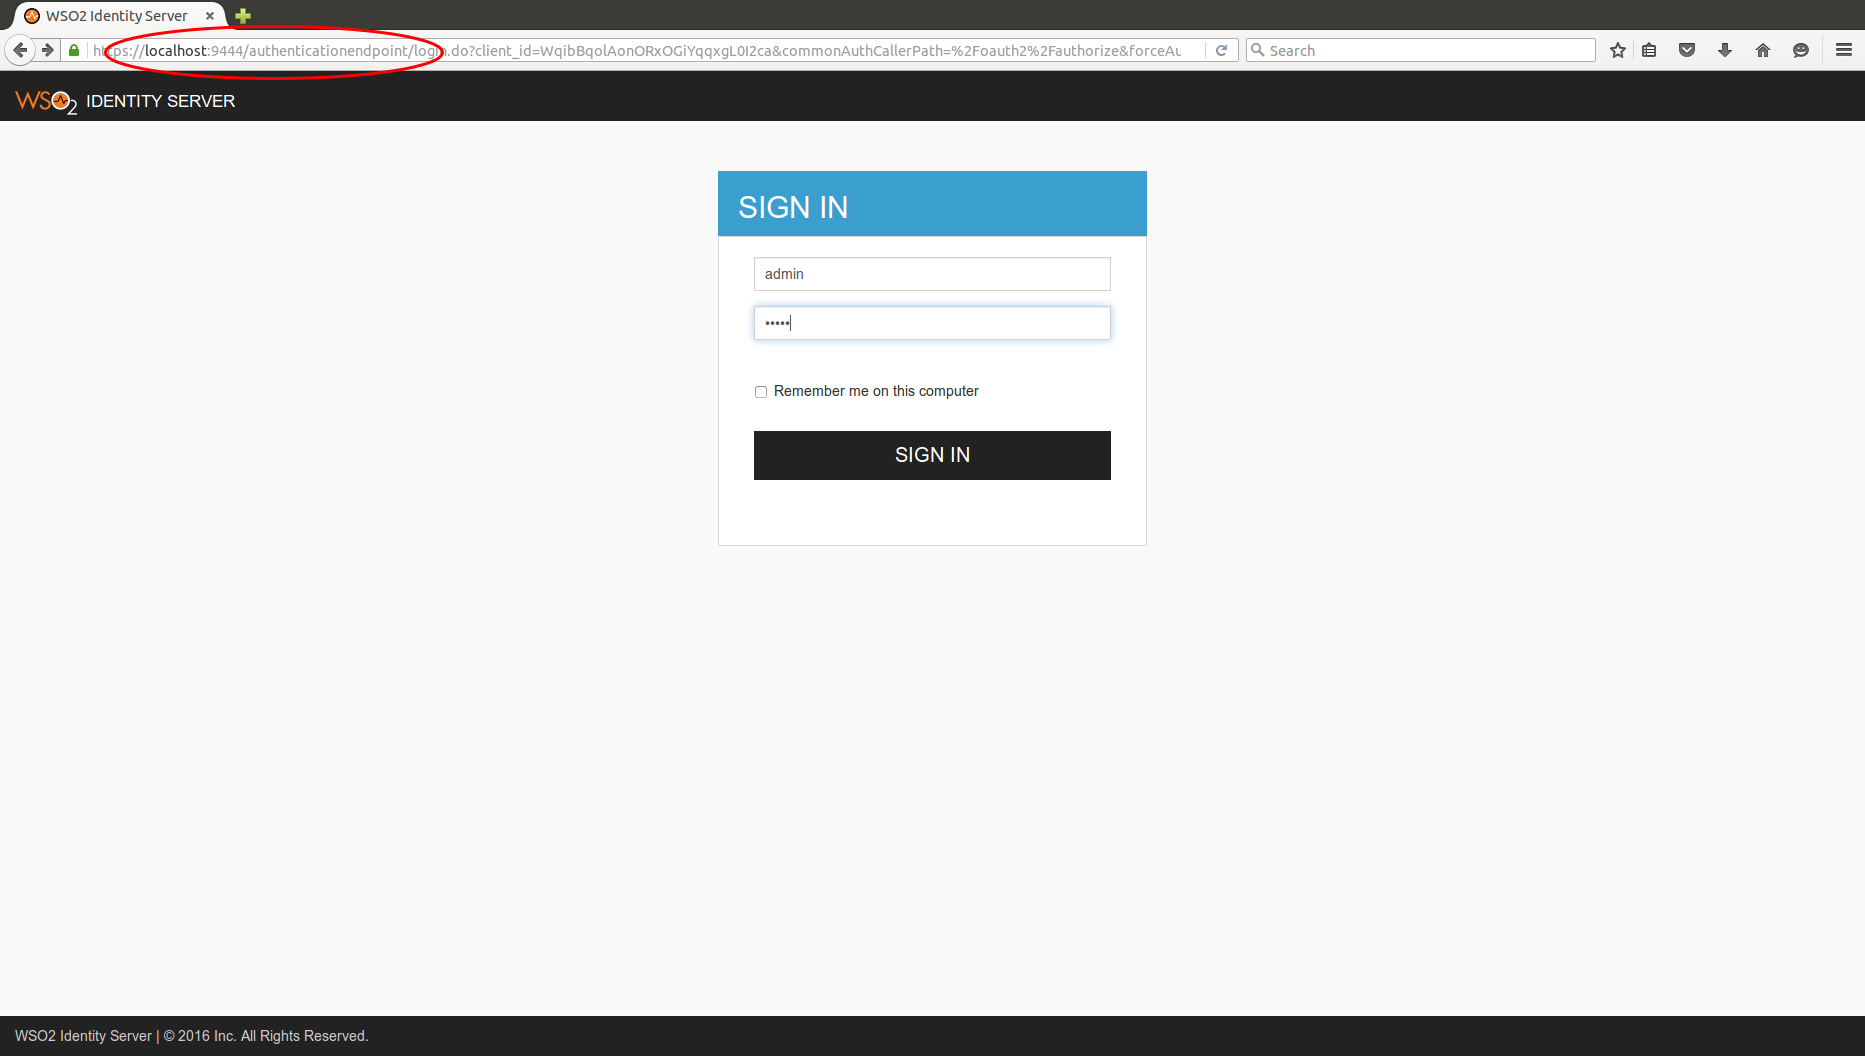
Try the authorization code grant as described here. You will be redirected to the second Identity Server instance instead of the first Identity Server instance for authentication.
