eIDAS SAML Attribute Profile Support via WSO2 Identity Server
eIDAS (electronic IDentification, Authentication and trust Services) is an EU regulation on electronic identification and trust services for electronic transactions in the internal market.
You can integrate WSO2 Identity Server with an eIDAS node, and then configure WSO2 Identity Server to support the eIDAS SAML attribute profile.
The following sections walk you through the steps you need to follow to integrate an eIDAS node with WSO2 Identity Server, and configure WSO2 Identity Server to support the eIDAS SAML attribute profile:
Integrating WSO2 Identity Server with an eIDAS node
Do the following configuration change in the eIDAS node:
-
Edit the
eidas_Specific.xmlfile and change it as follows to specify that authentication should be handled by an external IdP:<entry key="external.authentication">yes</entry> <entry key="idp.url">https://<ISHostname>:<ISPort>/samlsso</entry> <!--For Super Tenant--> <entry key="idp.metadata.url"> https://<ISHostname>:<ISPort>/identity/metadata/saml2</entry> <!-- For Tenant--> <entry key="idp.metadata.url"> https://<ISHostname>:<ISPort>/identity/t/<tenant_domain>/metadata/saml2</entry>
Adding certificate for assertion encryption
For assertion encryption, you need to use the public certificate of the eIDAS proxy service. When the authentication response is sent to the eIDAS proxy service from WSO2 IS, you can decrypt the assertion from the proxy service using the private key.
-
Use the following command to export the public certificate from the eIDAS proxy service keystore in a corresponding eIDAS node:
keytool -export -alias cpeps-ca-demo-certificate -file eidasCrt.crt -keystore <eIDAS_proxyservice_keystore_location> -storepass local-demo -
Import the certificate that you exported in the previous step to the WSO2 IS keystore.
-
If the service provider is configured in super tenant, use the following command to import the certificate to the primary keystore configured in the
carbon.xmlfile:keytool -import -trustcacerts -alias eidasCrt -file eidasCrt.crt -keystore wso2carbon.jks -
If the service provider is configured in a tenant, follow the steps below to import the certificate into the tenant keystore using the management console:
- Sign in to the the management console as the tenant admin.
- On the Main tab of the management console, go to Home -> Manage -> Keystores, and click List. This displays all available keystores.
- On the list, click Import Cert in the tenant keystore to import the certificate to it.
Note
In the eIDAS node, the certificate required to decrypt the assertion is obtained from the SAML response.
-
Obtaining certificate for signature validation of application requests
SAML authentication request from the eIDAS node are signed using the private key of the eIDAS proxy service. To validate the signature of SAML authentication requests, you need to use the public certificate of the eIDAS proxy service.
Therefore, as mentioned in the Adding the certificate for assertion encryption section, you need to import the certificate of the eIDAS proxy service to the primary keystore or tenant keystore of WSO2 IS.
Adding certificate for signing SAML assertions/responses
To support eIDAS cryptographic requirements, it is required to sign SAML assertions/responses using the Elliptic Curve Digital Signature Algorithm (ECDSA). For that you need to use an ECDSA certificate. Since the default wso2carbon certificate is not an ECDSA certificate, you should create a new ECDSA certificate and import it to the WSO2 IS keystore.
-
If the service provider is configured in super tenant, follow the steps below:
-
Use the following command to import the ECDSA certificate to the
wso2carbon.jkskeystore:keytool -genkeypair -alias ec -keyalg EC -keysize 256 -sigalg SHA256withECDSA -keypass wso2carbon -validity 365 -storetype JKS -keystore wso2carbon.jks -storepass wso2carbon -
Configure parameters as follows in the
IS_HOME/repository/conf/deployment.tomlfile:# Keystore file location [keystore.tls] file_name= "${carbon.home}/repository/resources/security/{{keystore.tls.file_name}}" # Keystore type (JKS/PKCS12 etc.) [keystore.tls] type= "JKS" # Keystore password [keystore.tls] password= "wso2carbon" # Private Key alias [keystore.tls] alias= "ec" # Private Key password [keystore.tls] key_password= "wso2carbon"Here, the certificate CN should be the hostname of WSO2 IS because you use this in the SSL HTTPS handshake.
-
To use the default wso2carbon certificate for internal encryption purposes, configure the following internal keystore in the
IS_HOME/repository/conf/deployment.tomlfile.# Keystore file location [keystore.internal] file_name= "${carbon.home}/repository/resources/security/{{tkeystore.internal.file_name}}" # Keystore type (JKS/PKCS12 etc.) [keystore.internal] type= "JKS" # Keystore password [keystore.internal] password= "wso2carbon" # Private Key alias [keystore.internal] alias= "ec" # Private Key password [keystore.internal] key_password= "wso2carbon"
-
-
If the service provider is configured in a tenant, create a new tenant keystore and import the ECDSA certificate to that as the public certificate of the tenant keystore (i.e., The certificate alias should be the tenant domain name and certificate CN should be localhost because you use this in the SSL HTTPS handshake).
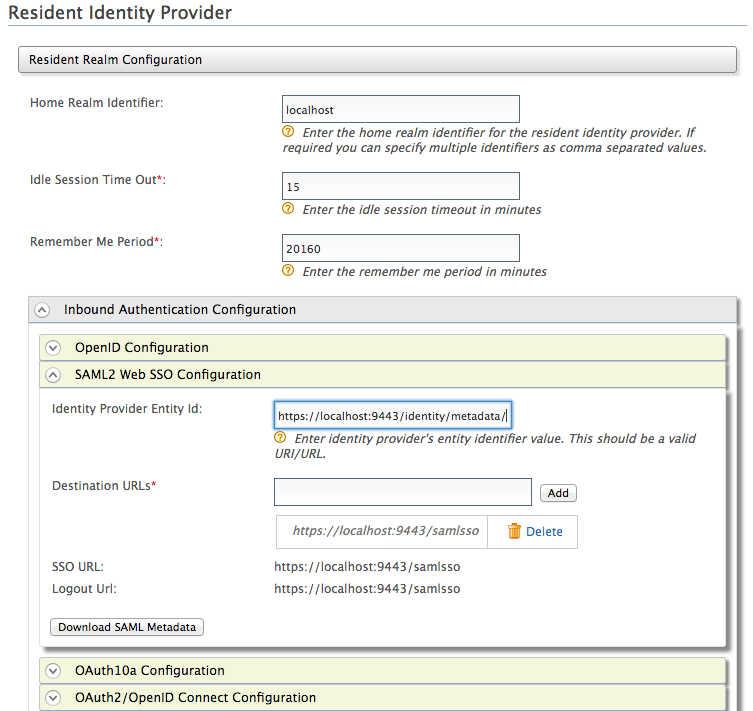
This validates the SAML response signature in the eIDAS proxy service using the WSO2 IS public certificate. Here, the WSO2 IS certificate is retrieved from the SAML metadata of WSO2 IS using the metadata URL.The SAML metadata URL is extracted from the issuer of the SAML response. You can change the WSO2 IS issuer value from management console as follows:
-
If the service provider is configured in the super tenant, specify the Identity Provider Entity Id as follows:
https://<ISHostname>:<ISPort>/identity/metadata/saml2 -
If the service provider is configured in a tenant, specify the Identity Provider Entity Id as follows:
https://<ISHostname>:<ISPort>/identity/t/<tenant_domain>/metadata/saml2
Since IS metadata URL is HTTPS, there will be a SSL handshake. For that, you need to add the WSO2 IS public certificate as a trusted certificate in the truststore of the eIDAS node.
-
Configuring a sample eIDAS application in WSO2 IS
Follow the steps below to configure the sample application:
-
Start WSO2 Identity Server and access the Management Console via
https://localhost:9443/carbon/. -
Navigate to Service Providers -> Add, enter a name for the new service provider and click Register.
-
Expand the Claim Configuration section.
-
Add
http://eidas.europa.eu/attributes/naturalpersonandhttp://eidas.europa.eu/attributes/legalpersonas service provider claim dialects.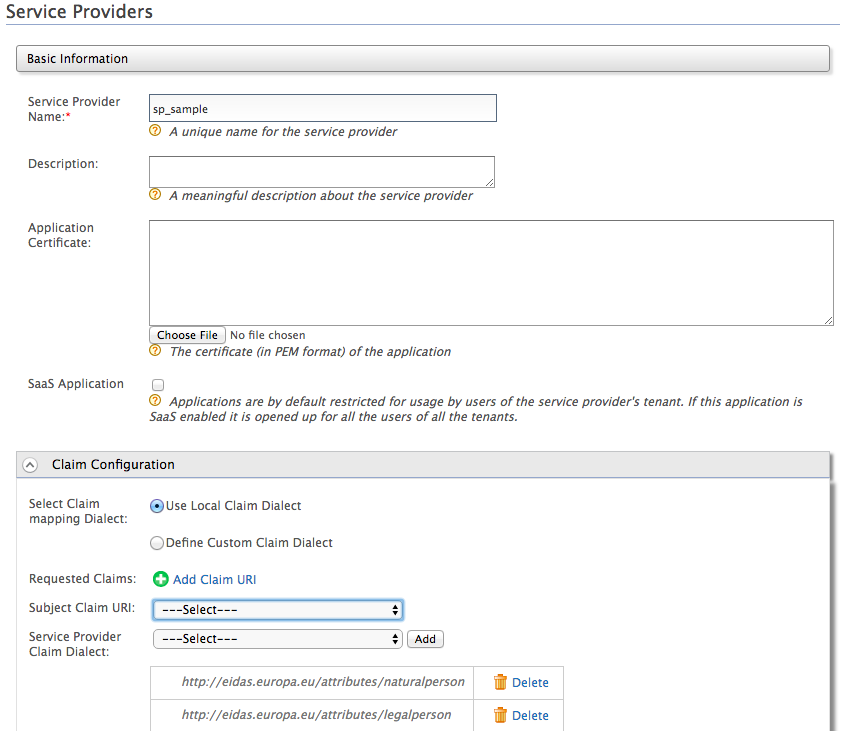
Click here for information on claims for eIDAS natural person and legal person attributes
WSO2 Identity Server supports the
http://eidas.europa.eu/attributes/naturalpersonandhttp://eidas.europa.eu/attributes/legalpersonclaim dialects by default for natural and legal person attributes:Following are the supported natural person mandatory attributes:
-
http://eidas.europa.eu/attributes/naturalperson/PersonIdentifier -
http://eidas.europa.eu/attributes/naturalperson/CurrentFamilyName -
http://eidas.europa.eu/attributes/naturalperson/CurrentGivenName -
http://eidas.europa.eu/attributes/naturalperson/DateOfBirth
Following are the supported natural person optional attributes:
-
http://eidas.europa.eu/attributes/naturalperson/BirthName -
http://eidas.europa.eu/attributes/naturalperson/PlaceOfBirth -
http://eidas.europa.eu/attributes/naturalperson/CurrentAddress -
http://eidas.europa.eu/attributes/naturalperson/Gender
Following are the supported legal person mandatory attributes:
-
http://eidas.europa.eu/attributes/legalperson/LegalPersonIdentifier -
http://eidas.europa.eu/attributes/legalperson/LegalName
Following are the supported legal person optional attributes:
-
http://eidas.europa.eu/attributes/legalperson/LegalPersonAddress -
http://eidas.europa.eu/attributes/legalperson/VATRegistrationNumber -
http://eidas.europa.eu/attributes/legalperson/TaxReference
All the claims that are provided by default are mapped with wso2 claims. If necessary you can also create new wso2 claims to map any of the above claims.
Note
Based on the eIDAS specification, the date of birth should be a date in the following format:
YYYY + “-“ + MM + “-“ + DDTherefore, in order to restrict including values in other formats, you need to add the following regex pattern for the mapped WSO2 claim of
http://eidas.europa.eu/attributes/naturalperson/DateOfBirth.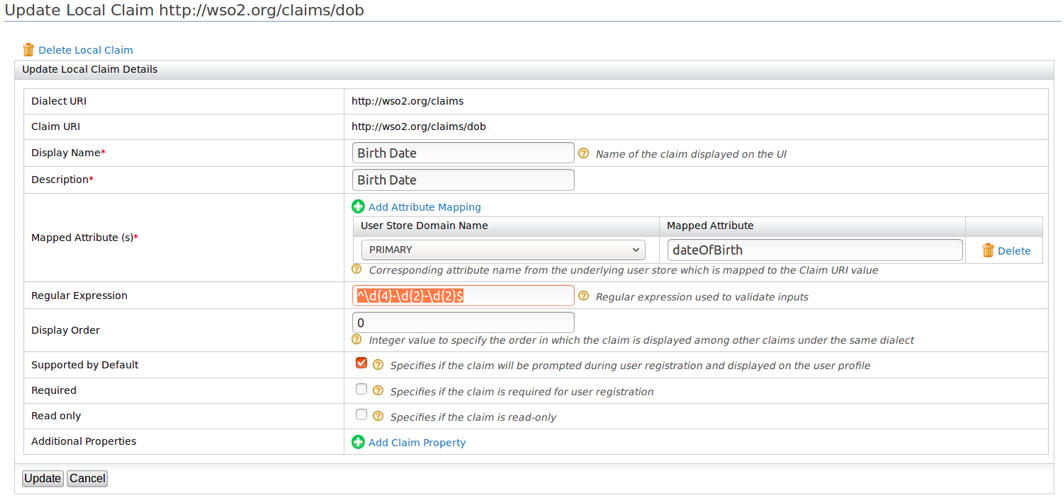
If you want wso2 claims that are mapped with the eIDAS claims to display in the user profile claims, be sure to select Supported by Default when you update the local claim.
-
-
Expand Inbound Authentication Configuration, then expand SAML2 Web SSO Configuration, and click Configure.
-
Provide values as follows:
- Issuer :
http://<EidasNodeHostname>:<EidasNodePort>/EidasNode/ServiceRequesterMetadata - Assertion Consumer URLs :
http://<EidasNodeHostname>:<EidasNodePort>/EidasNode/IdpResponse - Specify the application certificate alias for signature validation and encryption as the value of Certificate Alias .
- Configure the Response Signing Algorithm, Response Digest
Algorithm, Assertion Encryption Algorithm, and Key
Encryption Algorithm as in the diagram below:
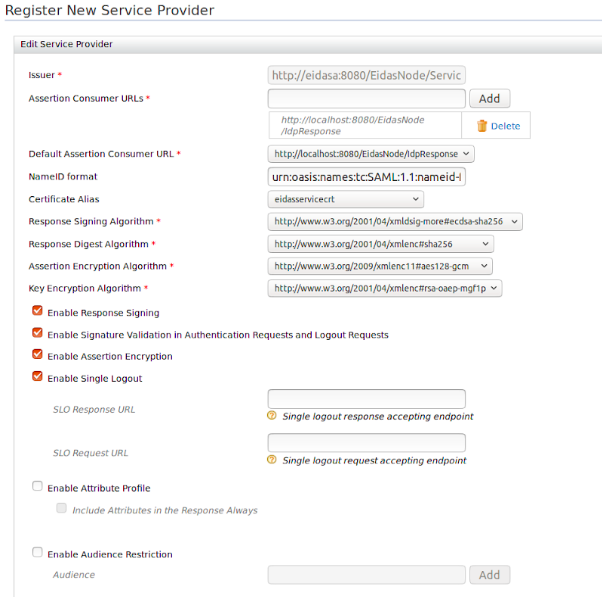
- Select the following:
- Enable Response Signing
- Enable Signature Validation inAuthentication Requests and Logout Requests
- Enable Assertion Encryption.
- Issuer :
- Click Register. This configures the service provider with the provided SAML2 Web SSO configuration.
Testing eIDAS profile support
Consider a sample scenario where a sample service provider in CA MS and citizen MS is also CA
-
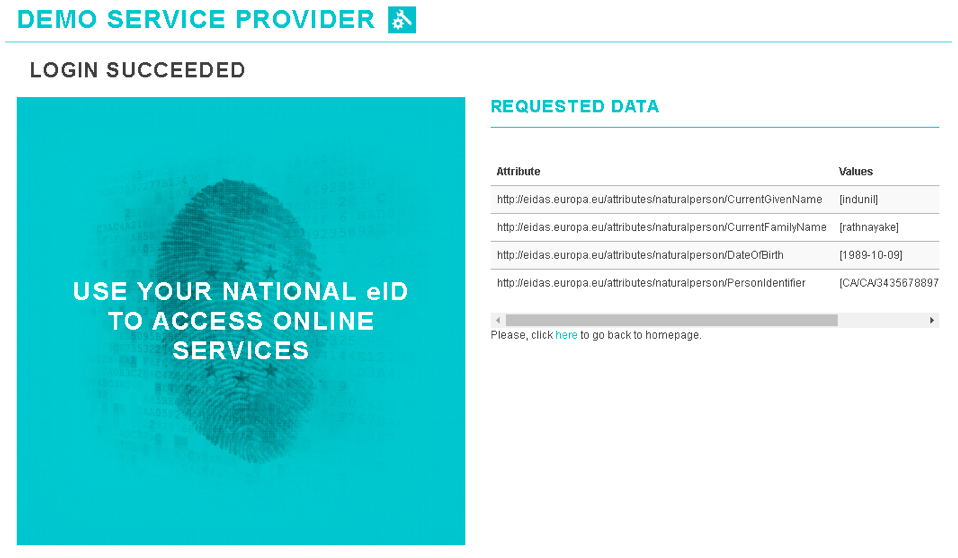
First, let's request natural person mandatory attributes. Assume that the corresponding user has all the user attributes that are requested.

Follow the steps below to create a new user via the management consoleof WSO2 IS, and send the request via the sample service provider:- On the Main tab on the management console, click Add under Users and Roles.
- Click Users. This link is only visible to users with the Admin role.
- Click Add New User, and create a new user with all the natural person user attributes.
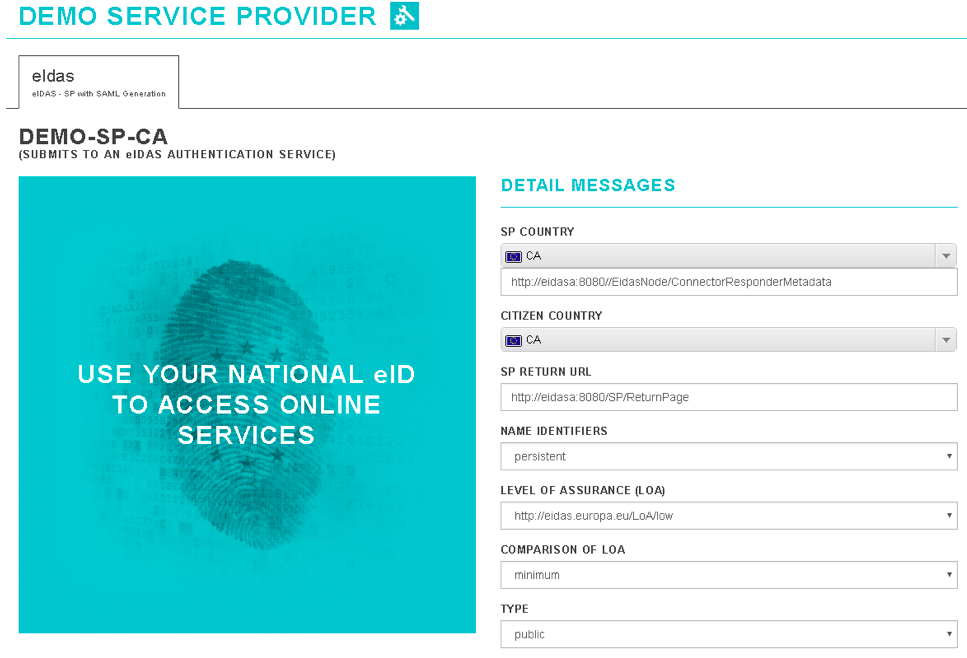
- Use the sample service provider to send the request.
When the signed SAML request is sent, you are redirected WSO2 IS for authentication.
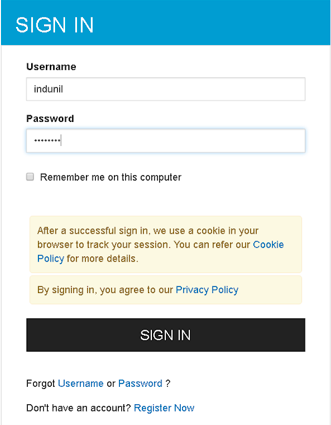
- Specify values for the Username and Password, and then click SIGN IN.
- On successful authentication, you are asked to provide consent
for the requested attributes. You need to provide consent, to
continue.
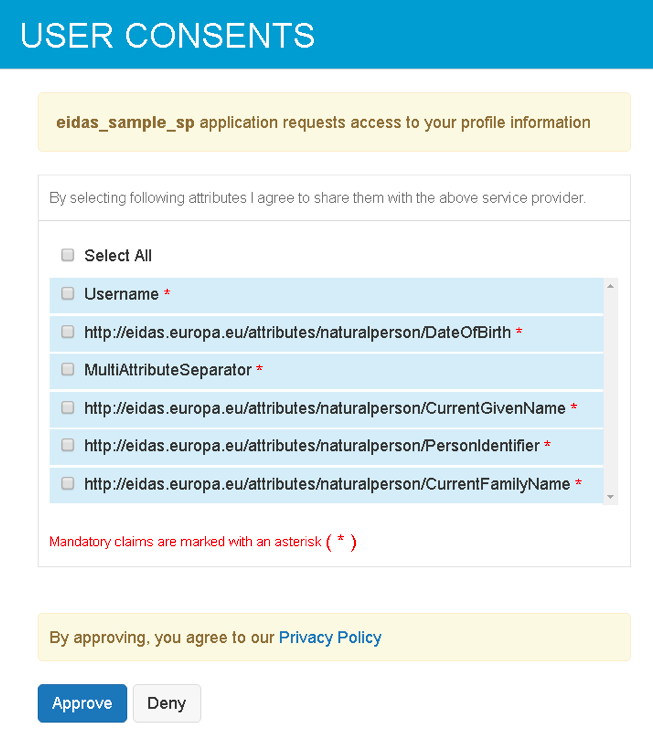
- Select the required attributes and click Approve to provide
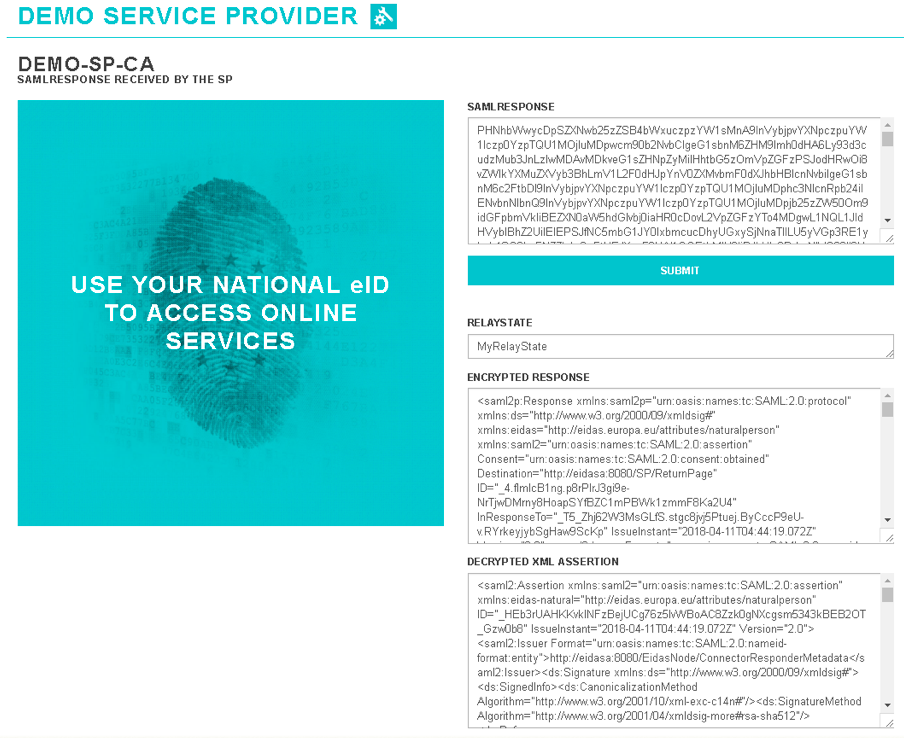
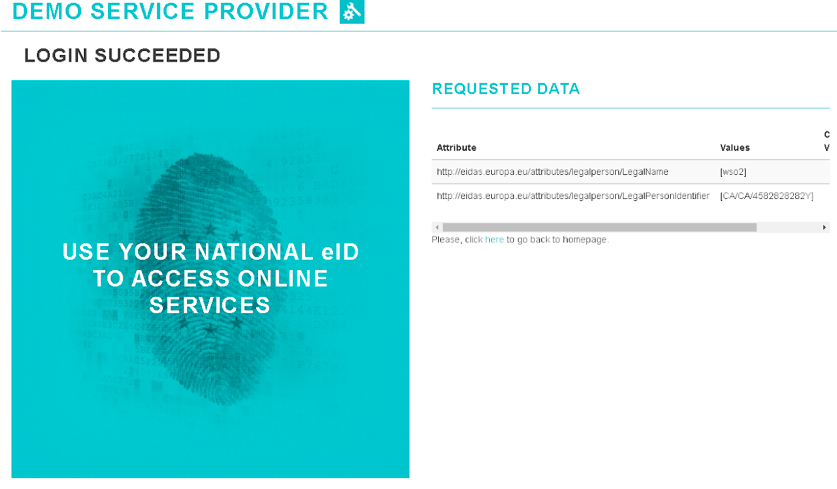
consent. You will see that the SAML response is sent to the
eIDAS proxy service with the user attributes (i.e., the signed
SAML response and encrypted assertion)
-
Now let's request legal person mandatory attributes for the same user.

Here, you will see that you are asked to provide consent for the legal person attributes for which you have not provided consent before.
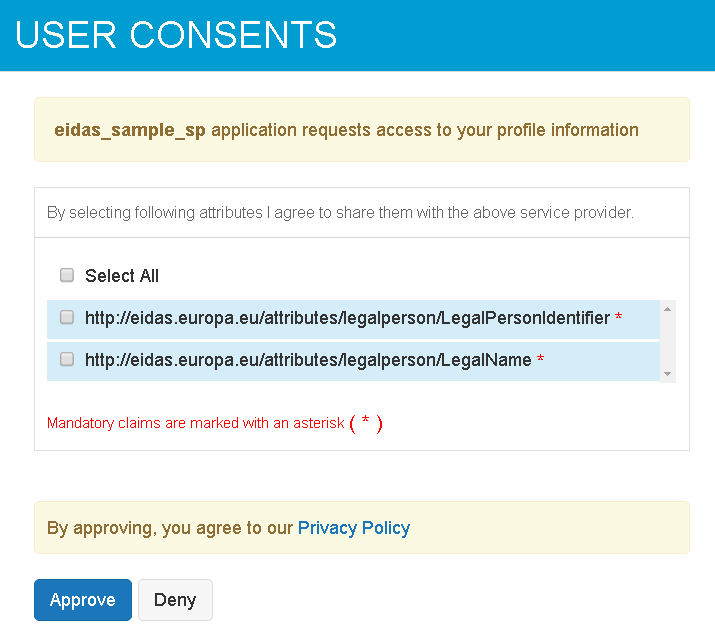
Once you provide consent and approve, you will see that the SAML response is sent to the eIDAS proxy service with the user attributes.
-
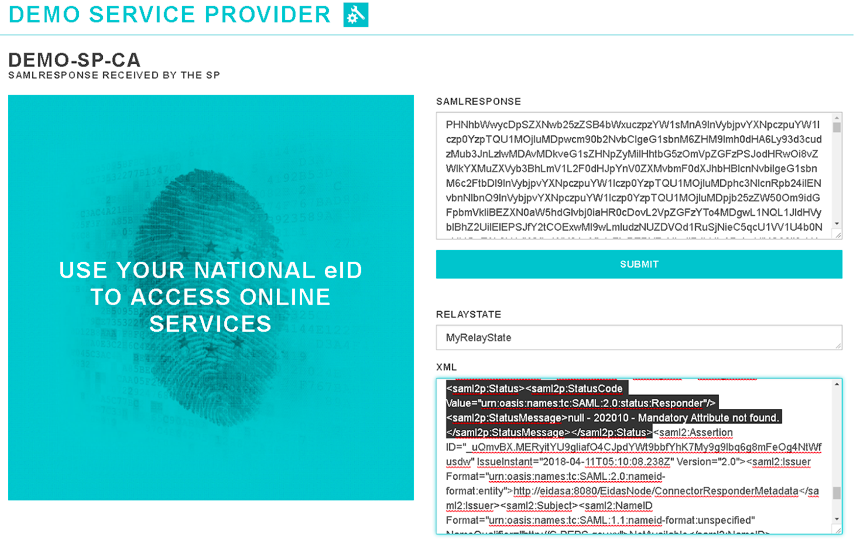
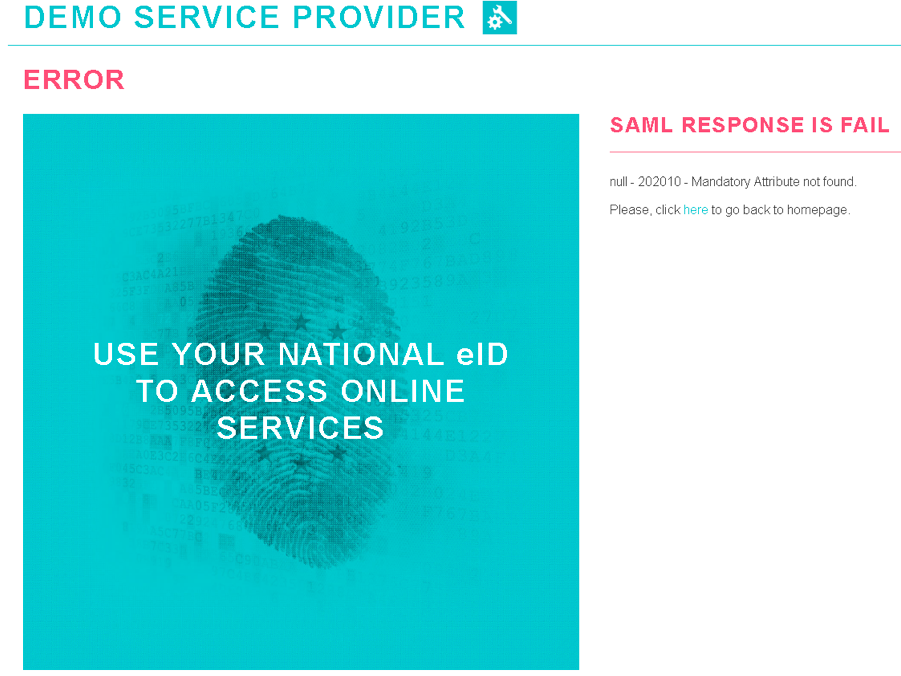
Next, let's request mandatory attributes where there are no values assigned to the claims so that you can see how an error response is sent from WSO2 IS.