Configuring TOTP Authenticator
The TOTP authenticator allows you to authenticate a user using Time-Based One Time Password (TOTP) through WSO2 Identity Server. It uses the TOTP specification to calculate the access tokens based on the time and the shared secret key between the user and the identity provider.
TOTP is an algorithm-generated temporary passcode that is used for strong authentication. The algorithm that generates each passcode uses the current time of day as one of its factors, ensuring that each password is unique.
Info
Before You begin
-
Sign in to the Management Console by entering your username and password.
If you have migrated from older version of WSO2 Identity Server
- Under the WSO2 local claim dialect, check whether the
http://wso2.org/claims/identity/secretkeyclaim exists. - Unless, in the Main menu, click Add under Claims .
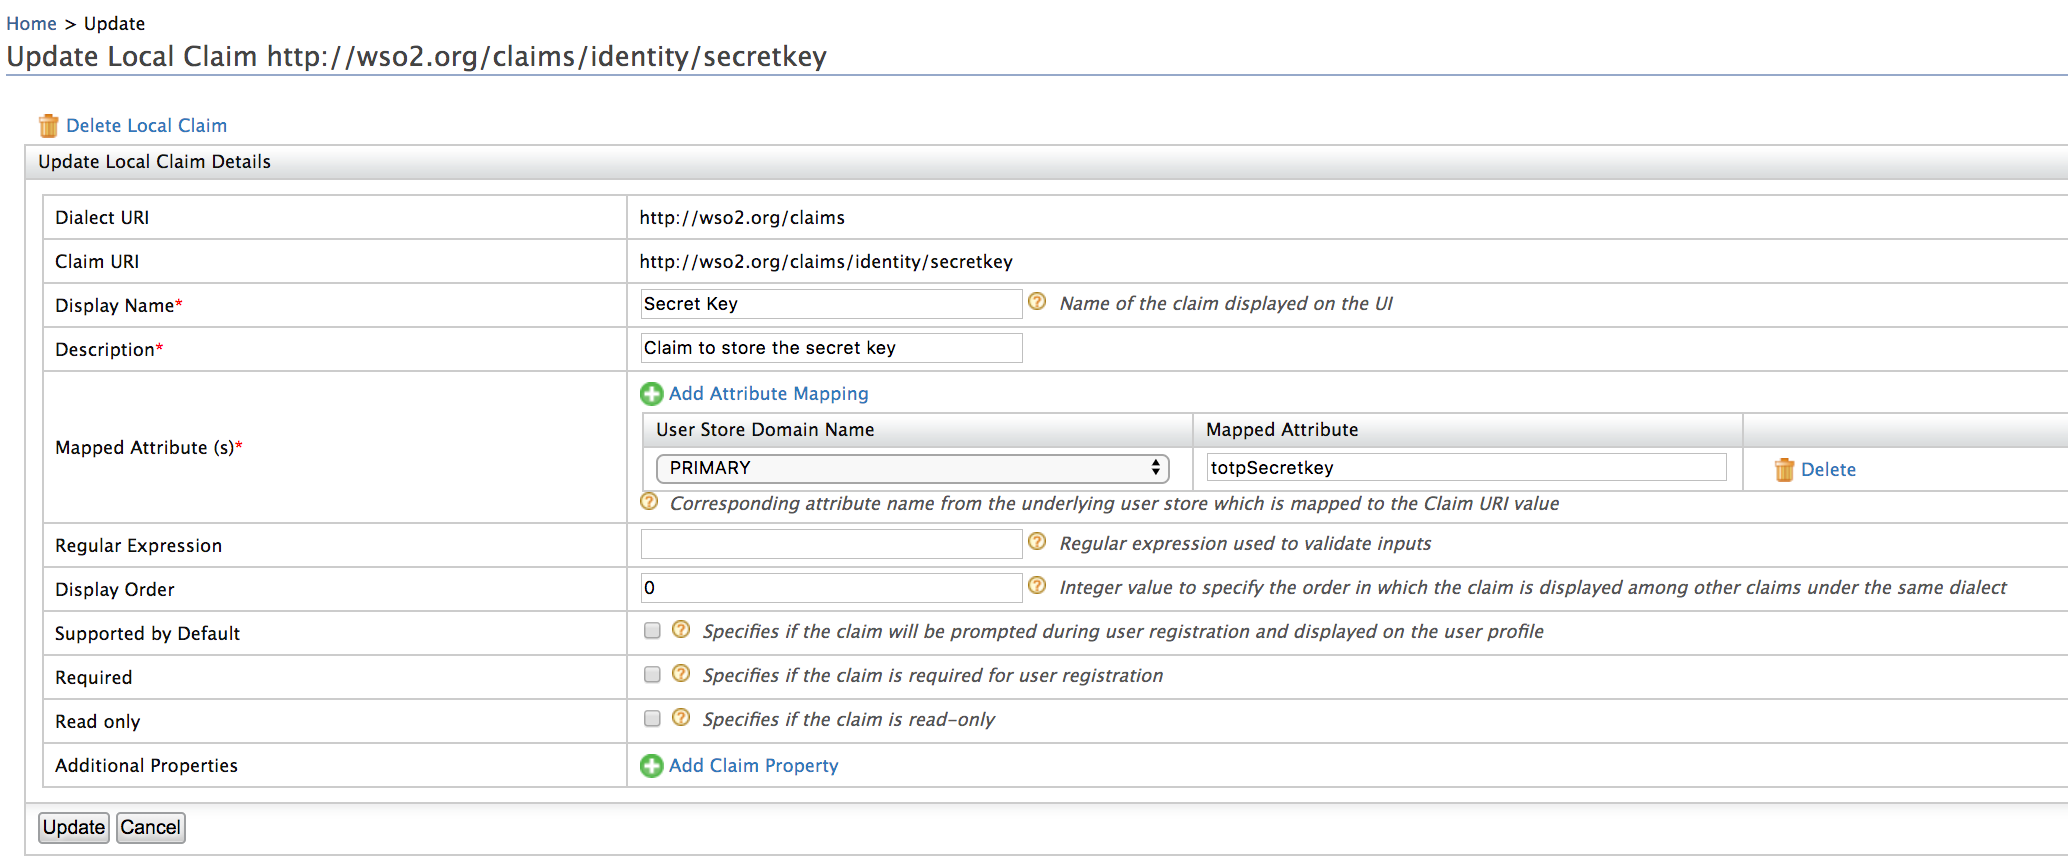
- Click Add Local Claim . This displays the Add Local Claim screen.
- Specify the following claim details in the appropriate fields:
| Claim URI | http://wso2.org/claims/identity/secretkey |
| Display Name | Secret Key |
| Description | Claim to store the secret key |
| Mapped Attribute | totpSecretkey if you are using a LDAP or AD, set a proper attribute for this. |
Deploying travelocity.com sample application
You need to deploy and configure travelocity.com sample application to try out the TOTP authenticator. See deploy the sample application for more information on configuring travelocity application.
Configuring the service provider
The next step is to configure the service provider.
-
In the previous section of this guide you have deployed and registered the
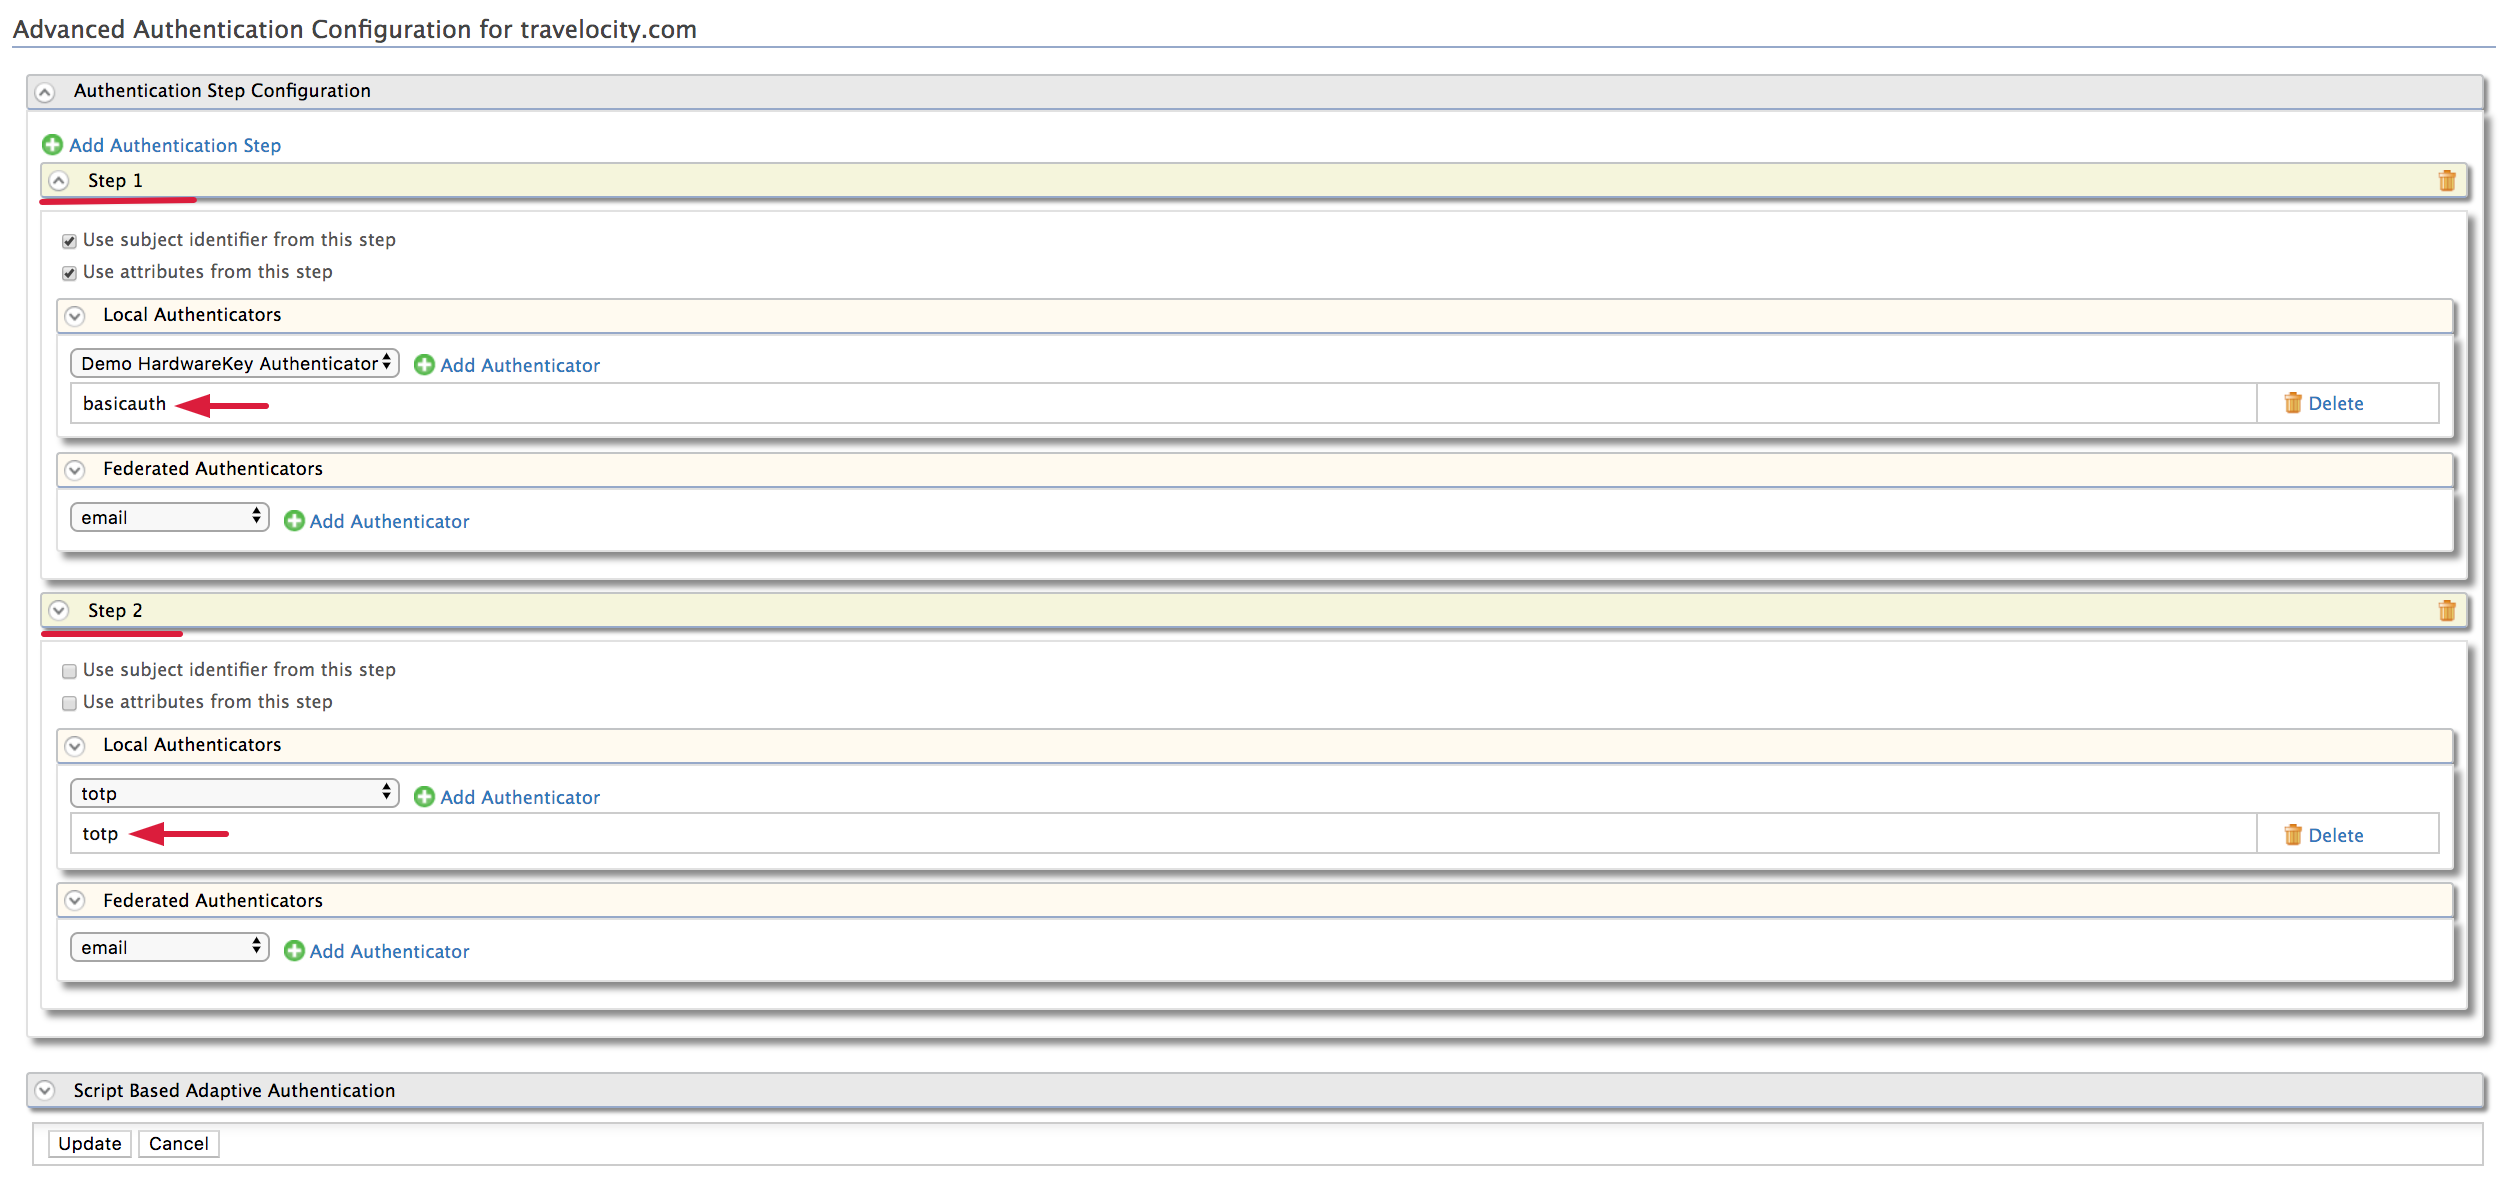
travelocity.comwebapp. Let's edit the same service provider to configuretotpas an additional authentication factor. -
Locate the "travelocity.com" service provider and navigate to the Local and Outbound Authentication Configuration section.
-
Select the Advanced configuration radio button option.
-
To create the first authentication step:
-
Click Add Authentication Step.
-
Click Add Authenticator that is under Local Authenticators of Step 1 to add the
basicauthentication as the first step.
Adding basic authentication as a first step ensures that the first step of authentication will be done using the user's credentials that are configured with the WSO2 Identity Server
-
-
To create the second authentication step:
-
Click Add Authentication Step.
-
Click Add Authenticator that is under Local Authenticators of Step 2 to add the
totpfrom the drop down as the second step.
-
-
Now totp is a second step that adds another layer of authentication
and security during the authentication for this application.
Configuring the user profile
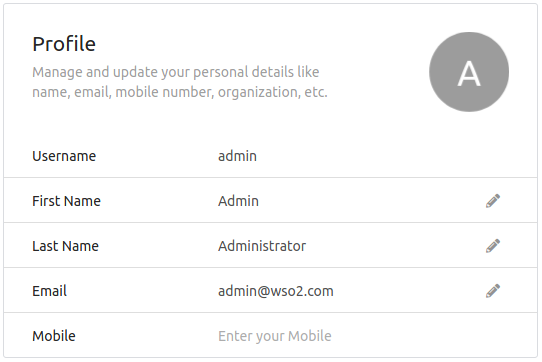
- Login to the My Account user portal and go to Personal info.
- Update your email address in Profile(this email address is used to send the
token).
-
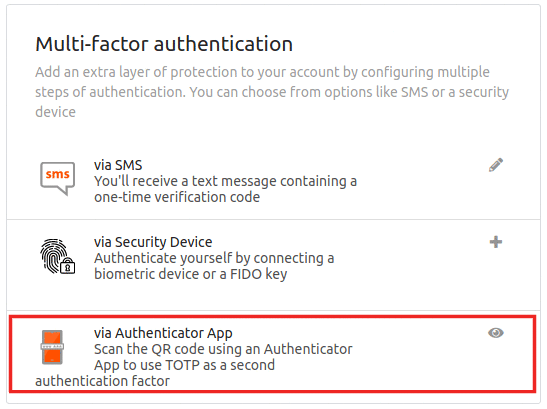
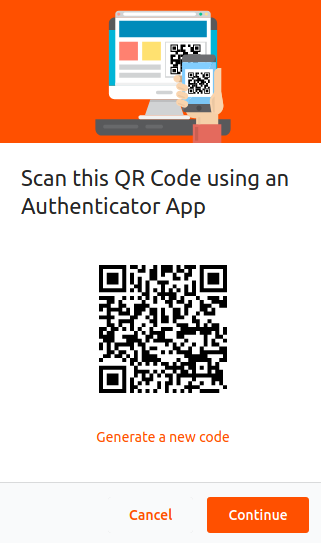
You can use the Google Authenticator Application to generate the one-time passwords (tokens). Click on Security and go to Multi-factor authentication. Click on the eye icon to scan the QR-Code using the Google Authenticator mobile app.
Testing the sample
-
To test the sample, go to the following URL:
http://<TOMCAT_HOST>:<TOMCAT_PORT>/travelocity.com/index.jsp.For example, this looks like http://localhost:8080/travelocity.com.
-
Click the link to log in with SAML from the WSO2 Identity Server.
- The basic authentication page is visible. Use your username and password to log in.
-
Enter the verification code from your Google Authenticator Mobile Application to authenticate.
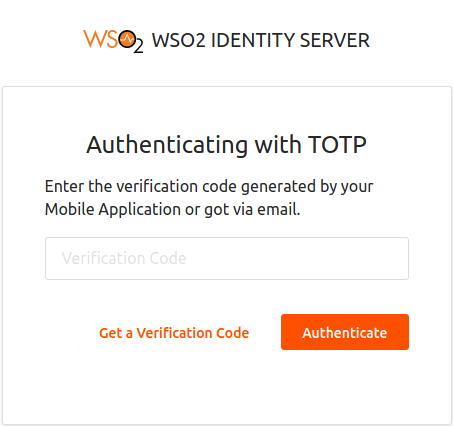
Tip
Alternatively, you can generate the verification code by clicking on Get a Verification Code and use the code that is sent to your email address. See send email with totp for more details on how to configure email sending.
-
If your verification is successful, you are taken to the home page of the travelocity.com application.
Advanced Configurations of TOTP authenticator
Disable TOTP
From WSO2 Identity Server 5.9.0 onwards, TOTP authenticator is enabled by default.
You can disable the TOTP authenticator by adding the following
configuration to the deployment.toml file in the
<IS_HOME>/repository/conf folder.
[authentication.authenticator.totp]
enable=false
TOTP Configuration Properties
You may configure any of the following parameters to change the behaviour of the TOTP authenticator according to your requirements.
The following table describes the definition of the parameters and the various values you can configure for the authenticator.
| Feild | Description |
|---|---|
| usecase | This field can take one of the following values: local, association, userAttribute, subjectUri. If you do not specify any usecase, the default value is local. If you have chosen userAttribute as the usecase, add the following parmeter to specify the user attribute. userAttribute = "http://wso2.org/foursquare/claims/email" |
| encodingMethod | The encoding method which is used to generate the TOTP. |
| authenticationMandatory | If this value is true, the TOTP authentication will be enforced as a second step. |
| timeStepSize | The time step size, which is used to validate the TOTP. |
| windowSize | The window size, which is used to validate the TOTP. |
| enrolUserInAuthenticationFlow | If this value is true, it will ask the user to enable the TOTP authenticator in the authentication flow. |
| secondaryUserstore | The user store configuration is maintained per tenant as comma separated values. For example, secondaryUserstore = "jdbc, abc, xyz" |
| TOTPAuthenticationEndpointURL | This is the endpoint of the UI which is used to gather the TOTP. |
| TOTPAuthenticationEndpointErrorPage | This is the endpoint of the error page. |
| TOTPAuthenticationEndpointEnableTOTPPage | This is the endpoint of the TOTPauthenticator enrollment page. |
| Issuer | This is the issuer name which will be shown the Mobile Application. If not configured, tenant domain will be shown. |
| UseCommonIssuer | If true, the issuer name defined in deployment.toml will be used as the issuer for all the tenants. |
You can configure any of the above as following in the
<IS_HOME>/repository/conf/deployment.toml file.
[authentication.authenticator.totp.parameters]
<Property-name> = <Property-value>
Sample configurations of the authenticator with default Values
[authentication.authenticator.totp.parameters]
encodingMethod="Base32"
timeStepSize="30"
windowSize="3"
authenticationMandatory=true
enrolUserInAuthenticationFlow=true
usecase="local"
secondaryUserstore="primary"
TOTPAuthenticationEndpointURL="totpauthenticationendpoint/totp.jsp"
TOTPAuthenticationEndpointErrorPage="totpauthenticationendpoint/totpError.jsp"
TOTPAuthenticationEndpointEnableTOTPPage="totpauthenticationendpoint/enableTOTP.jsp"
Issuer="WSO2"
UseCommonIssuer=true
Note
You may choose to configure any of the above property in the <IS_HOME>/repository/conf/deployment.toml file according to your requirements.
If you do not configure any of the property from the <IS_HOME>/repository/conf/deployment.toml, the server will take the default values to the consideration
To enable scanning QR code during authentication flow
An admin can activate the feature to enable the TOTP authenticator
in the authentication flow by changing the enrolUserInAuthenticationFlow values ( true or false ).
- If you specify that the user can enable TOTP in the
authentication flow
enrolUserInAuthenticationFlow=trueand TOTP is not registered for the user's profile, you will be asked to enable TOTP in the in the authentication flow. If you don't enable it at this stage, the TOTP error page appears. - If you specify that the user can't enable TOTP in the
authentication flow
enrolUserInAuthenticationFlow=falseand TOTP is not registered for the user's profile , the TOTP error page appears during the authentication flow.
TOTP for secondary user stores
If you use the secondary user store, enter all the user store values
for the particular tenant as comma separated values. Make this
configuration change in the <IS_HOME>/repository/conf/deployment.toml file.
[authentication.authenticator.totp.parameters]
secondaryUserstore= "jdbc, abc, xyz"
Tip
The user store configuration is maintained per tenant"
If you works only in super tenant, mode put all the above
parameter values (mentioned in step 4) into the <IS_HOME>/repository/conf/deployment.toml file.
If you use a tenant, upload the XML file found in<IS_HOME>/repository/conf/identity/application-authentication.xml
into a specific registry location ( /_system/governance/totp).
- Sign in to the Management Console as a tenant administrator.
- Create the collection named
totpunder/_system/governance/ - Add a new resource at
/_system/governance/totpand upload theapplication-authentication.xmlfile into the registry location. - Change the relevant properties under
<AuthenticatorConfig name="totp" enabled="true">tag.
Note
While doing the authentication, first server checks whether there is an XML file uploaded to the registry. If that is so, server reads it from the registry but does not take the local file. If there is no file in the registry, then it only takes the property values from the local file. This is how the user store configuration is maintained per tenant. You can use the registry or local file to get the property values.
Obtaining the QR code without using the user portal
If you need to obtain the QR code without using the user portal, you can call the REST API or call the Admin Service(SOAP) that does this.
Using REST API
See the swagger documentation for the TOTP REST API here to understand how to obtain TOTP related information via the API.
Using Admin Services
Prior to the REST APIs, WSO2 Identity Server exposed its TOTP functionality via a SOAP API. The following is the Admin Service used to obtain the QR code.
https://localhost:9443/services/TOTPAdminService?wsdlInfo
Read more about calling admin services here
-
The QR code URL can be retrieved using the
initTOTPmethod in theTOTPAdminService.Example
The following is a sample cURL command that invokes the TOTPAdminService.
curl -i -X POST -H 'Content-Type: application/x-www-form-urlencoded' -H 'Authorization:Basic YWRtaW46YWRtaW4=' https://localhost:9443/services/TOTPAdminService/initTOTP -k -d '[email protected]'The following is a sample response that is obtained.
<ns:initTOTPResponse xmlns:ns="http://services.totp.authenticator.application.identity.carbon.wso2.org"><ns:return>b3RwYXV0aDovL3RvdHAvY2FyYm9uLnN1cGVyOmR1c2hhbmk/c2VjcmV0PUJGR0RFUllPU1ZSR0s3
 TE0maXNzdWVyPWNhcmJvbi5zdXBlcg==
 </ns:return></ns:initTOTPResponse> -
The Secret Key can be retrieved using the retrieveSecretKeymethod in the
TOTPAdminService.Example
The following is a sample cURL command that invokes the TOTPAdminService.
curl -i -X POST -H 'Content-Type: application/x-www-form-urlencoded' -H 'Authorization:Basic YWRtaW46YWRtaW4=' https://localhost:9443/services/TOTPAdminService/retrieveSecretKey -k -d '[email protected]'The following is a sample response that is obtained.
<ns:retrieveSecretKeyResponse xmlns:ns="http://services.totp.authenticator.application.identity.carbon.wso2.org"><ns:return>4AAC2HEG7COGHQYI</ns:return></ns:retrieveSecretKeyResponse>
Send email with TOTP
Additionally, users may receive an email consisting the TOTP code during the authentication flow.
- Enable the email sending configurations of the WSO2 Identity Server as explained here
-
Add the following configuration to the
deployment.tomlfile.[authentication.authenticator.totp.parameters] AllowSendingVerificationCodeByEmail = trueTip
The email template used to send this email notification is the TOTP template.
You can edit and customize the email template. For more information on how to do this, see Customizing Automated Emails.
Please note that you must include
{{token}}in the email body as a placeholder for the token generated during the authentication flow.