Configuring Access Delegation with OAuth 2.0
Introduction
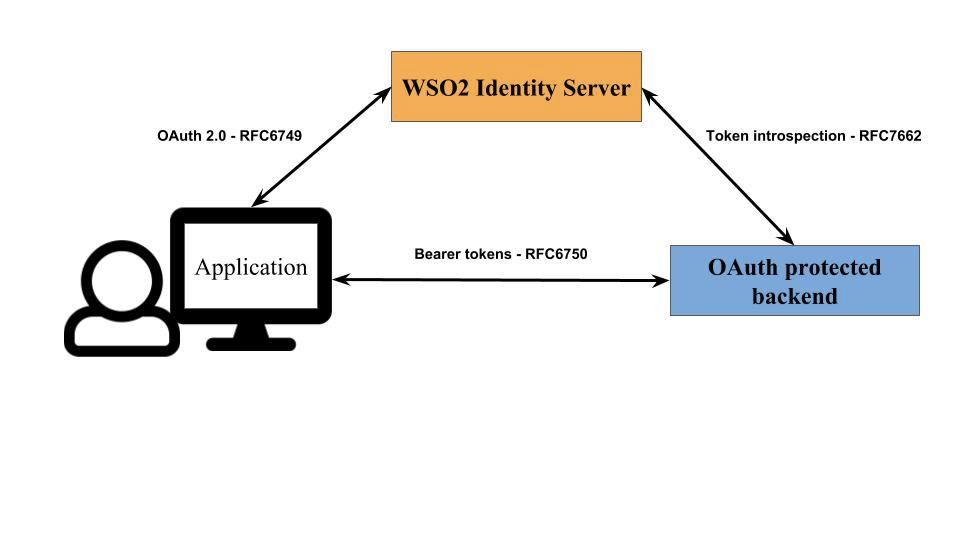
This tutorial demonstrates how WSO2 Identity Server (WSO2 IS) can be used as an OAuth 2.0 authorization server. It guides you through the OAuth 2.0 application configuration, deployment, and the usage scenario.
In this sample scenario, a user tries to log in to a vehicle booking web application called "pickup-dispatch" via WSO2 Identity Server and receives an access token to call the API to view the vehicle bookings.
Setting up
-
Navigate to
<IS_HOME>/binand start the server by executing one of the following commands.``` java tab="Linux/macOS" sh wso2server.sh
``` java tab="Windows" wso2server.bat run -
Follow the steps in deploying pickup-dispatch webapp to download, deploy and register dispatch sample.
-
Download the
backend-service.jarfile from the latest release assets.
Info
For more information about the backend service, see Introduction to Backend Service.
The setup is now complete and you can proceed to try out the scenario.
Try it out
-
Run the application by visting the following URL: http://localhost.com:8080/pickup-dispatch/index.jsp
-
Log in using the preferred credentials (e.g., admin/admin)
-
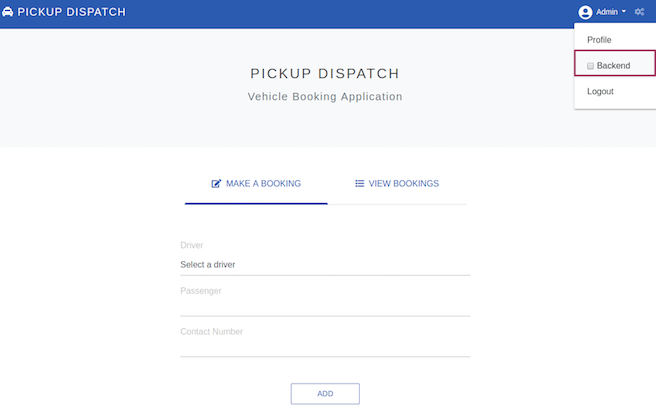
Next you have to provide consent to use your user name. Backend calls are disabled by default. Enable it by selecting the Backend box in the drop down list as shown below.
-
Add a new booking by selecting a driver from the drop down list and filling passenger details.
-
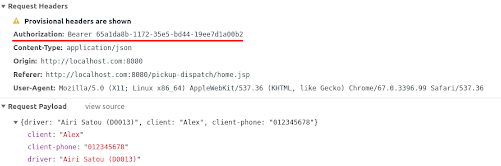
Click Add. On the backend-service log, you will notice that the request sent to
http://localhost:39090/bookingscontains an authorization header. -
You may view the request and response by clicking on the gear icon on the top-right corner.
-
Similarly, you can also view stored bookings. This request also contains an Authorization header.