Configure Pre-Issue Access Token Action with AWS Lambda
5 mins
Using AWS Lambda
This section describes how to implement the Pre-Issue Access Token Action scenario using AWS Lambda with Node.js. In this approach, the validation logic is encapsulated within a Lambda function that evaluates the context of an access token request before it is issued.
The Lambda function performs two key checks to determine whether the access token should be issued or modified:
- First, it verifies the originating country or region of the request. If the request originates from a restricted location, token issuance is blocked immediately.
- If the location is permitted, the function checks the request's IP address against AbuseIPDB to retrieve its abuse confidence score. Depending on the score and contextual factors such as access time, the function may either reduce the token’s validity period or block it entirely.
Set Up Your Node.js Project
Create a folder to hold your Lambda source code and its dependencies, so it can be packaged as a ZIP file to be uploaded as a Lambda function.
Run the following command to generate a package.json file which helps manage your project dependencies:
This creates a basic package.json with default values. The -y flag automatically accepts all default settings, so
you don't have to manually answer prompts.
Install required dependencies for the use case. The Lambda function requires the following packages:
- geoip-country – Enables the function to determine the country associated with a given IP address by performing a lookup against a local GeoIP database. This is used to identify the originating country of the access token request.
Create the Lambda Source Files for Deployment
Create a new file named index.mjs, which will contain the implementation of the Lambda function.
Define the initial structure in the index.mjs file as shown below; this will lay the groundwork for building the
token policy validation logic.
import https from "https";
import geoip from "geoip-country";

const BLOCKED_COUNTRIES = ["KP", "IR", "RU", "SY", "CN"];
const ABUSEIPDB_API_KEY = process.env.ABUSEIPDB_API_KEY;
const ABUSEIPDB_ENDPOINT = "https://api.abuseipdb.com/api/v2/check";

const EXPIRY_WORKING_HOURS = 900; // 15 minutes
const EXPIRY_NON_WORKING_HOURS = 300; // 5 minutes
Add helper functions for the following scenarios:
getClientIp– Extracts the client’s IP address from the custom header x-client-source-ip within the incoming event payload. This is used to identify the source of the access token request.lookupCountry– Uses the geoip-country library to determine the country code corresponding to a given IP address. This helps in enforcing geographic-based access restrictions.callAbuseIPDB– Queries the AbuseIPDB API using the client’s IP address to retrieve its abuse confidence score. This score helps assess the likelihood of the IP being associated with malicious activity.isWorkingHours– Checks whether the current time (in UTC) falls within standard working hours (9 AM – 5 PM). This can be used as an additional risk factor in decision-making.denyResponse– Returns a standardized response object that indicates the access token issuance should be denied, including a reason for the failure.allowResponse– Returns a standardized response object that indicates the access token issuance was successful and allowed.
function getClientIp(event) {
  try {
    const body = JSON.parse(event.body);
    const headers = body?.event?.request?.additionalHeaders || [];
    const ipHeader = headers.find((h) => h.name.toLowerCase() === "x-client-source-ip");
    return ipHeader?.value?.[0] || null;
  } catch (e) {
    console.warn("Failed to parse client IP:", e.message);
    return null;
  }
}

function lookupCountry(ip) {
  const geo = geoip.lookup(ip);
  return geo?.country || "UNKNOWN";
}

function callAbuseIPDB(ip) {
  const url = `${ABUSEIPDB_ENDPOINT}?ipAddress=${ip}`;
  const options = {
    method: "GET",
    headers: {
      Key: ABUSEIPDB_API_KEY,
      Accept: "application/json"
    }
  };

  return new Promise((resolve, reject) => {
    const req = https.request(url, options, (res) => {
      let data = "";
      res.on("data", (chunk) => data += chunk);
      res.on("end", () => {
        try {
          const parsed = JSON.parse(data);
          const score = parsed?.data?.abuseConfidenceScore ?? 0;
          resolve(score);
        } catch (err) {
          reject(new Error("Failed to parse AbuseIPDB response"));
        }
      });
    });

    req.on("error", (err) => {
      reject(err);
    });

    req.end();
  });
}

function isWorkingHours() {
  const hourUTC = new Date().getUTCHours();
  return (hourUTC >= 9 && hourUTC < 17); // 9 AM - 5 PM UTC
}

function denyResponse(reason) {
  return {
    statusCode: 200,
    headers: { "Content-Type": "application/json" },
    body: JSON.stringify({
      actionStatus: "FAILED",
      failureReason: "access_denied",
      failureDescription: reason
    })
  };
}

function allowResponse() {
  return {
    statusCode: 200,
    headers: { "Content-Type": "application/json" },
    body: JSON.stringify({
      actionStatus: "SUCCESS"
    })
  };
}
Implement the Lambda function that listens for access token issuance requests from WSO2 Identity Server.
export const handler = async (event) => {
  console.log("Received event:", JSON.stringify(event, null, 2));

  const ip = getClientIp(event);
  if (!ip) {
    console.warn("No IP address found. Denying the request by default.");
    return denyResponse();
  }

  console.log(`Client IP: ${ip}`);

  const country = lookupCountry(ip);
  console.log(`Resolved country: ${country}`);

  if (BLOCKED_COUNTRIES.includes(country)) {
    console.log(`Blocked due to restricted country: ${country}`);
    return denyResponse(`Access token issuance is blocked from your region (${country}).`);
  }

  try {
    const abuseScore = await callAbuseIPDB(ip);
    console.log(`Abuse Confidence Score: ${abuseScore}`);

    if (abuseScore > 75) {
      console.log(`Blocked due to high abuse score: ${abuseScore}`);
      return denyResponse("Access token issuance is blocked due to high IP risk.");
    }

    if (abuseScore < 25) {
      console.log(`Allowed token issuance: Low abuse score (${abuseScore}). No modifications applied.`);
      return allowResponse();
    }

    // Determine expiry based on score and login time
    let expiry;
    if (isWorkingHours()) {
      expiry = EXPIRY_WORKING_HOURS; // 15 mins for low risk during working hours
    } else {
      expiry = EXPIRY_NON_WORKING_HOURS; // 5 mins for low risk outside working hours
    }

    console.log(`Allowing token issuance with expiry: ${expiry} seconds`);

    return {
      statusCode: 200,
      headers: {"Content-Type": "application/json"},
      body: JSON.stringify({
        actionStatus: "SUCCESS",
        operations: [
          {
            op: "replace",
            path: "/accessToken/claims/expires_in",
            value: expiry.toString()
          }
        ]
      })
    };
  } catch (err) {
    console.error("Error during AbuseIPDB lookup:", err.message);
    return denyResponse();
  }
};
The above source code performs the following key tasks to help fulfill the use case defined earlier in this document:
- It defines an AWS Lambda handler function that processes incoming events to determine whether an access token should be issued based on geolocation and risk-based intelligence.
- It extracts the client’s IP address from the incoming request using a helper function. If the IP address cannot be found, the request is denied by default.
- It determines the country associated with the IP address using a GeoIP lookup. If the country is listed in a predefined set of blocked countries, the request is denied with an appropriate message.
- It performs a risk assessment by querying the AbuseIPDB API to retrieve the IP address's abuse confidence score.
- If the abuse score is high (above
75), the request is blocked immediately with a relevant error message. - If the abuse score is low (below
25), the request is allowed to proceed without any modifications to the token. - For medium-risk IP addresses (abuse score between
25and75), the token’s expiry time is adjusted based on the time of day—longer validity during working hours and shorter validity during off-hours. - It constructs and returns a response that either indicates success (
actionStatus: "SUCCESS") or failure (actionStatus: "FAILED"), and optionally applies modifications such as replacing the access token’sexpires_inclaim. - It includes error handling to catch any issues during the AbuseIPDB lookup process and denies the request if an error occurs.
The final source code should look similar to the following.
import https from "https";
import geoip from "geoip-country";

const BLOCKED_COUNTRIES = ["KP", "IR", "RU", "SY", "CN"];
const ABUSEIPDB_API_KEY = process.env.ABUSEIPDB_API_KEY;
const ABUSEIPDB_ENDPOINT = "https://api.abuseipdb.com/api/v2/check";

const EXPIRY_WORKING_HOURS = 900; // 15 minutes
const EXPIRY_NON_WORKING_HOURS = 300; // 5 minutes

function getClientIp(event) {
  try {
    const body = JSON.parse(event.body);
    const headers = body?.event?.request?.additionalHeaders || [];
    const ipHeader = headers.find((h) => h.name.toLowerCase() === "x-client-source-ip");
    return ipHeader?.value?.[0] || null;
  } catch (e) {
    console.warn("Failed to parse client IP:", e.message);
    return null;
  }
}

function lookupCountry(ip) {
  const geo = geoip.lookup(ip);
  return geo?.country || "UNKNOWN";
}

function callAbuseIPDB(ip) {
  const url = `${ABUSEIPDB_ENDPOINT}?ipAddress=${ip}`;
  const options = {
    method: "GET",
    headers: {
      Key: ABUSEIPDB_API_KEY,
      Accept: "application/json"
    }
  };

  return new Promise((resolve, reject) => {
    const req = https.request(url, options, (res) => {
      let data = "";
      res.on("data", (chunk) => data += chunk);
      res.on("end", () => {
        try {
          const parsed = JSON.parse(data);
          const score = parsed?.data?.abuseConfidenceScore ?? 0;
          resolve(score);
        } catch (err) {
          reject(new Error("Failed to parse AbuseIPDB response"));
        }
      });
    });

    req.on("error", (err) => {
      reject(err);
    });

    req.end();
  });
}

function isWorkingHours() {
  const hourUTC = new Date().getUTCHours();
  return (hourUTC >= 9 && hourUTC < 17); // 9 AM - 5 PM UTC
}

export const handler = async (event) => {
  console.log("Received event:", JSON.stringify(event, null, 2));

  const ip = getClientIp(event);
  if (!ip) {
    console.warn("No IP address found. Denying the request by default.");
    return denyResponse();
  }

  console.log(`Client IP: ${ip}`);

  const country = lookupCountry(ip);
  console.log(`Resolved country: ${country}`);

  if (BLOCKED_COUNTRIES.includes(country)) {
    console.log(`Blocked due to restricted country: ${country}`);
    return denyResponse(`Access token issuance is blocked from your region (${country}).`);
  }

  try {
    const abuseScore = await callAbuseIPDB(ip);
    console.log(`Abuse Confidence Score: ${abuseScore}`);

    if (abuseScore > 75) {
      console.log(`Blocked due to high abuse score: ${abuseScore}`);
      return denyResponse("Access token issuance is blocked due to high IP risk.");
    }

    if (abuseScore < 25) {
      console.log(`Allowed token issuance: Low abuse score (${abuseScore}). No modifications applied.`);
      return allowResponse();
    }

    // Determine expiry based on score and login time
    let expiry;
    if (isWorkingHours()) {
      expiry = EXPIRY_WORKING_HOURS; // 15 mins for low risk during working hours
    } else {
      expiry = EXPIRY_NON_WORKING_HOURS; // 5 mins for low risk outside working hours
    }

    console.log(`Allowing token issuance with expiry: ${expiry} seconds`);

    return {
      statusCode: 200,
      headers: {"Content-Type": "application/json"},
      body: JSON.stringify({
        actionStatus: "SUCCESS",
        operations: [
          {
            op: "replace",
            path: "/accessToken/claims/expires_in",
            value: expiry.toString()
          }
        ]
      })
    };
  } catch (err) {
    console.error("Error during AbuseIPDB lookup:", err.message);
    return denyResponse();
  }
};

function denyResponse(reason) {
  return {
    statusCode: 200,
    headers: {"Content-Type": "application/json"},
    body: JSON.stringify({
      actionStatus: "FAILED",
      failureReason: "access_denied",
      failureDescription: reason
    })
  };
}

function allowResponse() {
  return {
    statusCode: 200,
    headers: {"Content-Type": "application/json"},
    body: JSON.stringify({
      actionStatus: "SUCCESS"
    })
  };
}
Create the Deployment Package
Since this project includes external libraries, the Lambda function needs to be packaged as a ZIP archive before uploading:
This command includes all necessary files (index.mjs, node_modules) required by AWS Lambda.
Deploy the Function on AWS Lambda
Log in to the AWS Dashboard and navigate to the AWS Lambda Console. Once there, click Create function and choose Author from scratch.
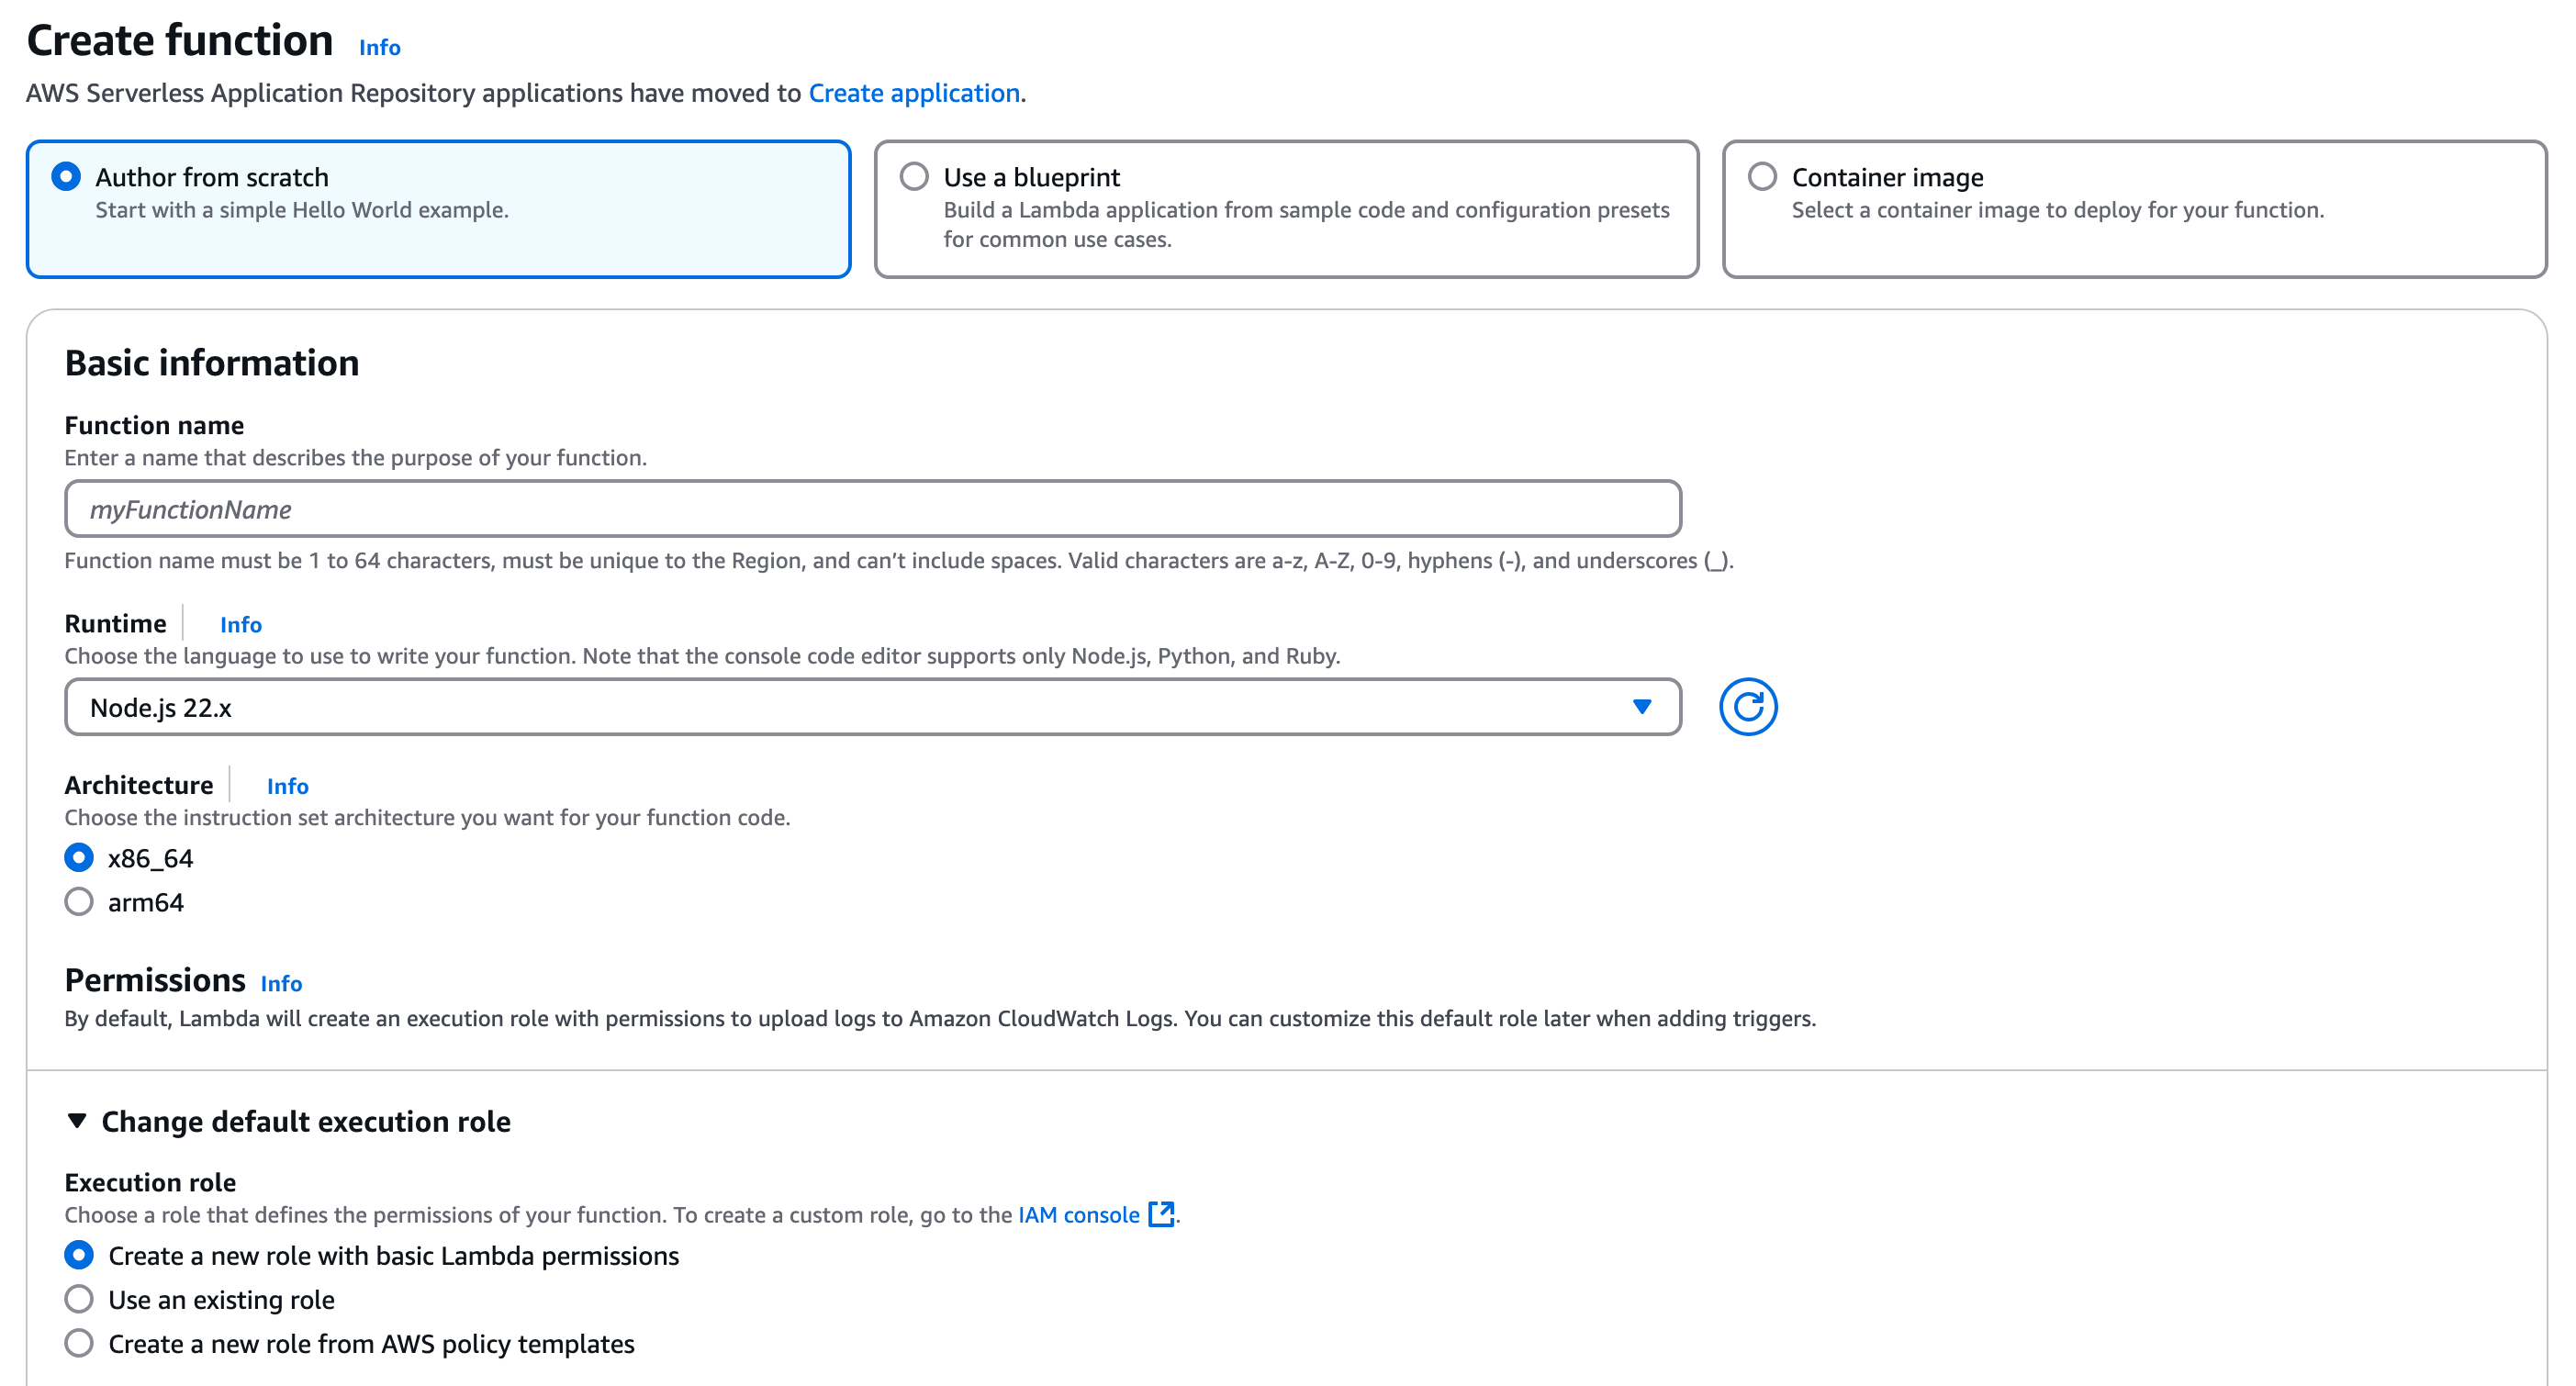
Then, fill in the following details and create the function:
- Function name: token-policy-validator
- Runtime: Node.js 22.x
- Architecture: x86
- Permissions: Choose an existing role or create a new one with basic Lambda permissions.
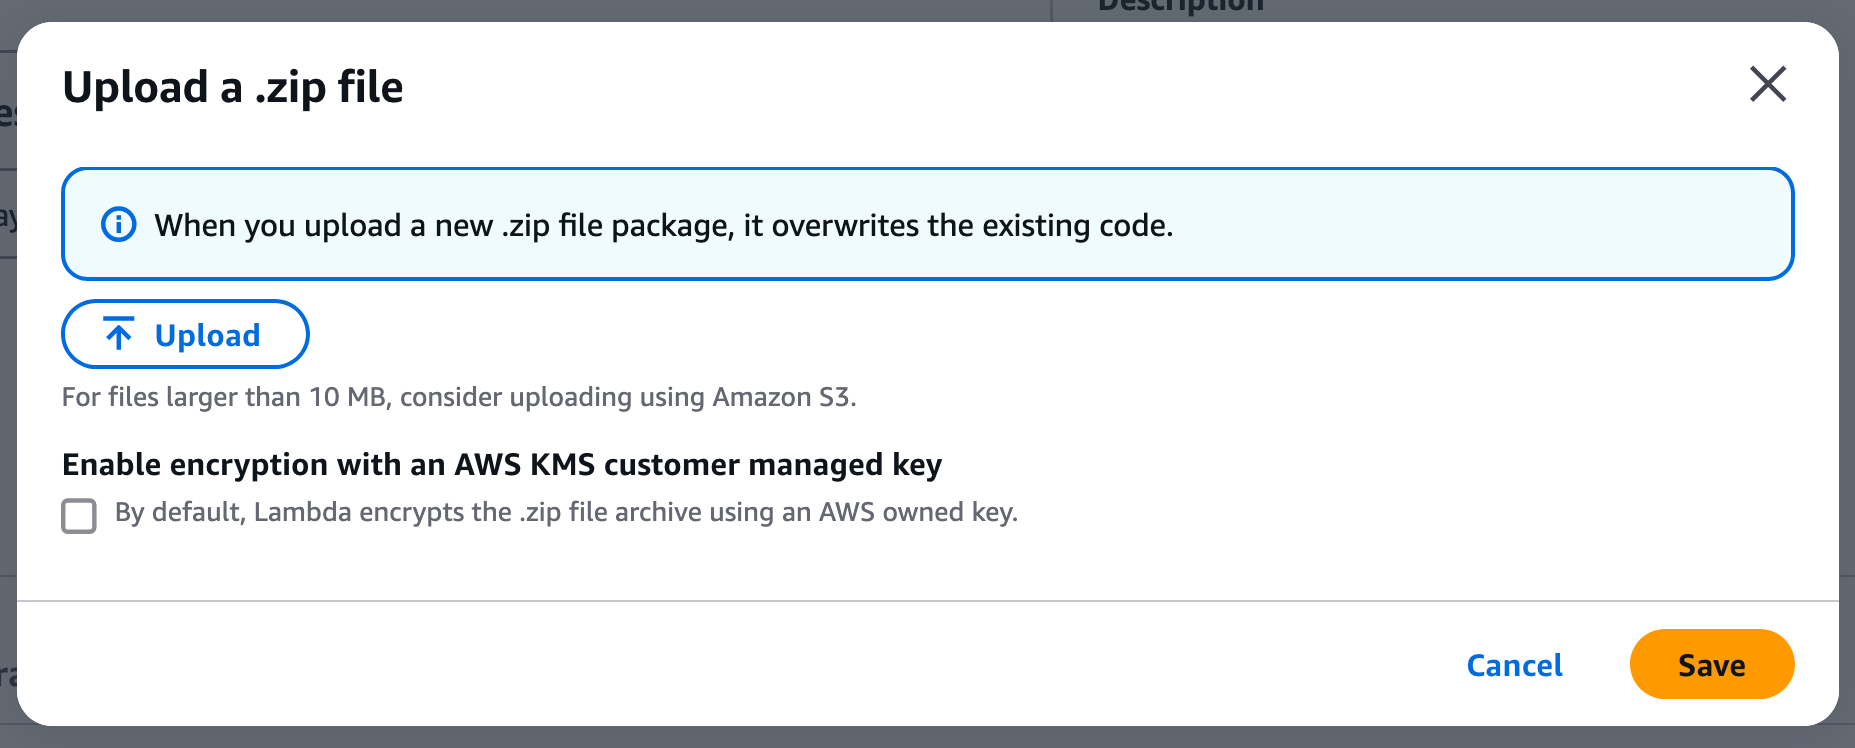
Once the function is created, go to the Code tab, upload the ZIP file (token-policy-validator.zip) that was created earlier, and click Save to upload the source code.
Next, configure the Function URL:
- Navigate to the Configuration tab, then to the Function URL section.
- Click Create function URL and set the Auth type to None.
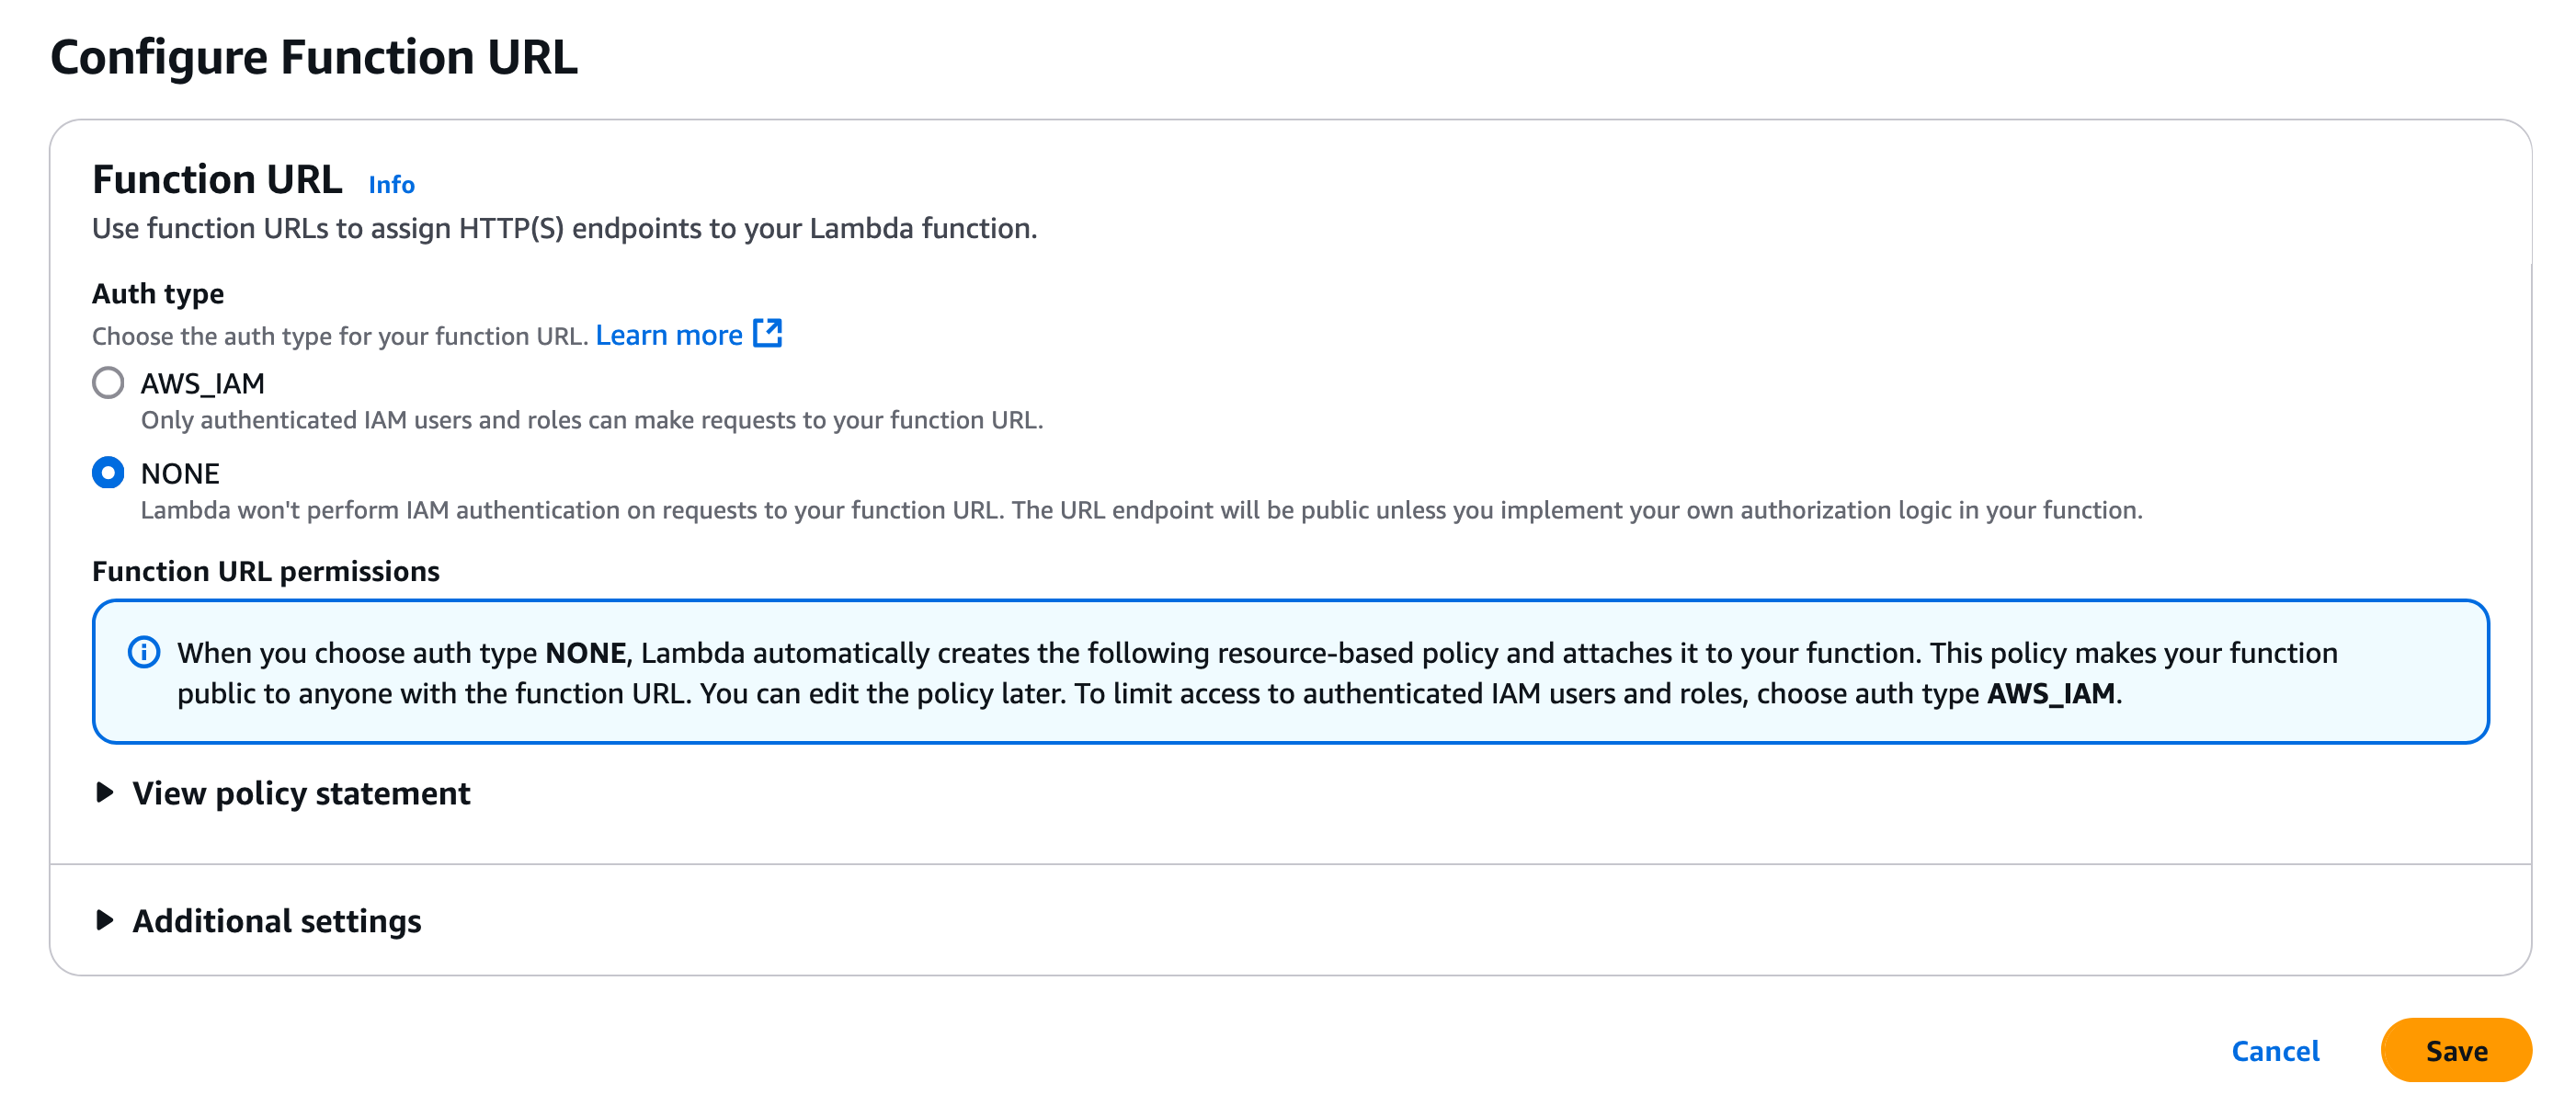
The generated function URL will be displayed in the Function overview section of the dashboard. Make sure to note this URL, as it will be used to expose the function to external services.
Since the source code uses environment variables to manage sensitive information, you must configure the corresponding environment variables in AWS. To do this:
- Go to the Configuration tab, then Environment variables.
- Add the value for the AbuseIPDB API key, and save the changes.
Test Deployed Service
To test the deployed service, you will need the function URL. A sample request for a successful scenario is shown below.
curl --location '<function_url>' \
--header 'Content-Type: application/json' \
--data '{
  "actionType": "PRE_ISSUE_ACCESS_TOKEN",
  "event": {
    "request": {
      "additionalHeaders": [
        {
          "name": "x-request-id",
          "value": [
            "b523491ab6c6291325cd5a130bef3c16"
          ]
        },
        {
          "name": "x-client-source-ip",
          "value": [
            "205.210.31.51"
          ]
        },
        {
          "name": "postman-token",
          "value": [
            "71a4ec17-4207-436c-b9b1-e9943154828b"
          ]
        }
      ],
      "clientId": "CCm5aWk4TjKgprfH_fmuMI7edDQa",
      "grantType": "client_credentials"
    },
    "tenant": {
      "id": "2210",
      "name": "testwso2"
    },
    "accessToken": {
      "tokenType": "JWT",
      "claims": [
        {
          "name": "iss",
          "value": "https://api.asgardeo.io/t/testwso2/oauth2/token"
        },
        {
          "name": "client_id",
          "value": "CCm5aWk4TjKgprfH_fmuMI7edDQa"
        },
        {
          "name": "aut",
          "value": "APPLICATION"
        },
        {
          "name": "expires_in",
          "value": 3600
        },
        {
          "name": "aud",
          "value": [
            "CCm5aWk4TjKgprfH_fmuMI7edDQa"
          ]
        },
        {
          "name": "subject_type",
          "value": "public"
        },
        {
          "name": "sub",
          "value": "CCm5aWk4TjKgprfH_fmuMI7edDQa"
        }
      ]
    }
  },
  "allowedOperations": [
    {
      "op": "add",
      "paths": [
        "/accessToken/claims/",
        "/accessToken/scopes/",
        "/accessToken/claims/aud/"
      ]
    },
    {
      "op": "remove",
      "paths": [
        "/accessToken/scopes/",
        "/accessToken/claims/aud/"
      ]
    },
    {
      "op": "replace",
      "paths": [
        "/accessToken/scopes/",
        "/accessToken/claims/aud/",
        "/accessToken/claims/expires_in"
      ]
    }
  ]
}'
Configure WSO2 Identity Server for Pre-Issue Access Token Action Workflow
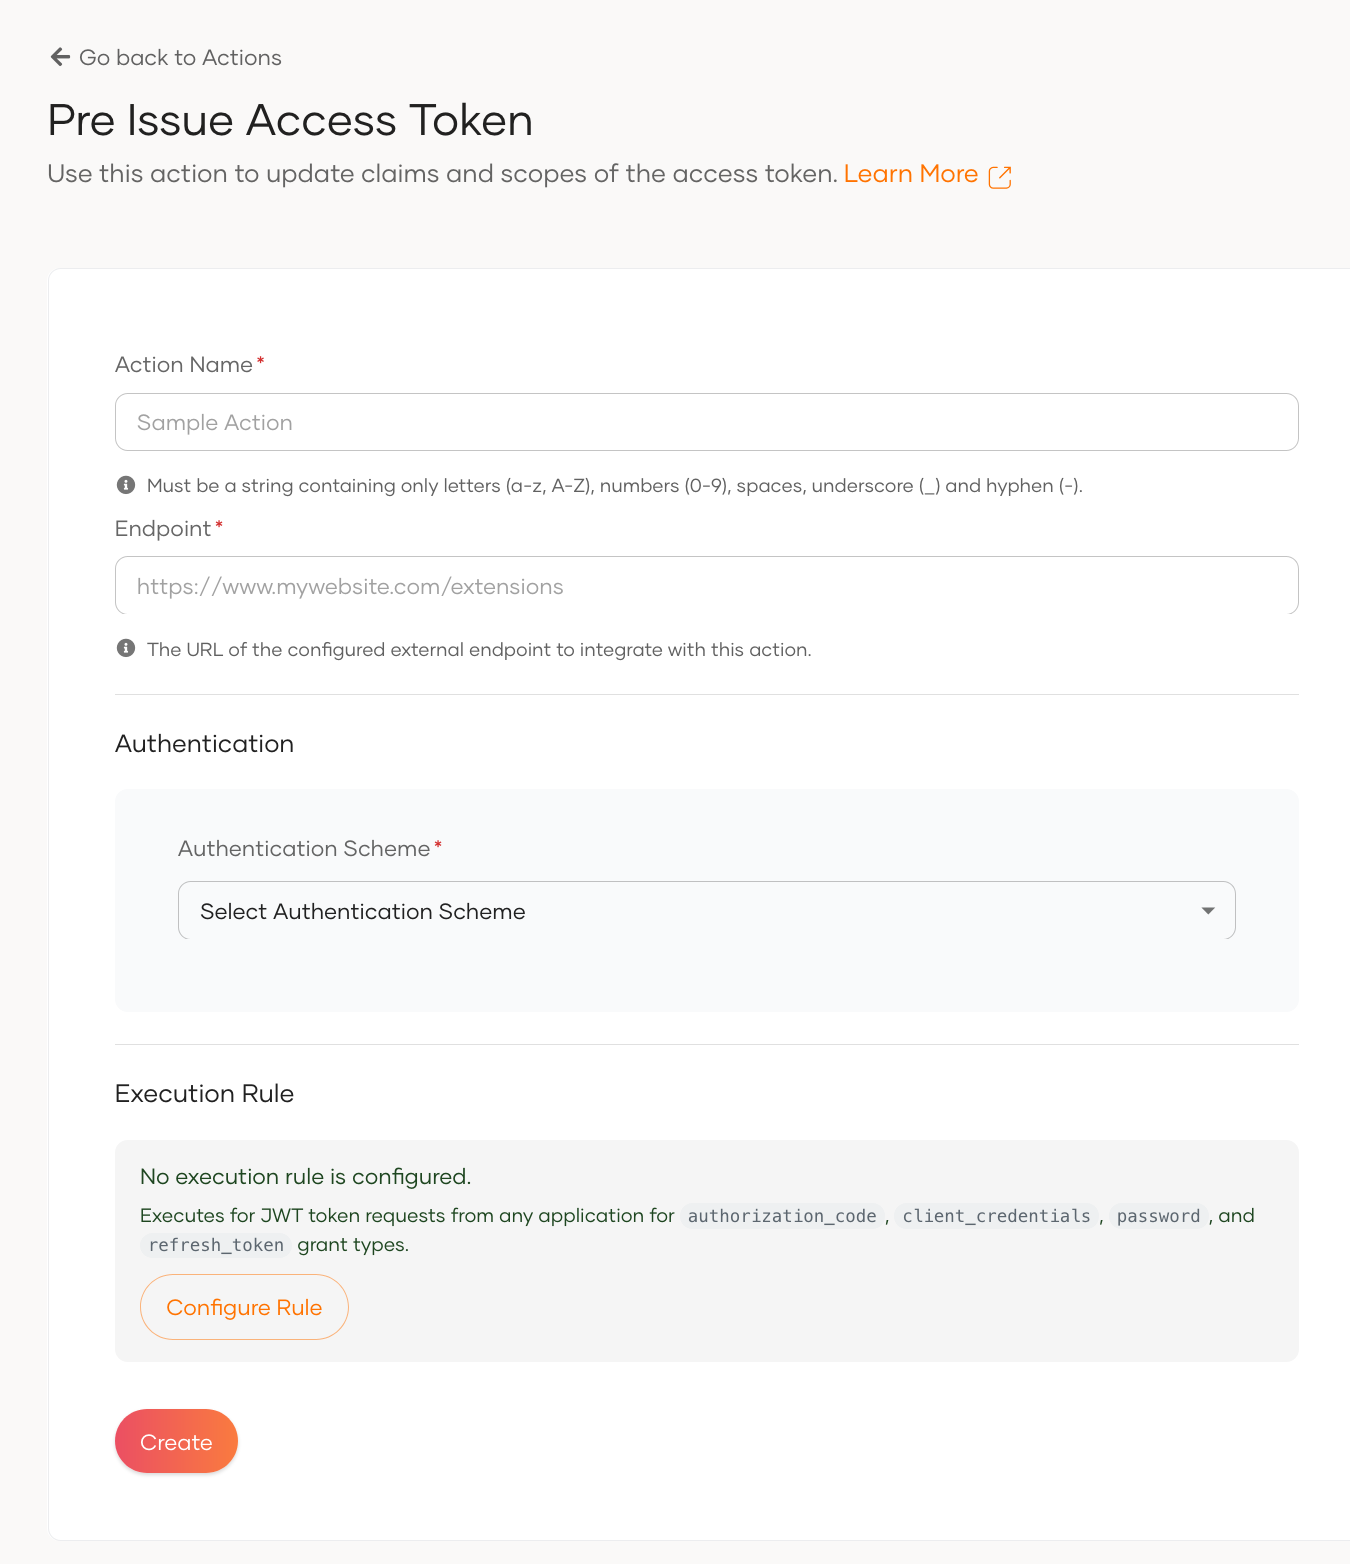
First, sign in to your WSO2 Identity Server account using your admin credentials, click on "Actions" and then select the action type Pre Issue Access Token.
Add an action name, the endpoint extracted from the deployment, and the appropriate authentication mechanism. For AWS Lambda, use the generated function URL directly, and set the authentication mechanism to None, as no authentication is required.
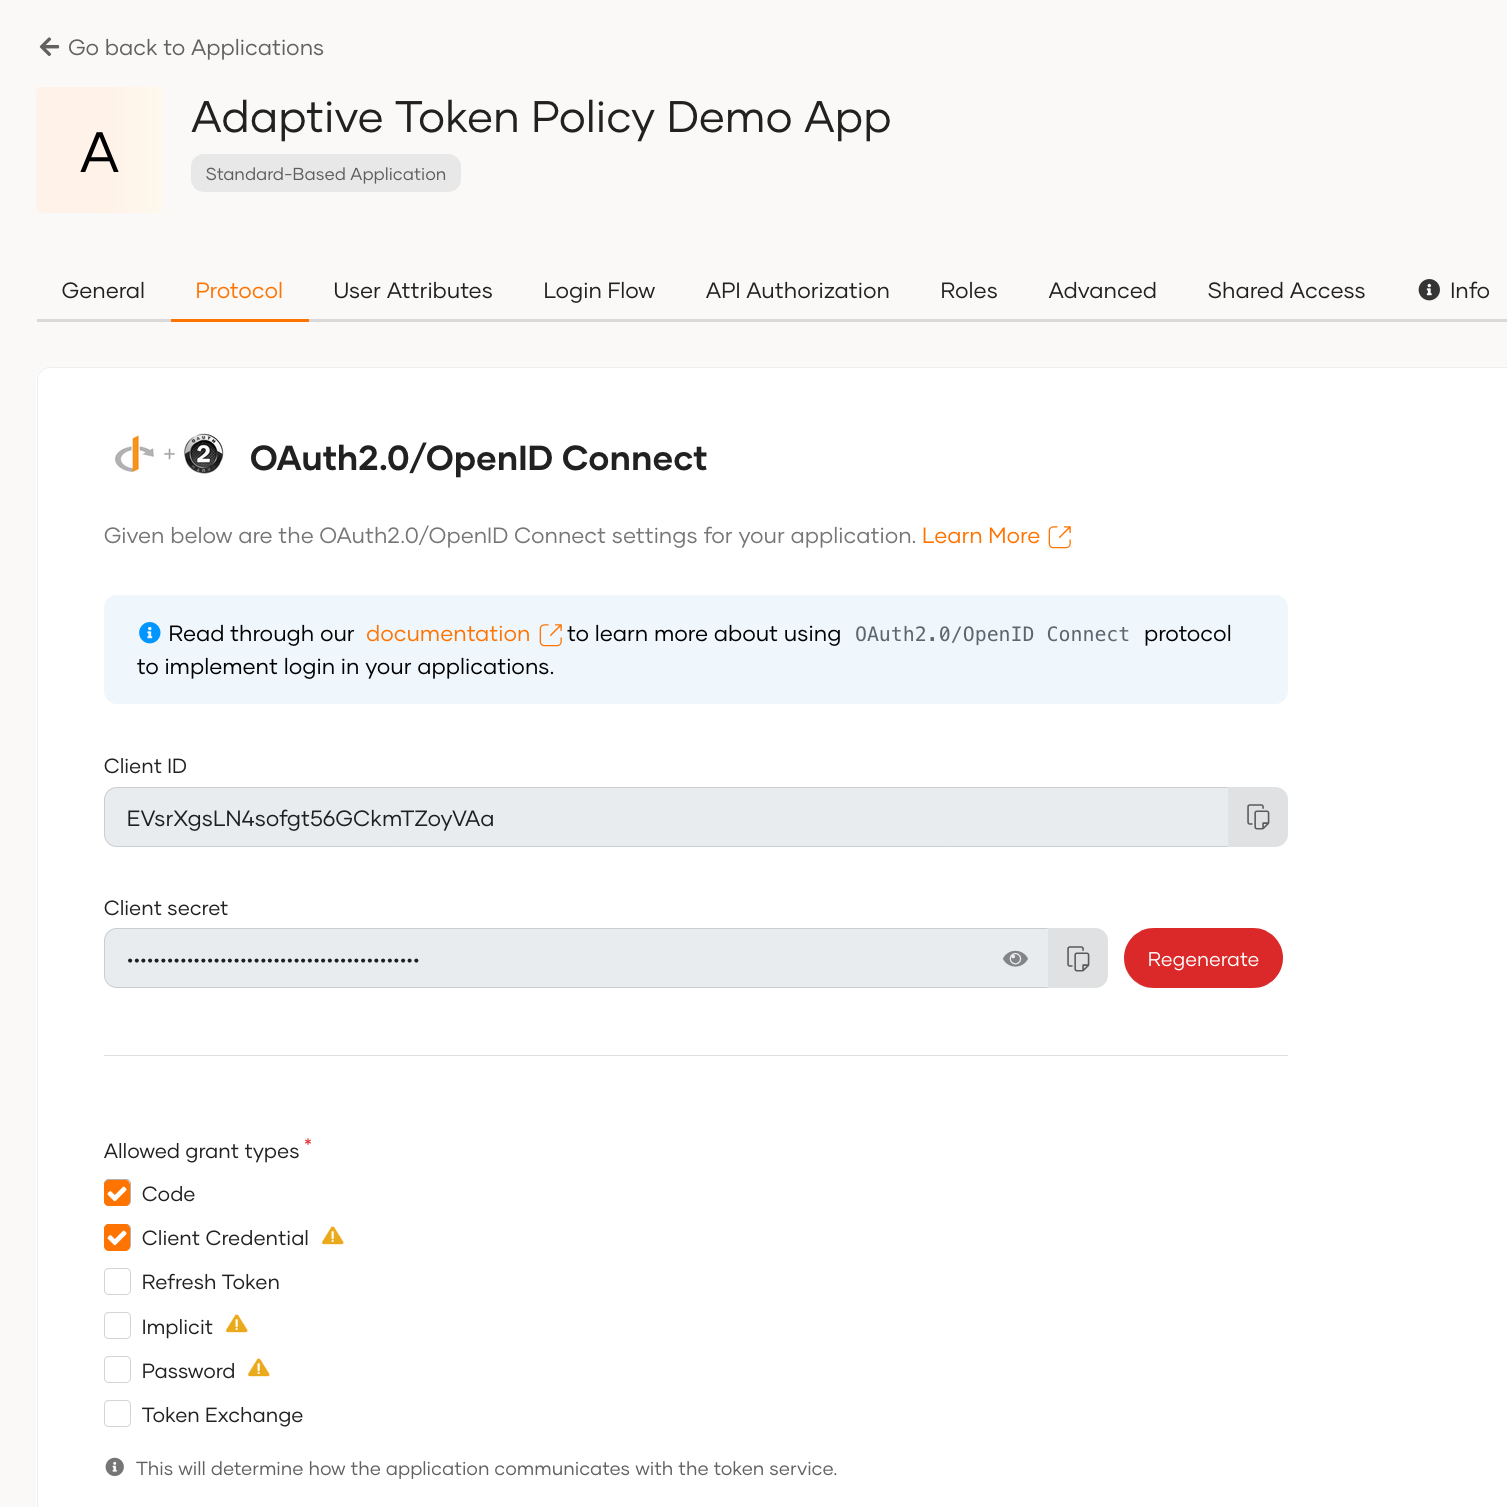
Once the action is configured, ensure that it is marked as active so it will be triggered during relevant operations. To set up the application, navigate to Applications > New Application in the Console application of WSO2 Identity Server, and select Standard-Based Application. Provide the application name as Adaptive Token Policy Demo App, choose OpenID Connect as the protocol, and enable both Authorization Code and Client Credentials under the Protocol tab. Additionally, make sure to add an Authorized Redirect URL, which should be a valid URL corresponding to your application.
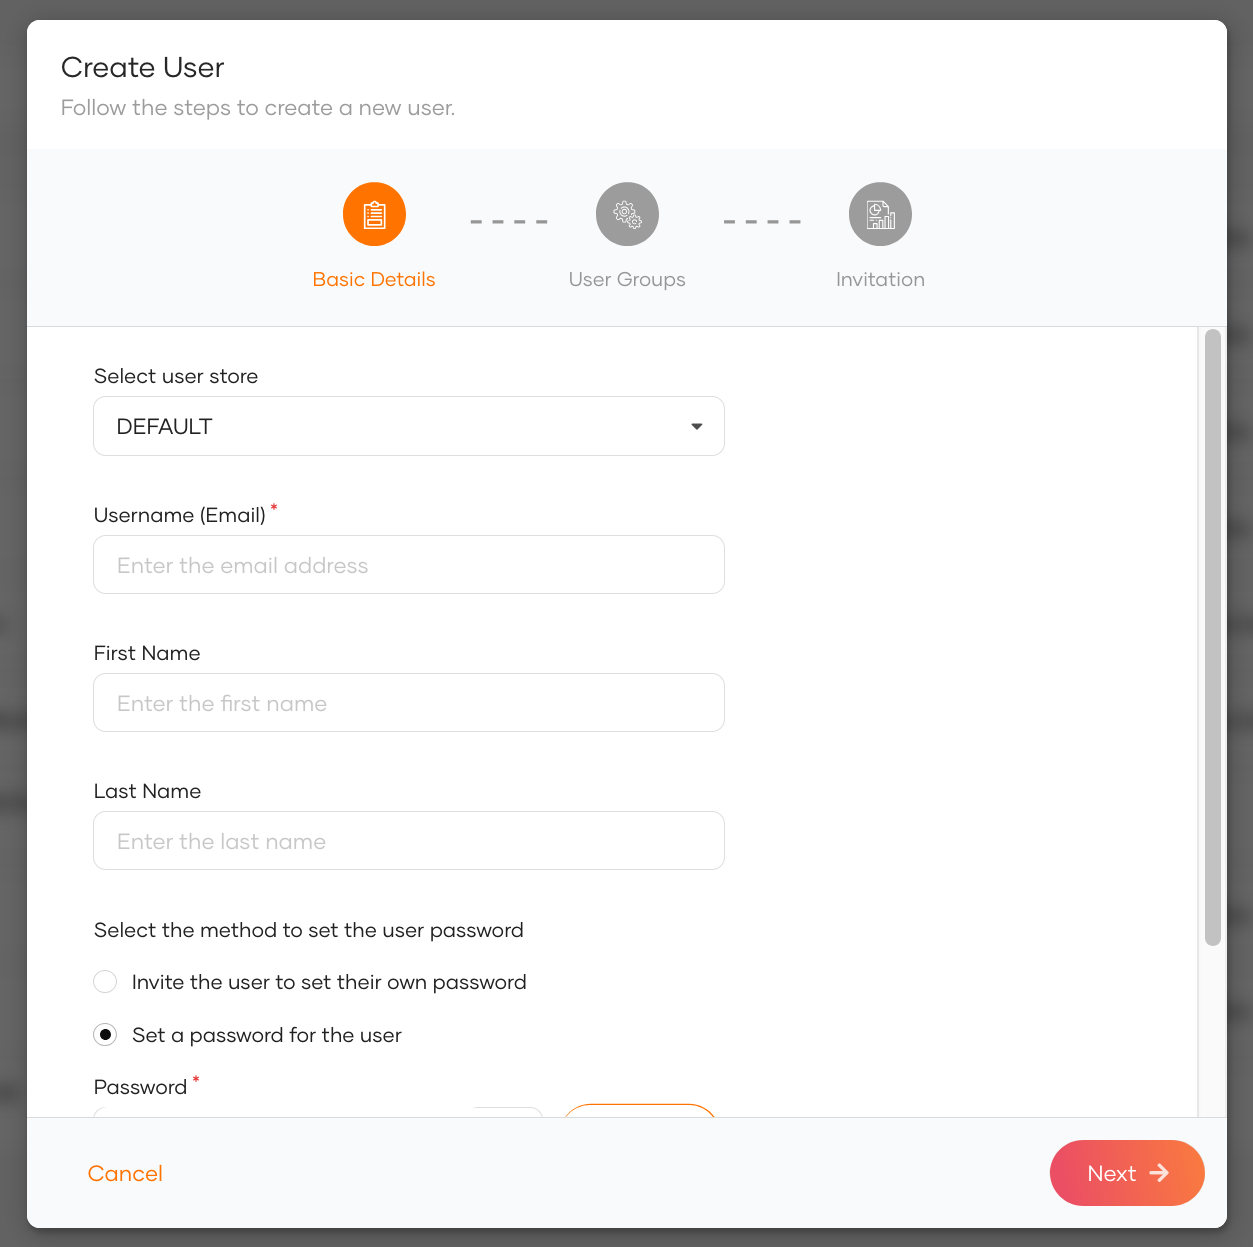
If you are testing the flow using the authorization_code grant, you will need a user. To add one, navigate to the
User Management > Users section in the Console and create a new user with a predefined password.
Validate Pre-Issue Access Token Action Workflow
To test the scenario, you can obtain an access token using the previously registered application with the
client_credentials grant, as shown in the cURL command below.
curl --location 'https://<hostname>/t/<tenant_domain>/oauth2/token' \
--header 'Content-Type: application/x-www-form-urlencoded' \
--header 'Authorization: Basic <base64_encoded_client_id_and_client_secret>' \
--header 'x-client-source-ip: <client_ip>' \
--data-urlencode 'grant_type=client_credentials'
Please note that this works similarly with the authorization_code grant as well. You will need to obtain the
authorization code by signing in through the authorize URL, and then obtain the token using a cURL command similar to
the one shown below.
curl -X POST https://<hostname>/t/<tenant-domain>/oauth2/token \
  -H "Content-Type: application/x-www-form-urlencoded" \
  -H "x-client-source-ip: <client_ip>" \
  -u "<client_id>:<client_secret>" \
  -d "grant_type=authorization_code" \
  -d "code=<authorization_code>" \
  -d "redirect_uri=<redirect_uri>"
Some scenarios you can try out are as follows:
- Restricted Country: The IP
175.45.176.0belongs to a restricted country (North Korea). The request will be blocked. - High Abuse Score: The IP
103.159.198.178has an abuse confidence score greater than 75. The request will be blocked due to high risk. - Moderate Abuse Score (Working Hours): The IP
14.102.69.58has an abuse confidence score between25and75. During working hours (9 AM–5 PM UTC), the token will be issued with a 15-minute expiry. - Moderate Abuse Score (Outside Working Hours): The IP
14.102.69.58has an abuse confidence score between25and75. Outside working hours, the token will be issued with a 5-minute expiry. - Low Abuse Score: The IP
205.210.31.51has an abuse confidence score below25. The token will be issued with a 1-hour expiry.