Configure External Authentication Service for On-demand Silent Password Migration with Choreo
WSO2 Identity Server supports on-demand silent password migration, where a migrated user's password can be seamlessly migrated to WSO2 Identity Server on-the-fly without forcing the user to reset the password. This involves configuring an external authentication service that communicates with the legacy IdP to authenticate users. This guide explains how you can configure the external authentication service in WSO2's integration platform, Choreo.
Note
Learn more on on-demand silent password migration.
Prerequisites
Before you begin, ensure the following are fulfilled.
- Ensure your legacy IdP provides means to perform basic user authentication (i.e. username and password authentication). For example, a SCIM2/Me REST API endpoint that could be authenticated with username and password.
- You need to have a GitHub repository to host the authentication service.
- Download Ballerina, the programming language used to define the external authentication service.
Step 1: Develop the authentication service
In this section, we will develop an authentication service that will communicate with the legacy IdP to authenticate users.
Note
You may find a sample Ballerina authentication service here.
-
Create a new Ballerina package. Learn how to do so in the Ballerina documentation.
-
Write a RESTful service that communicates with the legacy authentication system to perform user authentication. Your service should expose the following REST API endpoints.
Tip
External authentication may require additional processing time depending on the legacy IdP and network delays. Therefore it is recommended to perform the external authentication asynchronously without holding an active connection until the external authentication completes.
-
Start authentication endpoint - to initiate the authentication process with the legacy system. This endpoint should accept the request, return a response with a unique random identifier (preferably a UUID) and then start the external authentication process.
-
Authentication status endpoint - to retrieve and return the completed authentication result.
-
Polling endpoint - to return the completion status of the external authentication task. This should be an open endpoint that doesn’t require any authentication.
Adding logs
We highly recommend adding sufficient logging when developing the REST service. However, ensure no sensitive information or Personally Identifiable Information (PII) are included in the logs.
-
-
Commit your changes and push the code to your remote GitHub repository.
Step 2: Create and deploy the RESTful service in Choreo
We will now deploy the developed authentication service in Choreo, WSO2's integration platform. To do so,
-
Go to the Choreo Console and login to your account or create an account if you don't have one already.
-
On the top of the Console, create a new project or select an existing one.
-
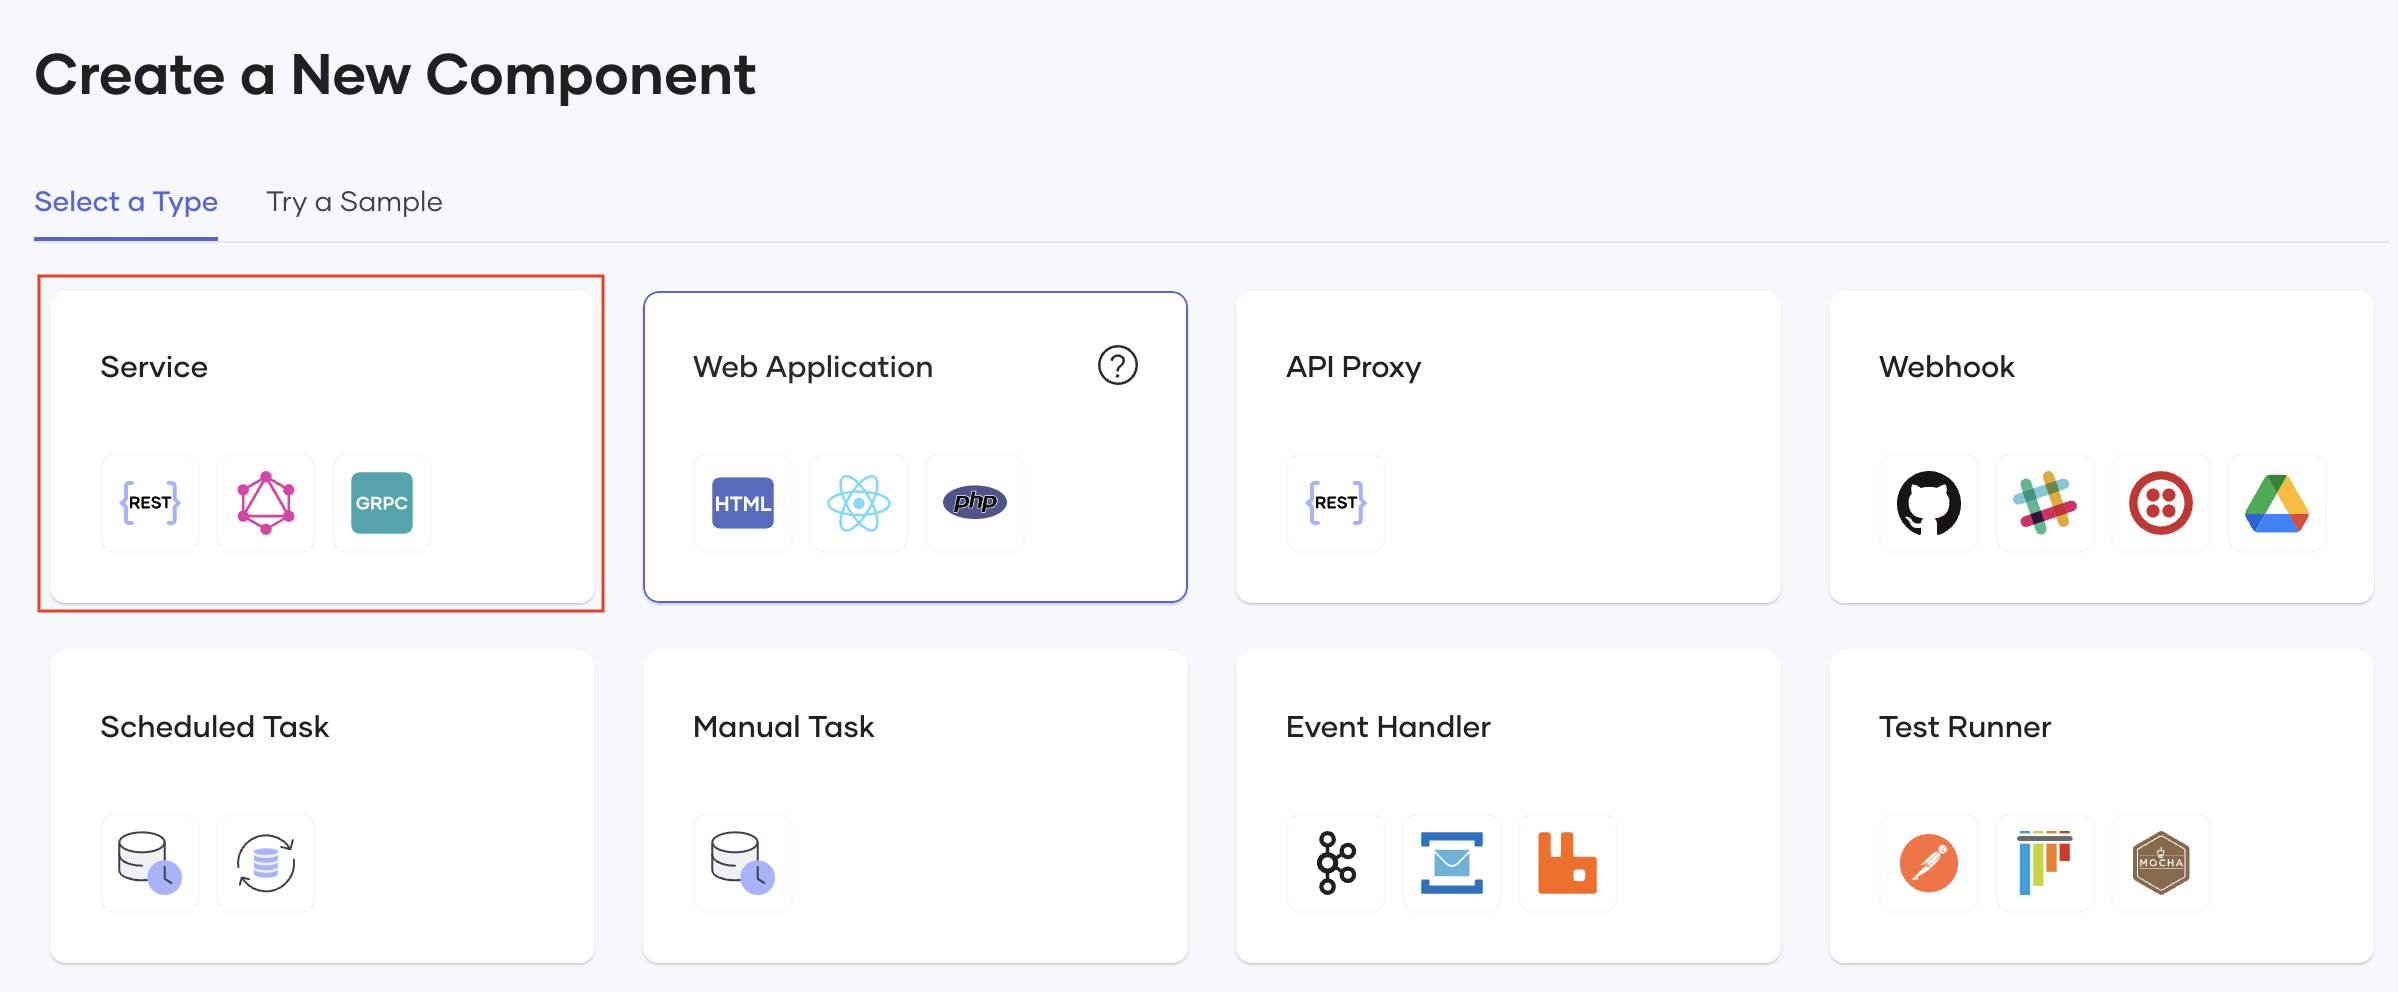
On the left panel, select Components and click Create.
-
On the Select a type tab, select Service.
Note
Learn more about service components in the Choreo documentation
-
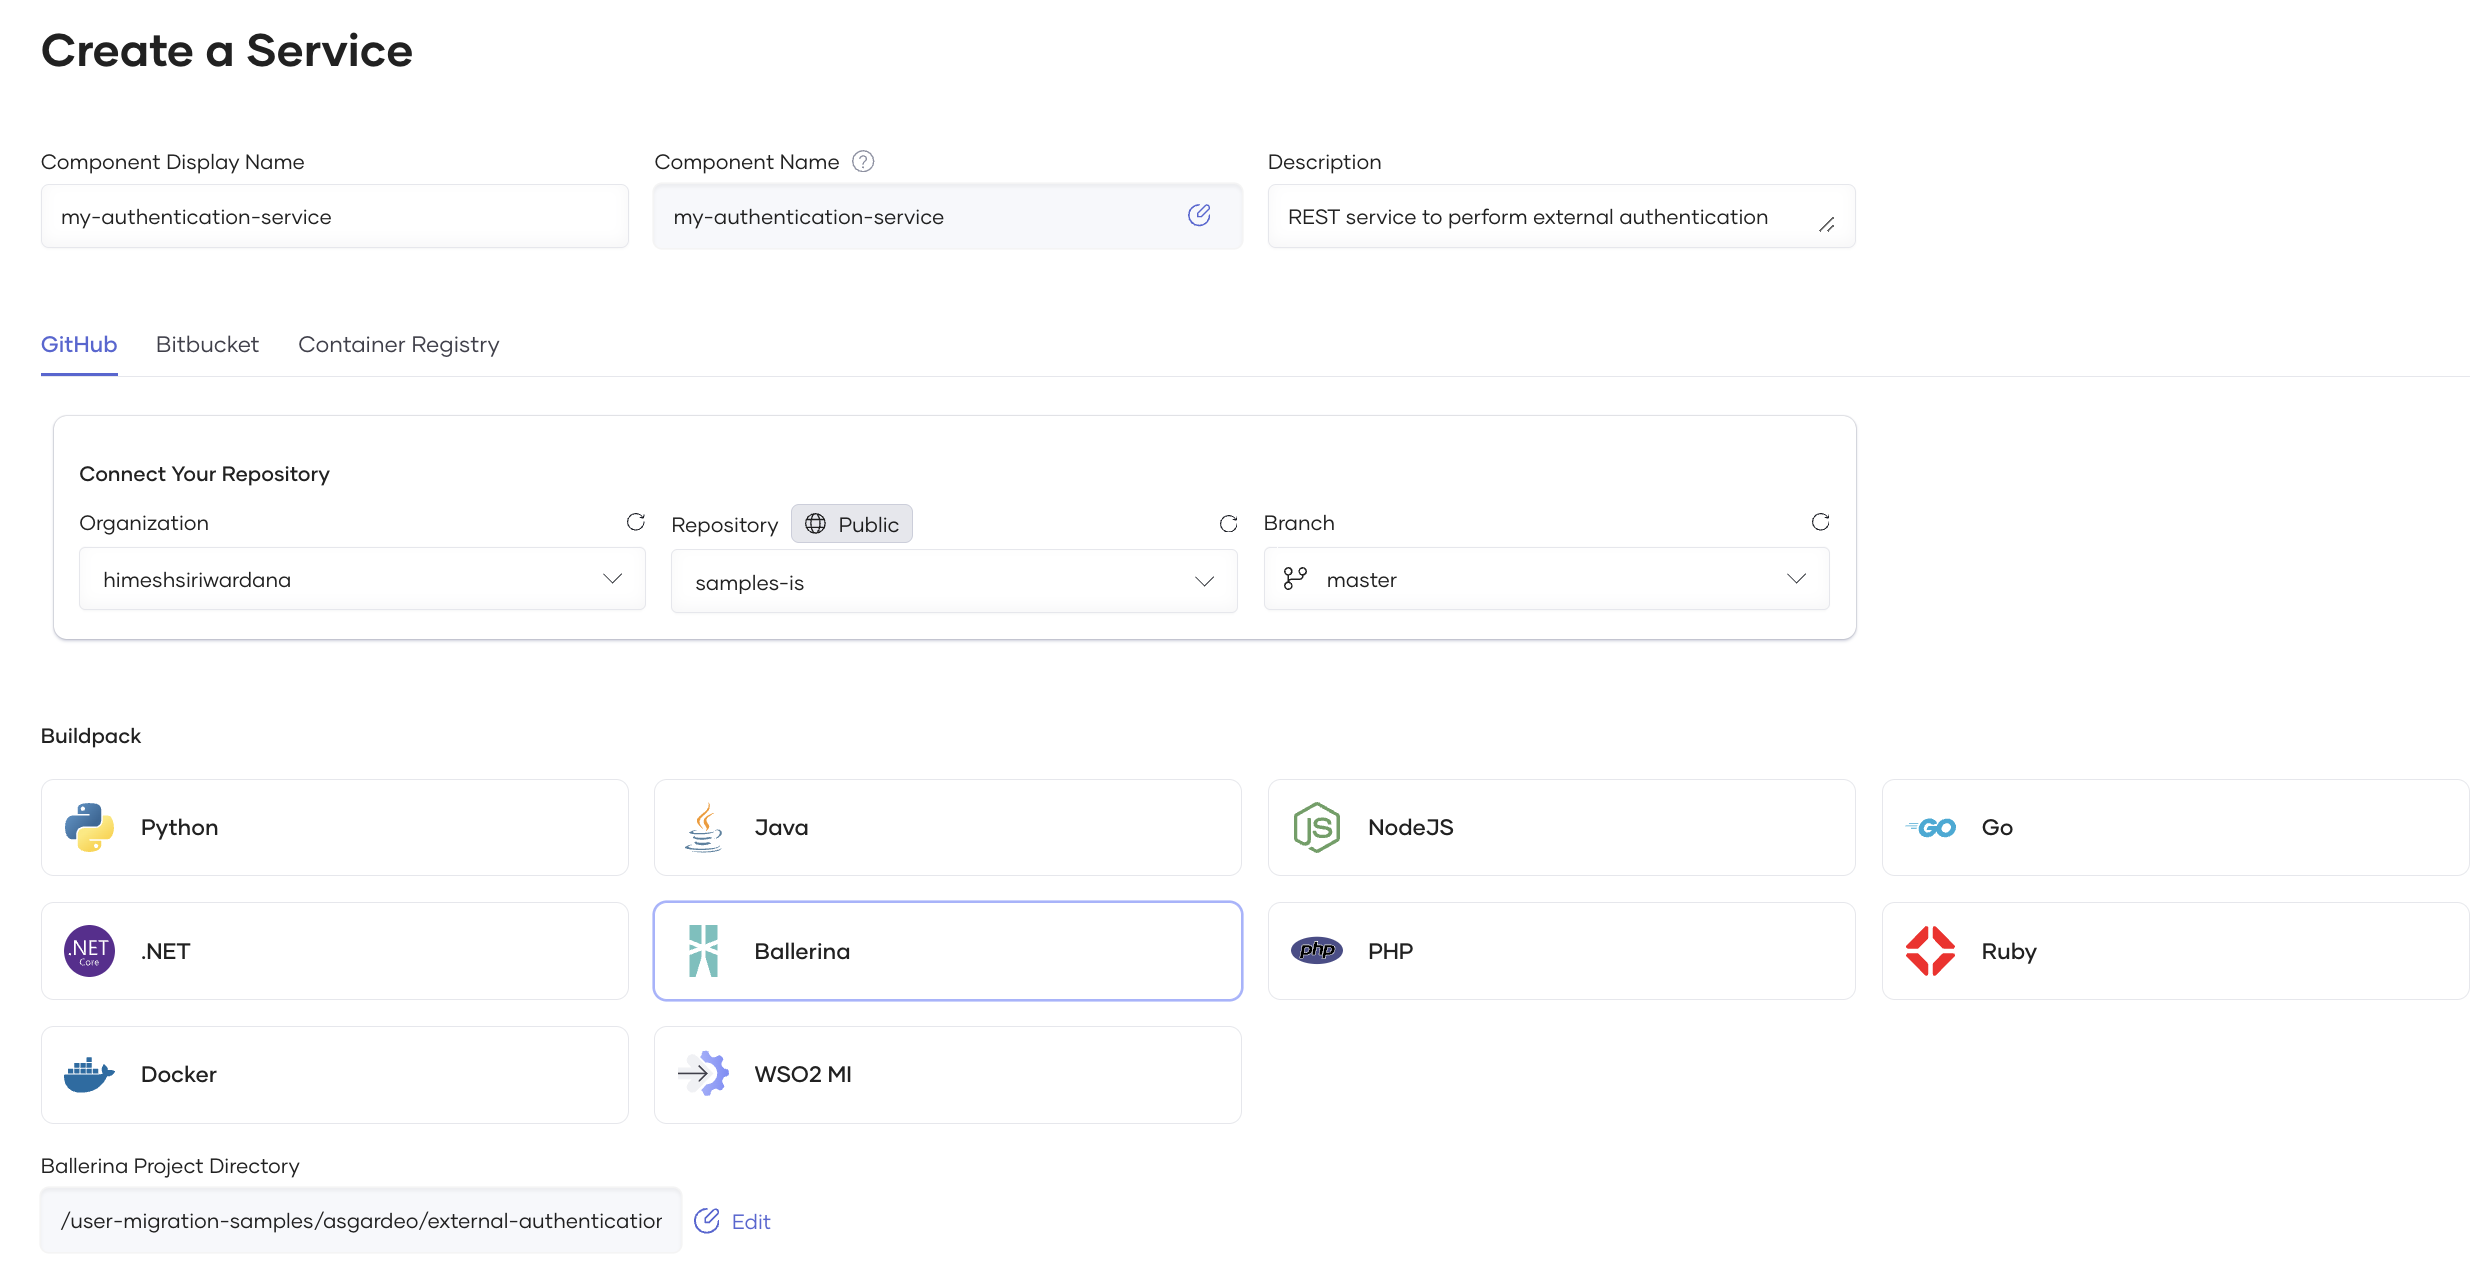
Enter a name and description for your service.
-
Click Authorize with GitHub and connect the relevant organization, repository and the branch for the developed authentication service in step 1.
-
Select Ballerina to be the buildpack and select the Ballerina project directory from your GitHub repository.
-
Click Create.
-
Build and deploy the service. See Choreo documentation for instructions.
Note
If you are using the sample authentication service, be sure to provide values for the necessary configurations before you deploy the service.
-
As discussed earlier, the polling endpoint should be an open endpoint. Follow the steps below to configure this.
-
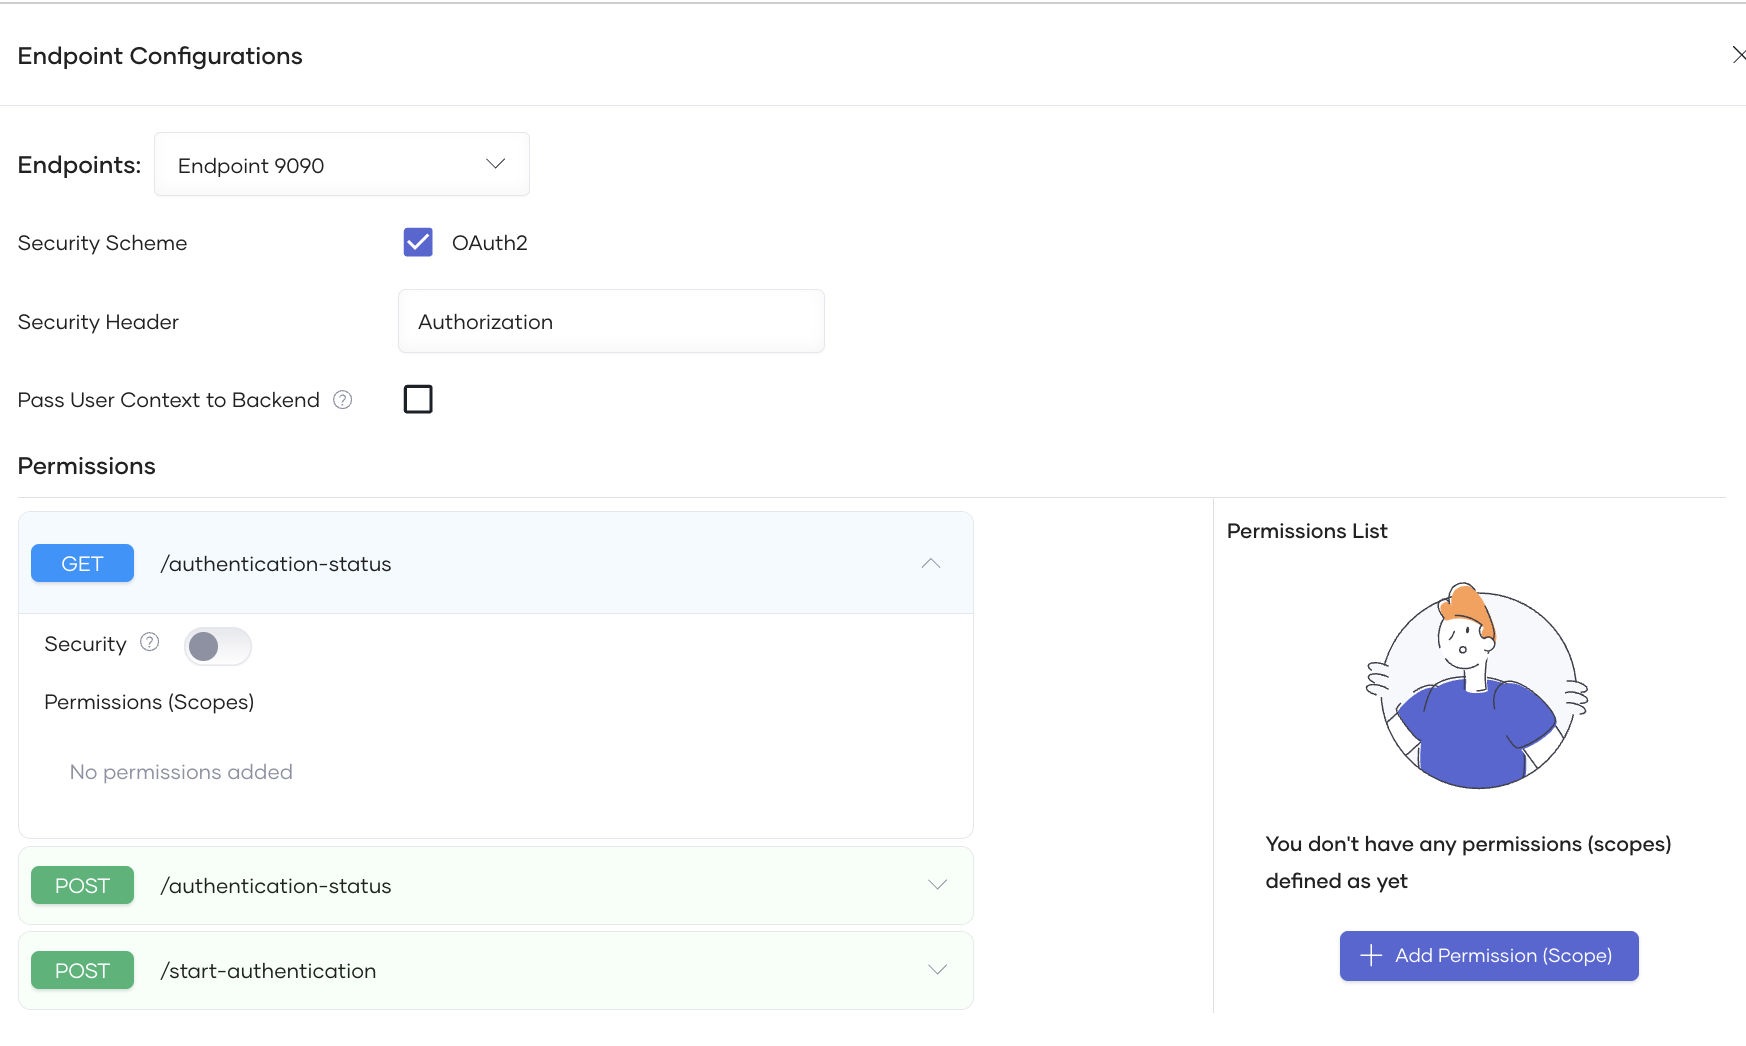
Go to Deployment and in the Set up card, click Endpoint Configurations.
-
In the window that appears, under Permissions, expand the polling endpoint and turn the Security toggle off.
-
Click Apply to save the changes.
-
-
On the left navigation, go to Manage > Lifecycle and click Publish.
Step 3: Create a Choreo application to consume the APIs
After the RESTful service is deployed, follow the steps below to create an application in Choreo and subscribe it to the REST API. This application will later be used to integrate the REST APIs with the WSO2 Identity Server application.
-
Sign in to the Choreo Developer Portal with the same email address you used to log in to the Choreo Console in step 2.
-
On the top navigation, go to Applications and click Create Application.
-
Provide a name and a description for the application and click Create.
-
On the left navigation, go to Credentials and click Generate Credentials.
-
Take note of the generated consumer key and consumer secret as you will need it later.
-
On the left navigation, go to Subscriptions and click Add APIs.
-
Click Add corresponding to the API that you created in step 2.
Note
To learn more about applications in Choreo, refer to the Choreo documentation.