Add Passwordless login with Push Notifications
Push notifications enable a secure and seamless passwordless authentication mechanism by allowing users to verify their identity with a simple tap on their registered mobile device. Instead of relying on traditional passwords or one-time passcodes, authentication requests are securely delivered via push notifications, ensuring real-time, user-friendly login.
This method enhances security by reducing the risk of phishing and credential-based attacks while offering a frictionless login experience. Users can authenticate from any trusted device with internet access, eliminating the need to remember or enter passwords.
To configure push notifications as a passwordless authentication mechanism in WSO2 Identity Server, follow the instructions below.
Prerequisites
-
To get started, you need to register an application with WSO2 Identity Server. You can register your own application or use one of the sample applications provided.
-
You need to configure a Push Provider in WSO2 Identity Server. If you haven't configured a Push Notification Provider yet, follow the instructions in the Push Provider Configuration guide.
-
You need to have a user account in WSO2 Identity Server. If you don't already have one, create a user account in WSO2 Identity Server.
-
A push authenticator application is required for the purpose of receiving push notifications. Learn how to build your own push authenticator app.
-
If push notification device progressive enrollment is disabled, application users need to register their push notification devices via the My Account app prior to using push notification based login. Be sure to educate your users on how to enroll push notification devices via My Account.
Set up Push Notifications
WSO2 Identity Server has some default settings for Push Notifications, which are sufficient for most cases. If required, you can change the default settings, as explained below.
To update the default Push Notification settings:
- On the WSO2 Identity Server Console, go to Connections and select Push Notification.
-
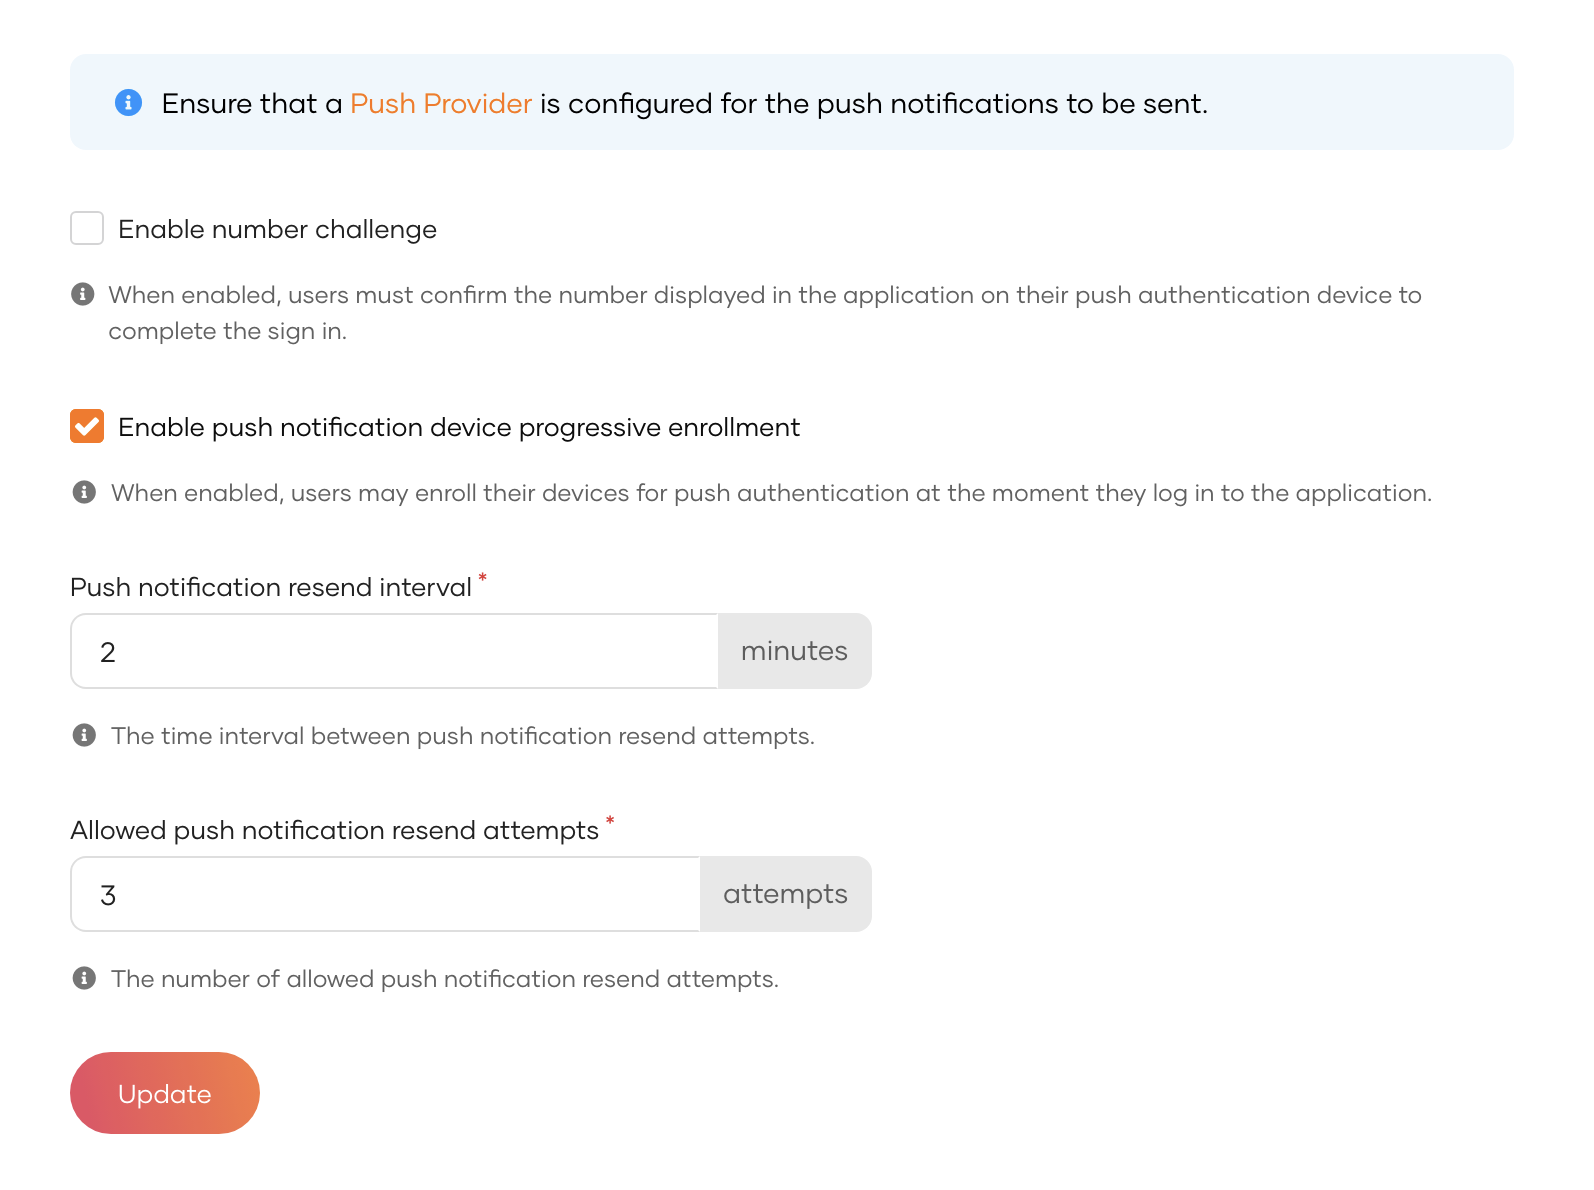
Update the following parameters in the Settings tab:

Field Description Enable number ChallengeWhen enabled, users must confirm the number displayed in the application on their push authentication device to complete the sign in. Enable push notification device progressive enrollmentWhen enabled, users may enroll their devices for push authentication at the moment they log in to the application. Push notification resend intervalSpecifies the time interval between the resend attempts. Also, the polling to identify user's response for the push notification will be ended once the timer is completed. Allowed push notification resend attemptsThe number of allowed push notification resend attempts. Once exceeded, the user will not be allowed to send any push notifications. -
Once you update the Push Notification settings, click Update.
Enable push notifications login for an app
Follow the steps given below to enable Push Notification login for your application.
-
On the WSO2 Identity Server Console, go to Applications.
-
Select the application to which you wish to add Push Notification.
-
Go to the Login Flow tab of the application and add Push Notification from your preferred editor:
-
Click + to add a second step to the login flow.
-
Click Add Sign In Option, select Push Notification and click Add.
-
Click Confirm to add login with push notifications to the sign-in flow.

-
-
Click Update to save your changes.
Enable push notification device progressive enrollment
This feature allows users to enroll their push notification devices seamlessly during the usual login flow, offering a blend of convenience and security. Follow the steps given below to enable Push Notification Devices progressive enrollment for your application.
-
On the WSO2 Identity Server Console, go to Connections.
-
Select the Push Notification connection.
-
Go to the Settings tab of the connection.
-
Enable the option for Enable push notification device progressive enrollment by checking its checkbox.
-
Click Update to save your changes.
-
Add the push notification device progressive enrollment adaptive script to the login flow of the application.
Note
Push notification device progressive enrollment can only be configured at the organizational level and cannot be modified at the application level.
Try out Push Notification passwordless login flow with a user already enrolled with a device
In this section, we will guide you through the steps to authenticate using Push Notification passwordless login with a user who has already enrolled a push notification device.
-
Access the application URL.
-
Click Login to access the WSO2 Identity Server login page.
-
On the login page, enter your username and click Continue.
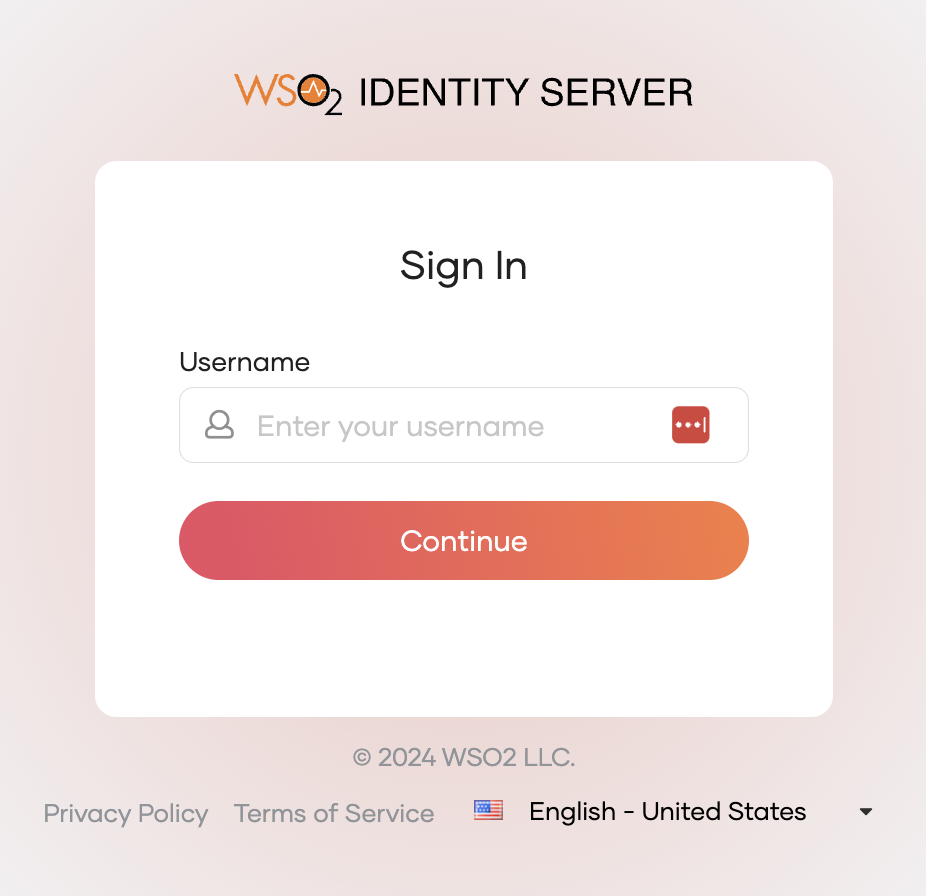
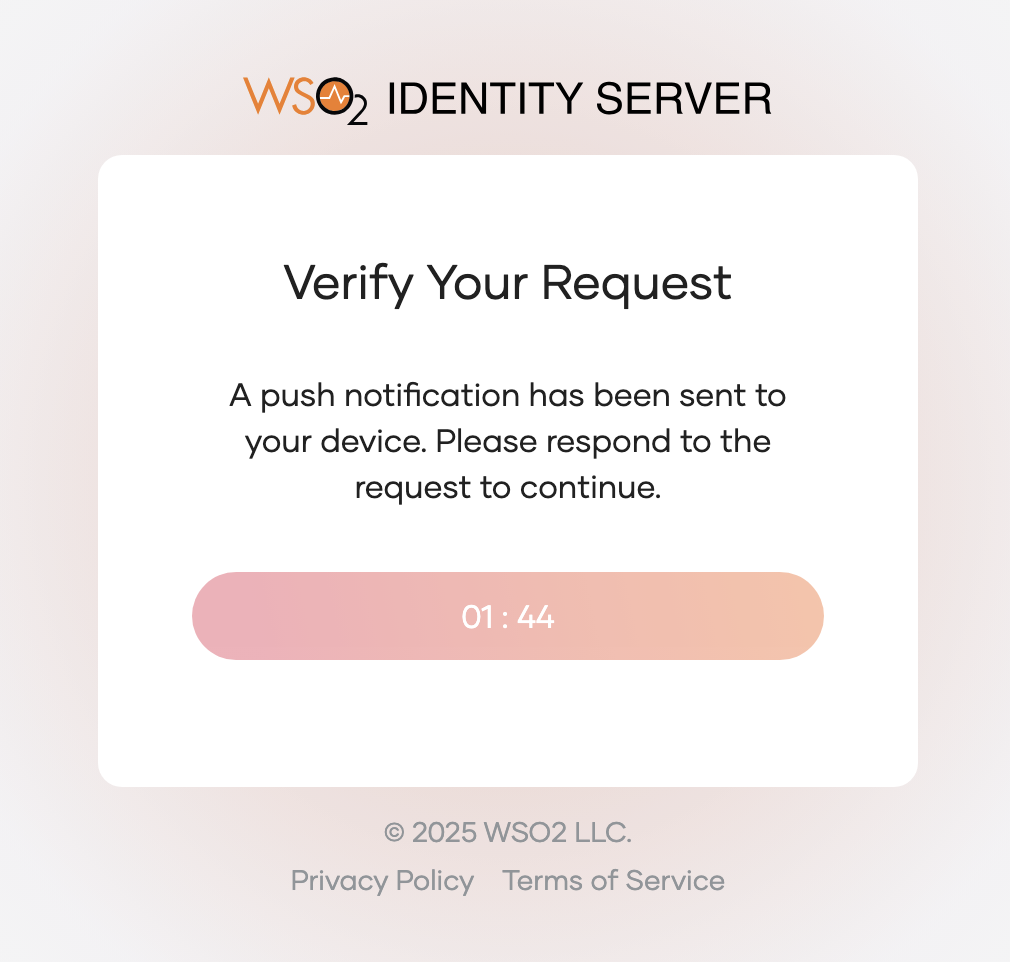
This action redirects you to the Push Notification Wait page.
-
You will receive a push notification on your registered device. Approve the authentication request from the registered device. Below shown page will be displayed and will be polling for the user's response.
-
Once you approve the authentication request, you will be successfully logged in to the application.
Try out Push Notification passwordless login flow with a user not enrolled with a device
In this section, we will guide you through the steps to authenticate using Push Notification passwordless login with a user who has not enrolled a push notification device when progressive enrollment is enabled.
-
Access the application URL.
-
Click Login to access the WSO2 Identity Server login page.
-
On the login page, enter your username and click Continue.
-
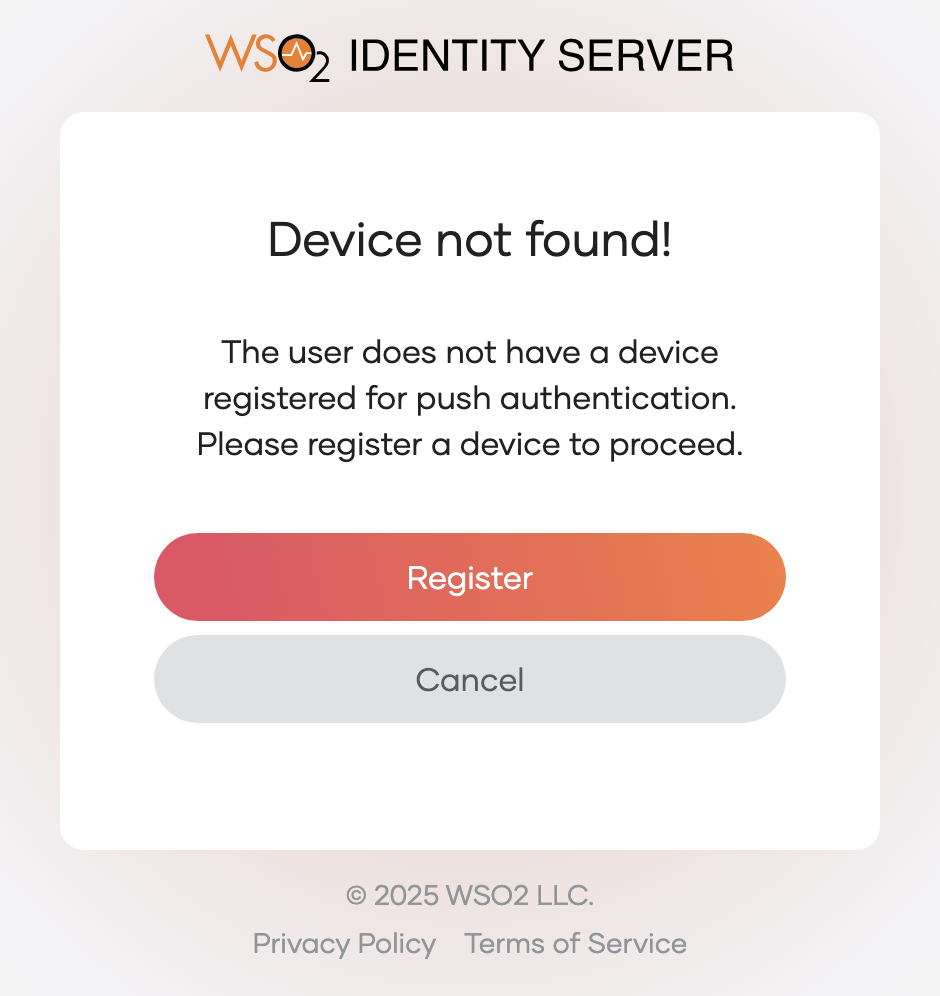
Since you have not enrolled a push notification device, you will be shown the following page to get your consent to enroll a push notification device. Click on Register to enroll a push notification device.
-
Since this authentication flow has not authenticated the user yet, you will be prompted to enter the password of the user account. This is to ensure that the user is the legitimate owner of the account.

-
Click on Sign In to proceed.
-
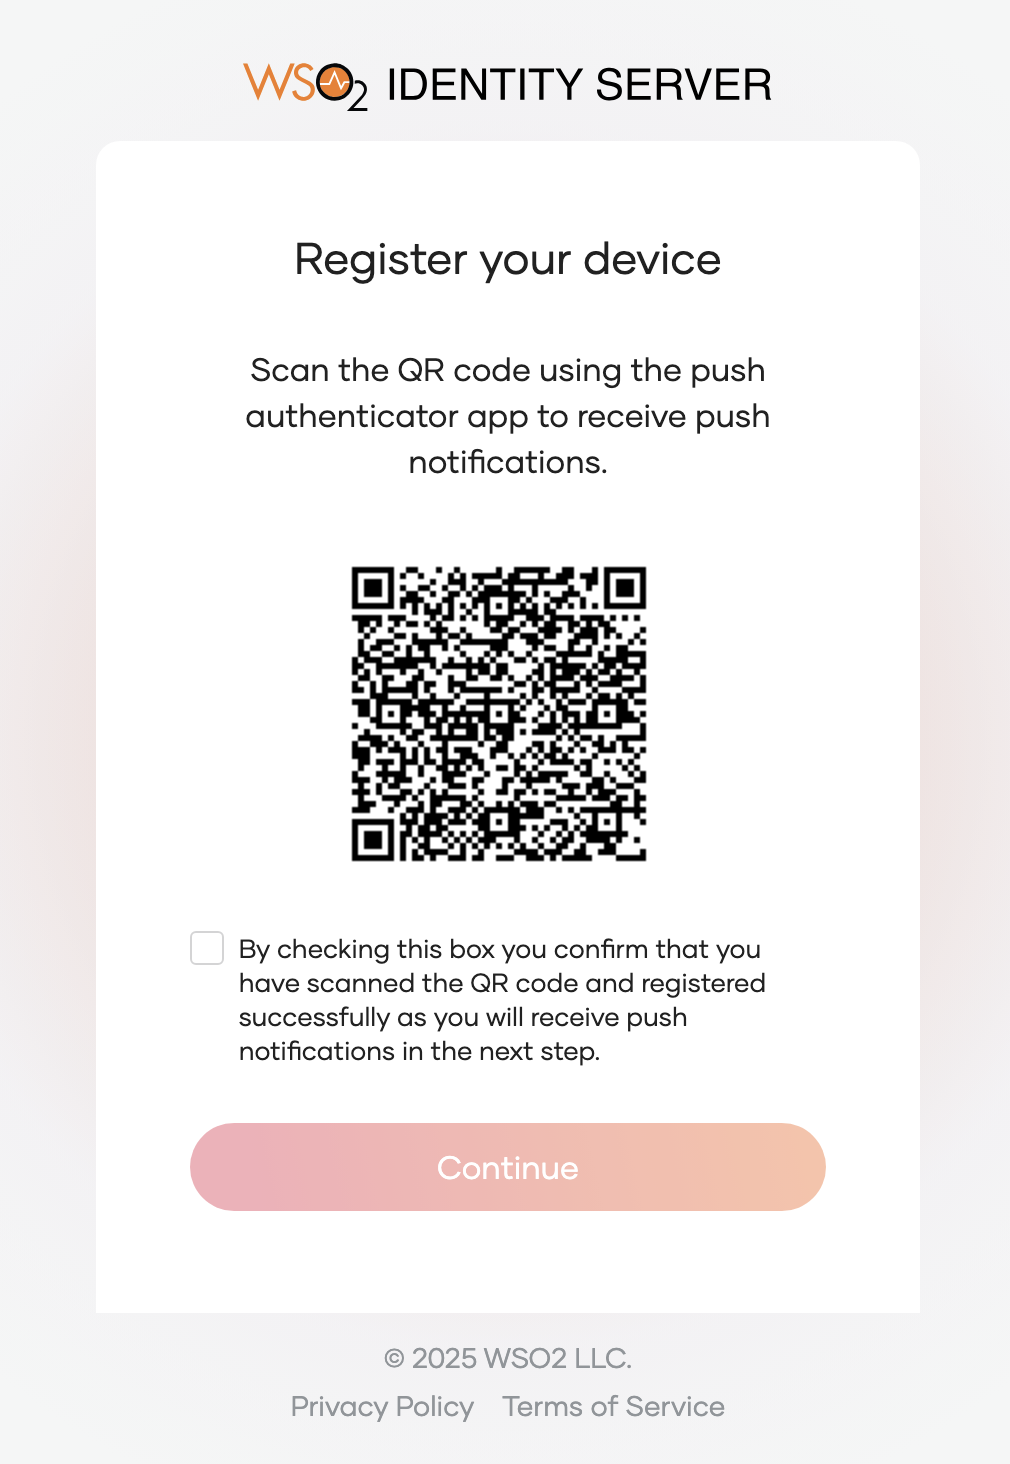
If authentication is successful, you will be shown the following page to scan the QR code using your Push Authenticator App to enroll your device. Once the device is enrolled successfully, check the checkbox and click Continue to proceed with the authentication.
-
You will receive a push notification on your registered device. Approve the authentication request from the registered device.
-
Once you approve the authentication request, you will be successfully logged in to the application.